Driveshafts — Reassembly
10-4prose procedureReassembly
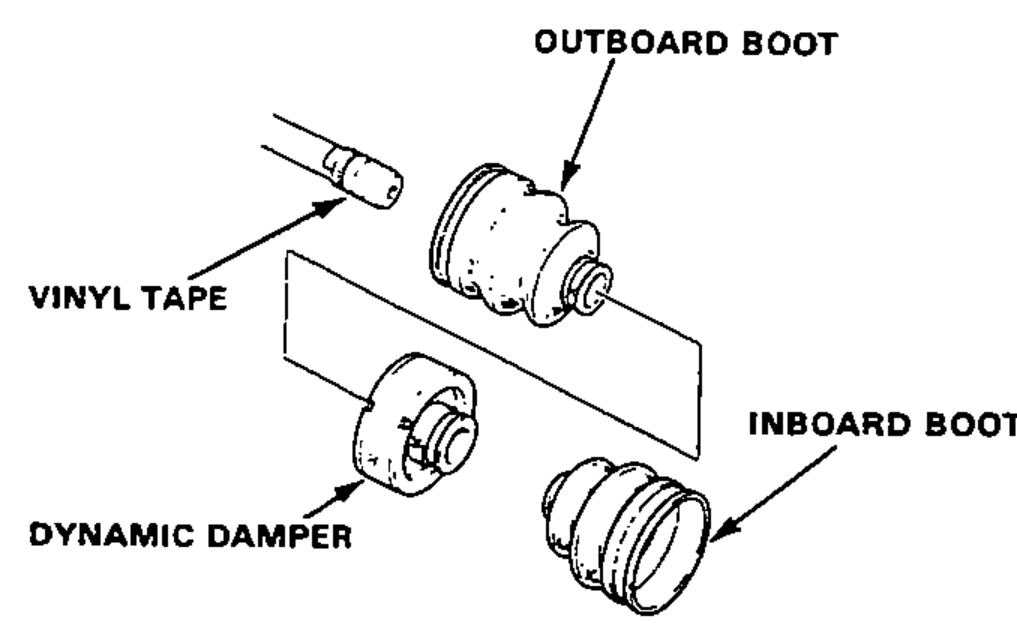
- 1Wrap the splines with vinyl tape to prevent damage to the boots and dynamic damper.
- 2Install the outboard boot, dynamic damper and inboard boot to the driveshaft, then remove the vinyl tape.
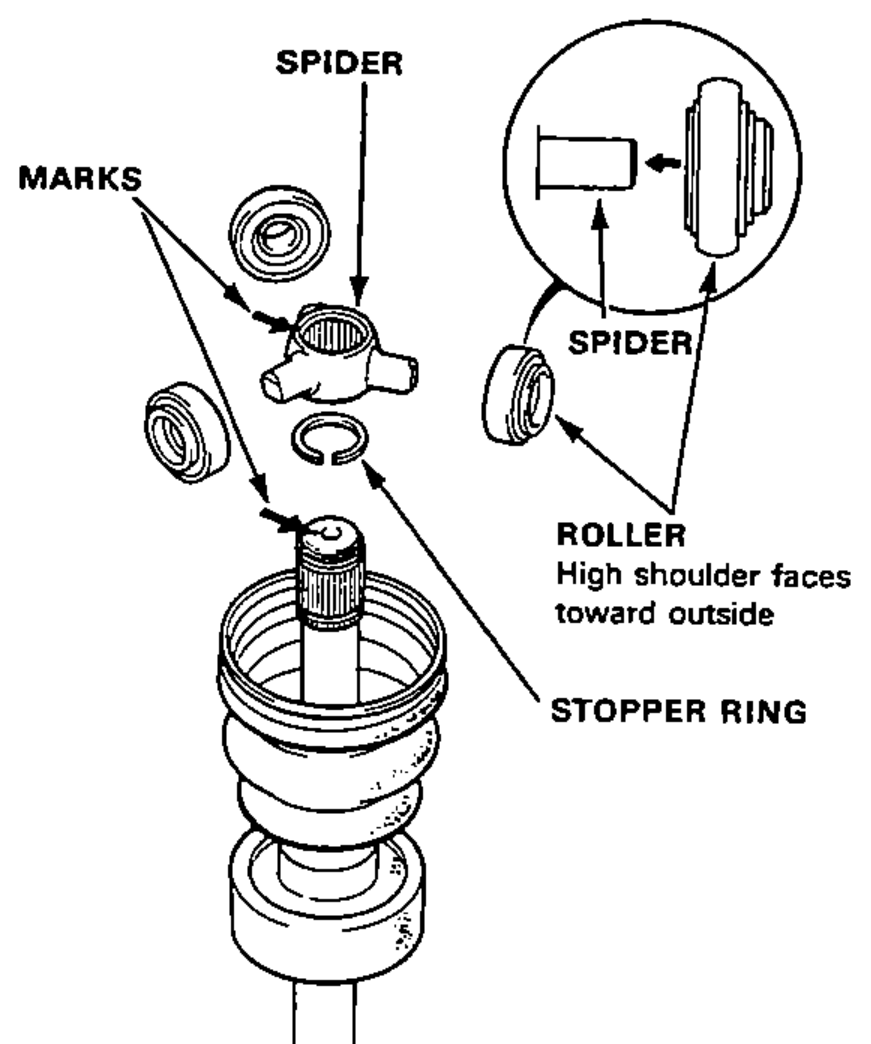
- 3Install the stopper ring onto the driveshaft groove.
- 4Install the spider on the driveshaft by aligning the marks on the spider and end of the driveshaft.
- 5Fit the rollers to the spider with their high shoulders facing outward.Reinstall the rollers to their original positions on the spider.Hold the driveshaft assembly so the spider and roller points up, to prevent it from falling off.
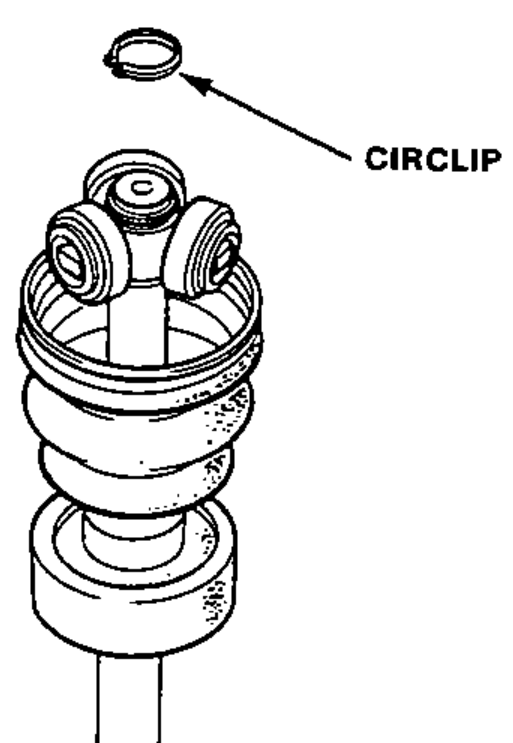
- 6Fit the circlip onto the driveshaft groove.
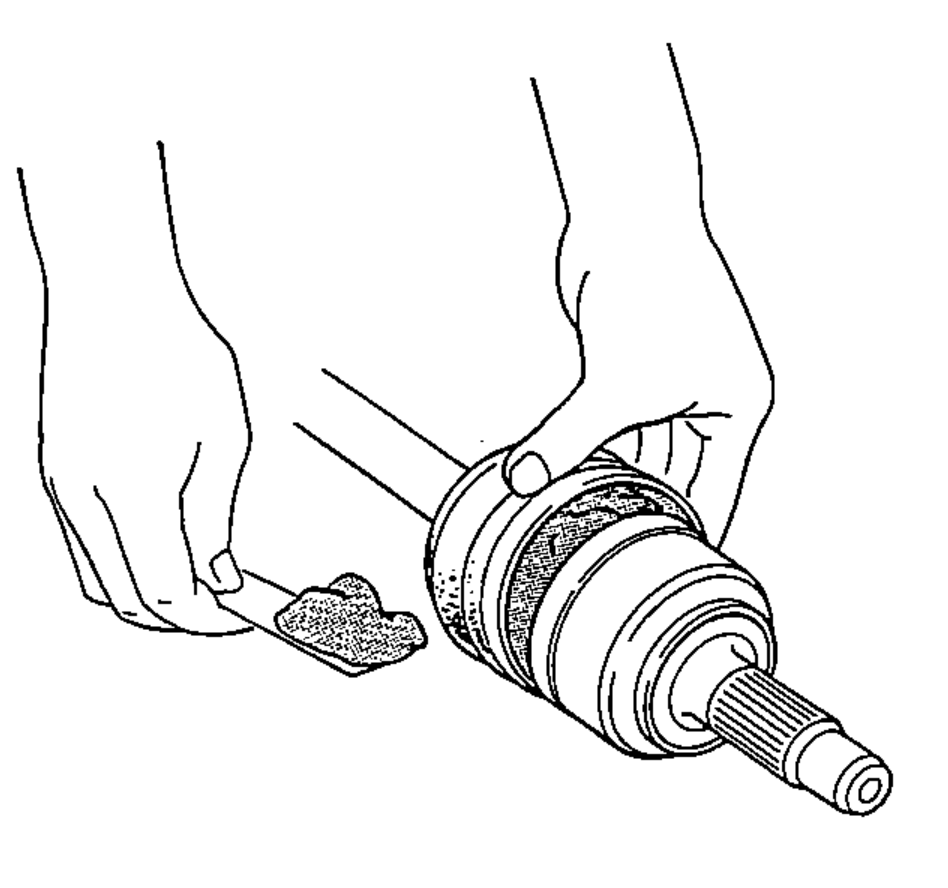
- 7Pack the outboard joint boot with molybdenum disulfide grease. Grease Quantity: 90–100 g