
Transmission - Removal (cont'd)
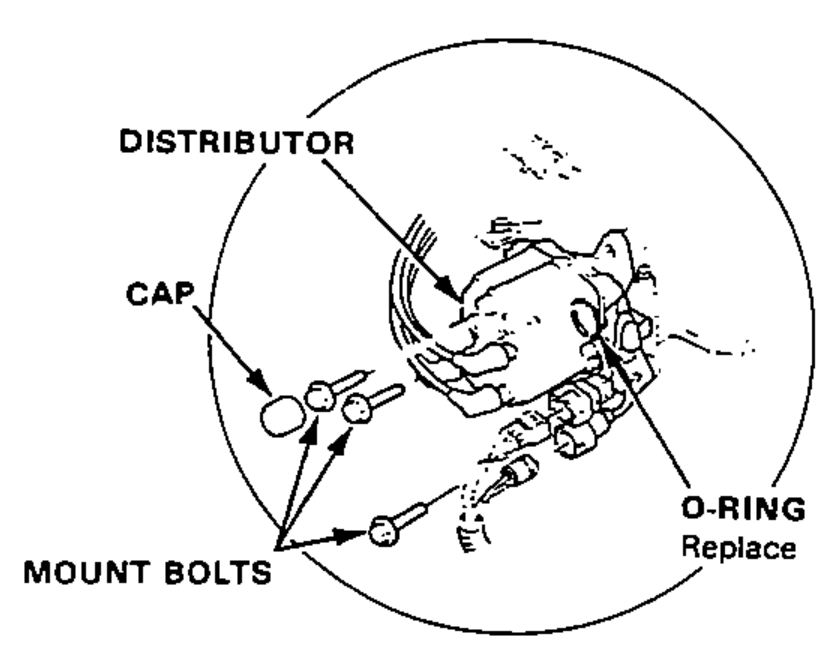
8-5prose procedure- 9Disconnect the connectors and remove the mount bolts, then remove the distributor from the cylinder head.
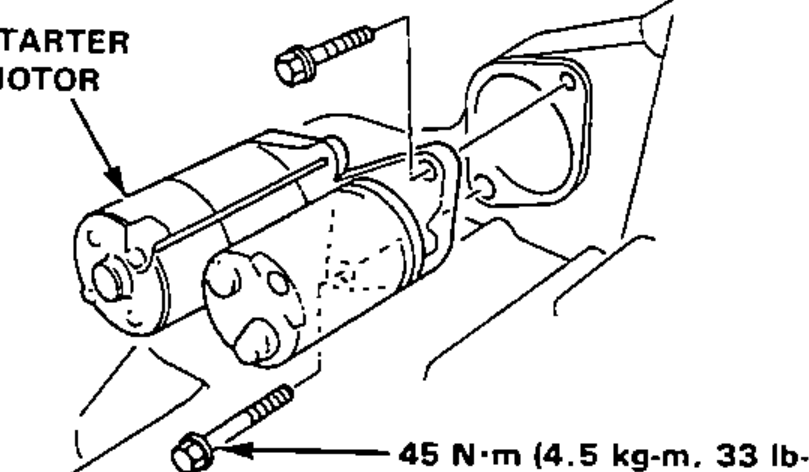
- 10Remove the bolts attaching the starter motor, and remove the starter motor.
- 11Remove the engine splash shield and the right wheelwell splash shield.
- 12Remove the header pipe.
- 13Remove the cotter pin and lower arm ball joint nut, separate the ball joint and lower arm.
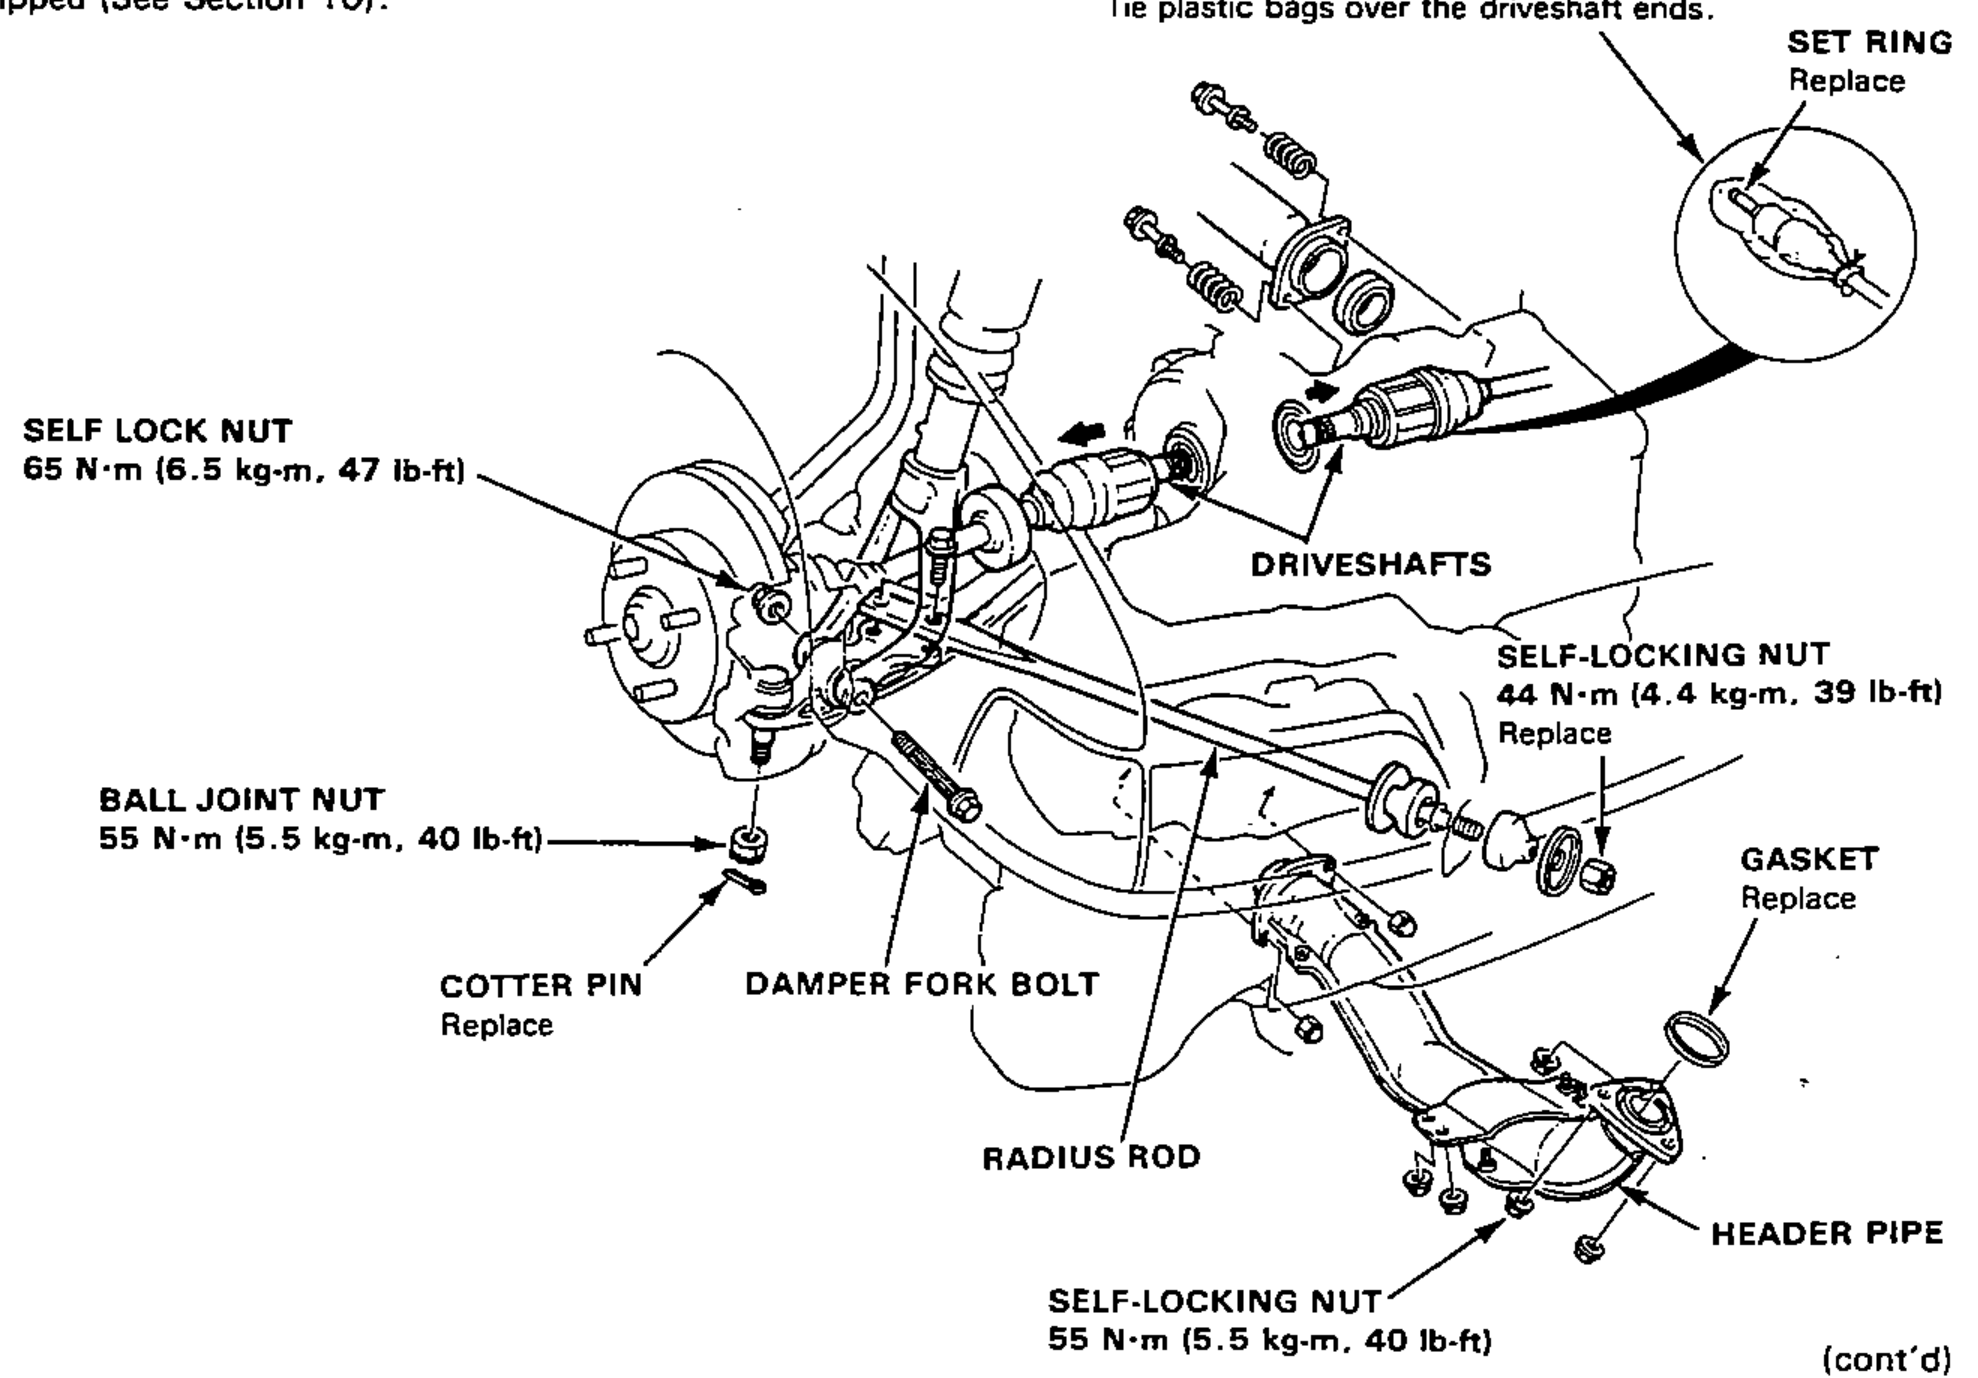
- 14Remove the bolts and nut, then remove the right radius rod.
- 15Remove the right driveshaft (See Section 10). Remove the left driveshaft and intermediate shaft if equipped (See Section 10).
NOTE
Coat all precision finished surfaces with clean engine oil or grease. Tie plastic bags over the driveshaft ends.
| Specification | Value |
|---|---|
| Starter motor bolt | 45N·m |
| Self lock nut (hub) | 65N·m |
| Ball joint nut | 55N·m |
| Self-locking nut (radius rod) | 44N·m |
| Self-locking nut | 55N·m |
Starter motor bolt
45N·m
Self lock nut (hub)
65N·m
Ball joint nut
55N·m
Self-locking nut (radius rod)
44N·m
Self-locking nut
55N·m