
Transmission - Installation (cont'd)
8-8prose procedureInstallation (cont'd)
- 12Install a new set rings on the end of each driveshaft.
- 13Install the right driveshaft (See Section 10). Install the left driveshaft and intermediate shaft if removed (See Section 10).Turn the right steering knuckle fully outward, and slide axle into the differential until you feel its spring clip engage side gear.
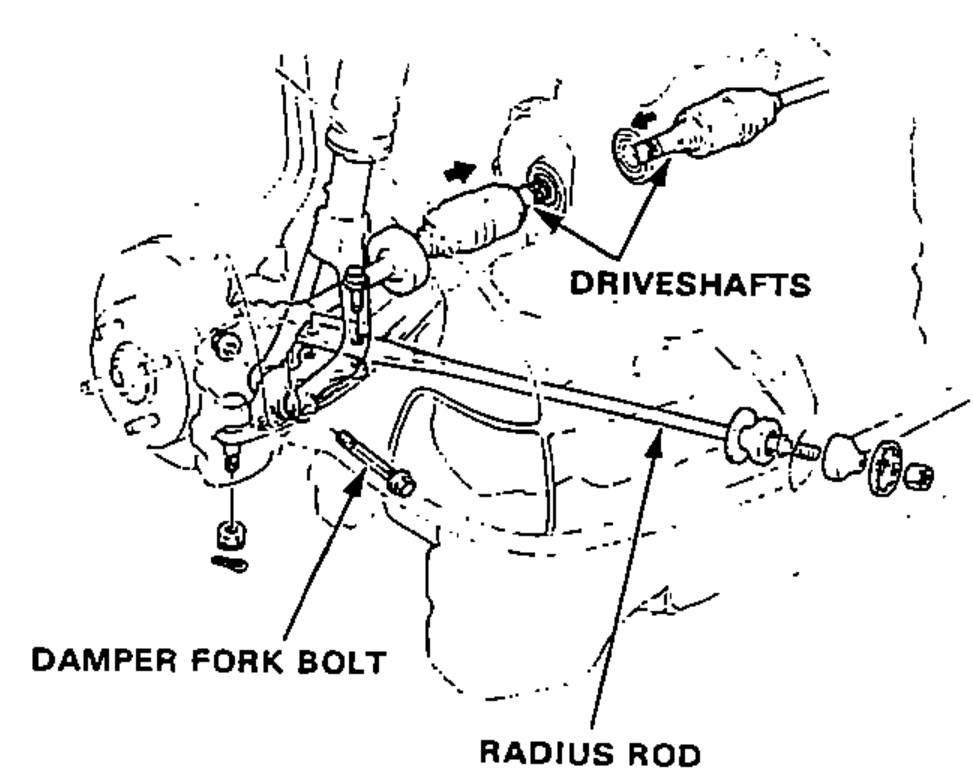
- 14Install the damper fork and radius rod.
- 15Install the ball joints to the lower arm.
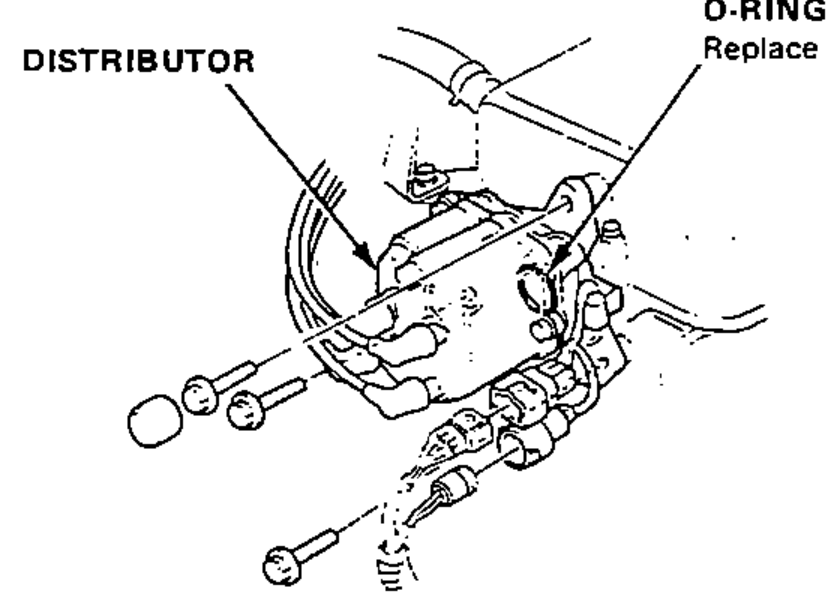
- 16Install the splash shields and exhaust header pipe. Install the distributor.
- 17Connect the speedometer cable.
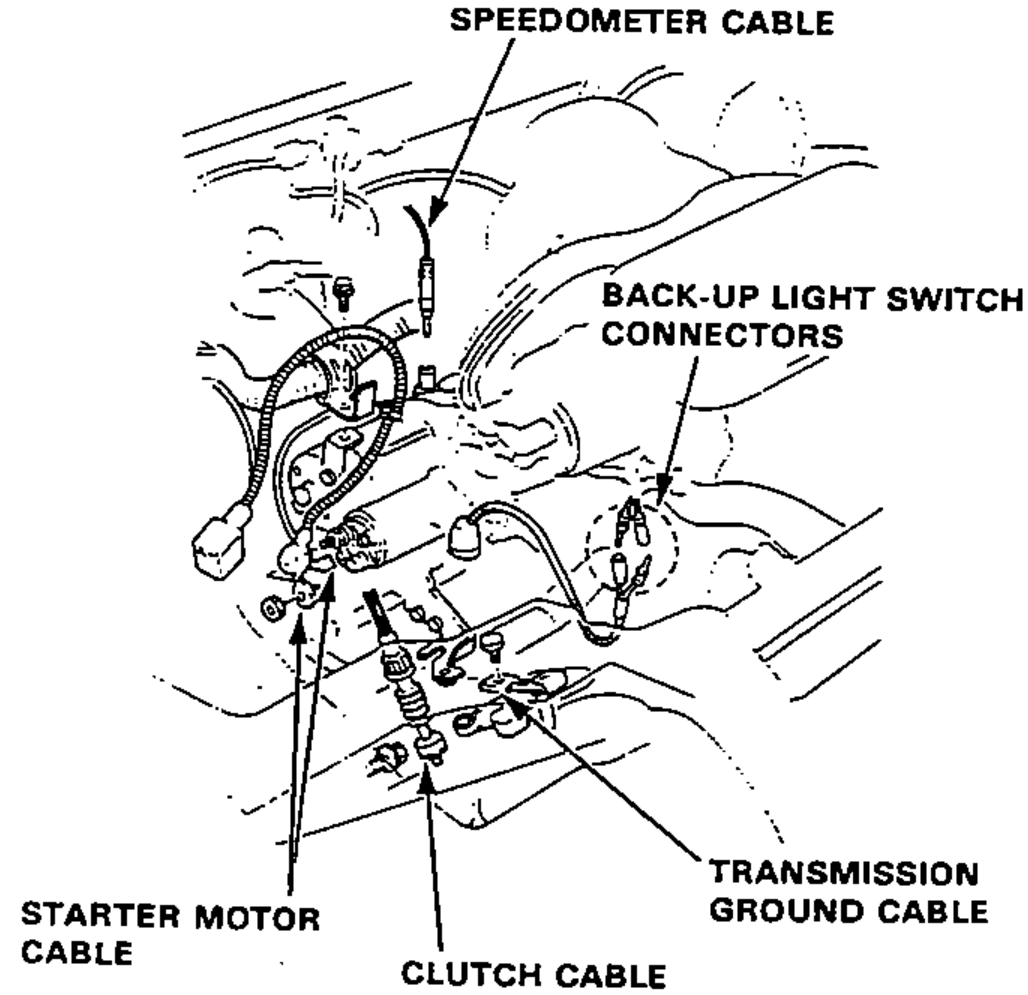
- 18Connect the clutch cable to release arm.
- 19Connect the back-up light switch connector.
- 20Install the 3 bolts located at the side of the battery base, and retighten the intake hose band of the throttle body.
- 21Refill the transmission with oil.
- 22Connect the starter motor and transmission ground cables.
- 23Connect the battery positive (+) and negative (−) cables to the battery.
- 24Install the air cleaner case and intake hose.
- 25Check the ignition timing (See Section 16).
- 26Check the transmission for smooth operation.