
Pressure Plate - Removal/Inspection
7-6prose procedureRemoval/Inspection
- 1Inspect the fingers of the diaphragm spring for wear at the release bearing contact area.
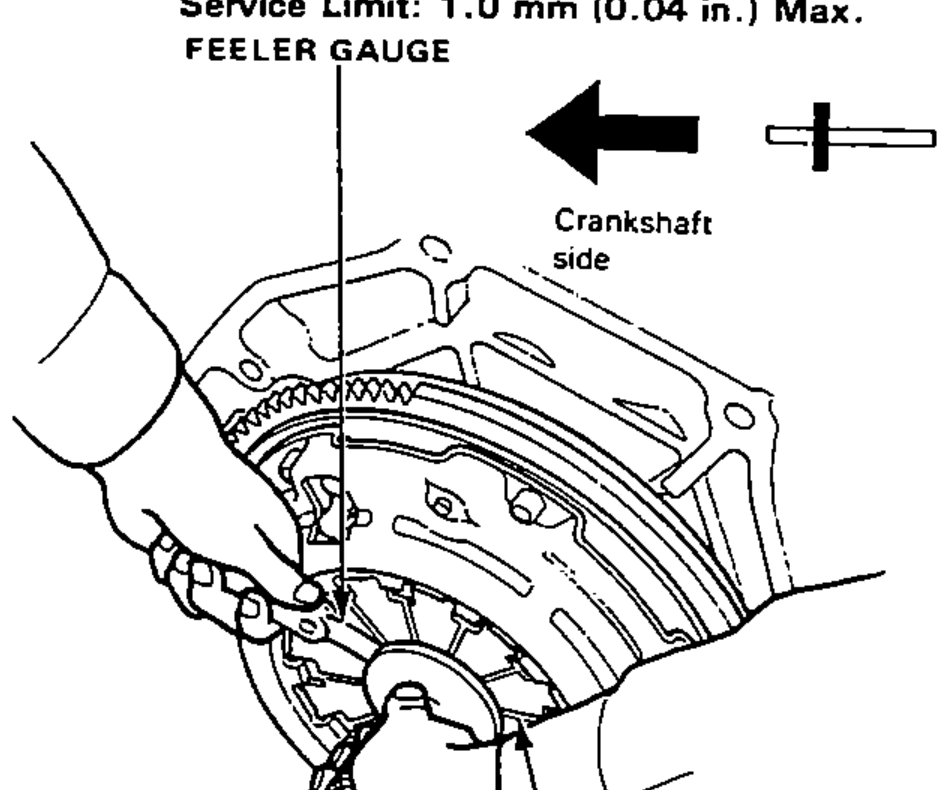
- 2Check the diaphragm spring fingers for height using the Clutch Disc Alignment Tool and feeler gauge.
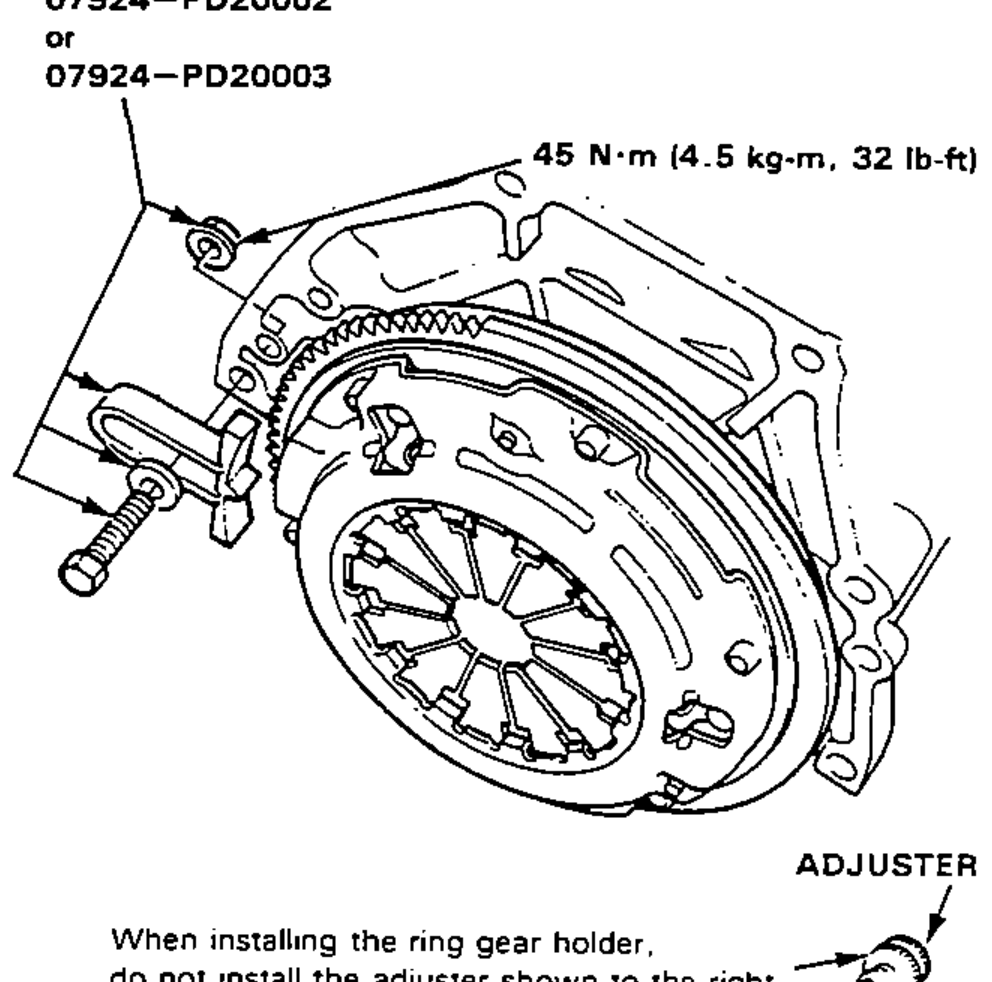
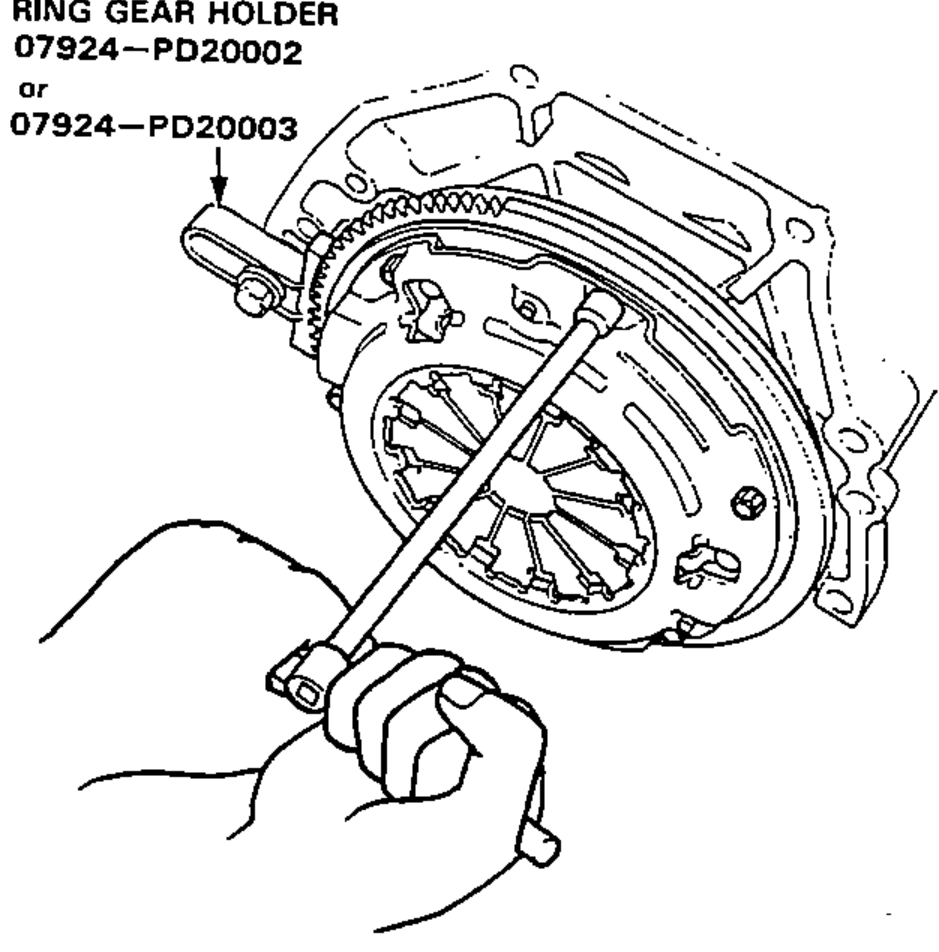
- 3Install the Ring Gear Holder.When installing the ring gear holder, do not install the adjuster shown to the right.
- 4To prevent warping, unscrew the pressure plate mounting bolts two turns at a time in a crisscross pattern using a 10 mm T-wrench, then remove the pressure plate and clutch disc.
- 5Inspect the pressure plate surface for wear, cracks, or burning.
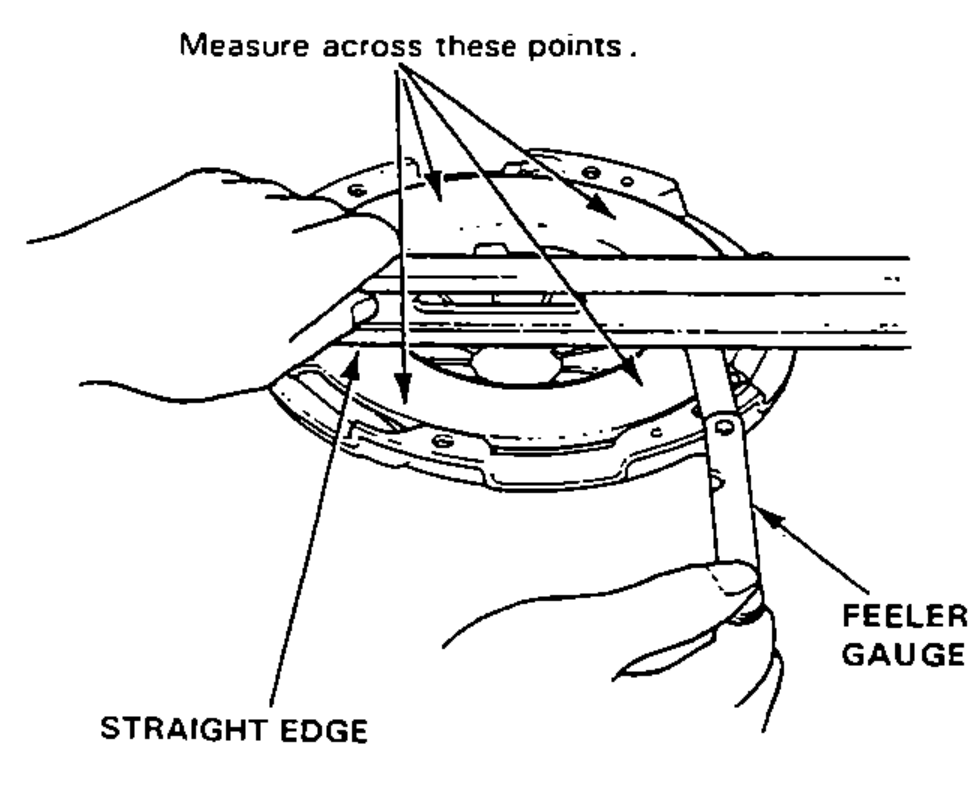
- 6Inspect for warpage using a straight edge and feeler gauge.
| Specification | Value |
|---|---|
| Diaphragm spring finger height (Service Limit) | 1.0 mm (0.04 in.) Max. |
| Pressure plate warpage (Service Limit) | 0.15 mm (0.006 in.) Max. |
| Ring gear holder bolt | 45N·m |
Diaphragm spring finger height (Service Limit)
1.0 mm (0.04 in.) Max.
Pressure plate warpage (Service Limit)
0.15 mm (0.006 in.) Max.
Ring gear holder bolt
45N·m