
Rear Suspension — Damper Disassembly/Inspection / Damper Disposal
12-24prose procedureDamper Disassembly/Inspection
- 1Compress the damper spring with the spring compressor according to the manufacturer's instructions.CAUTION: Do not compress the spring more than necessary to remove the 10 mm self locking nut.
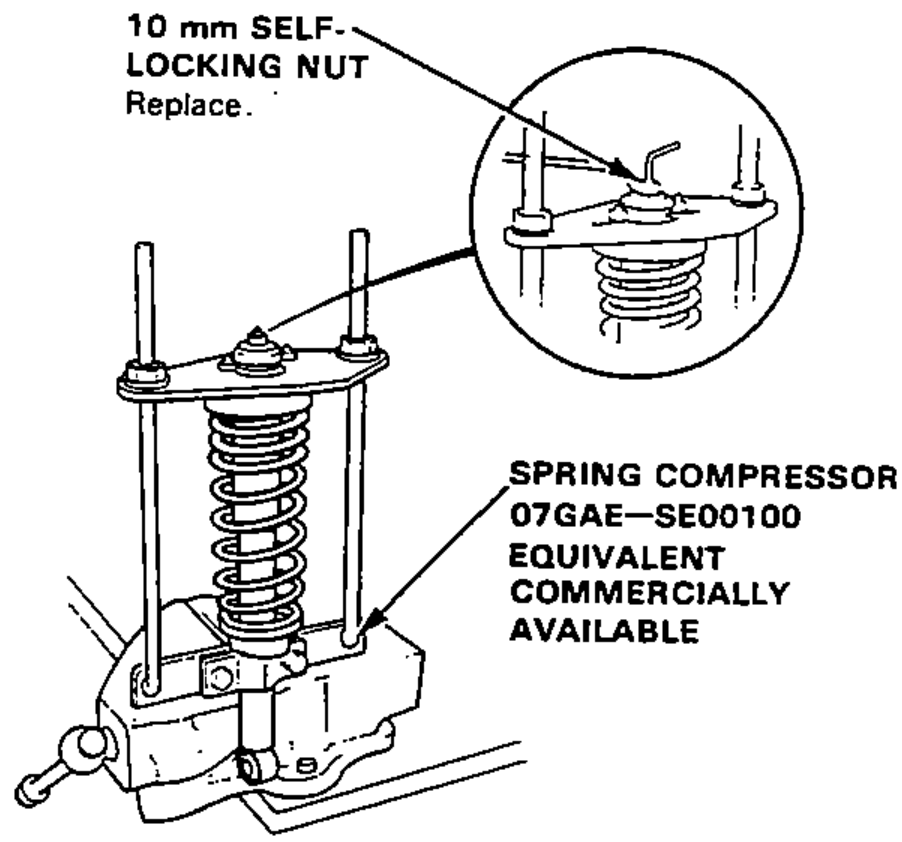
- 2Remove the 10 mm self locking nut from the damper assembly.
- 3Remove the spring compressor and disassemble the damper as shown on the next page.
- 4Check for smooth operation through a full stroke, both compression and extension.
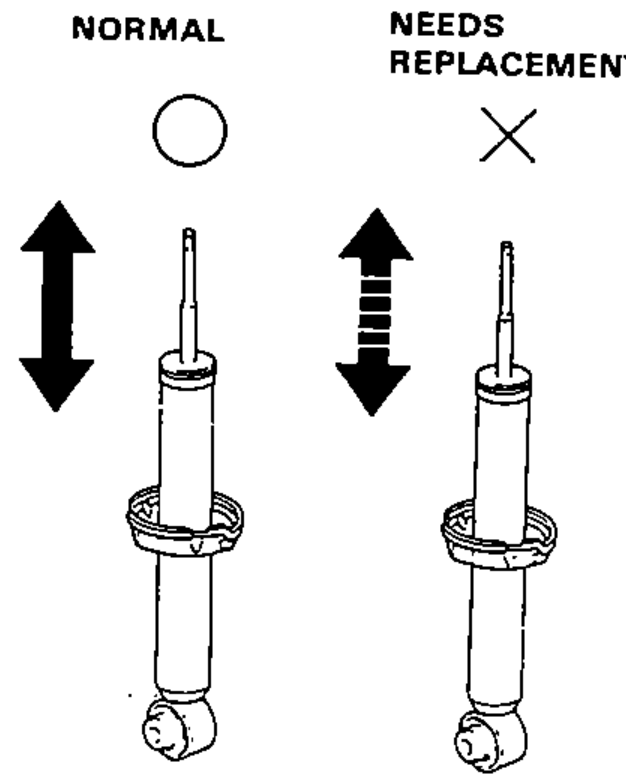
- 5Also check for smooth operation in soft strokes of 5—10 cm (2—4 in). Replace the damper if resistance is uneven or jerky.
- 6Check for oil leaks, abnormal noises or binding during these tests.
Damper Disposal
WARNING
The front and rear dampers contain nitrogen gas and oil under pressure. The pressure must be relieved before disposal to prevent explosion and possible injury.
Place the damper on a level surface with its rod extended and drill a holl of 2~3 mm (0.078—0.118 in) diameter in the body to release the gas.
WARNING
Always wear eye protection to avoid getting metal shavings in your eyes when the gas damper pressure is relieved.