
Fuel Supply System — Fuel Pump Replacement / Main Relay: Relay Testing
6-79prose procedureFuel Pump — Replacement
WARNING
Do not smoke while working on fuel system. Keep open flames away from your work area.
- 1Remove the fuel tank (page 6-81).
- 2Remove the fuel pump mounting nuts.

- 3Remove the fuel pump from the fuel tank.
| Specification | Value |
|---|---|
| Fuel pump mounting nut | 6N·m |
Fuel pump mounting nut
6N·m
Main Relay
Relay Testing
- 1Remove the main relay.
- 2Attach the battery positive terminal to the No. 4 terminal and the battery negative terminal to the No. 8 terminal of the main relay. Then check for continuity between the No. 5 terminal and No. 7 terminal of the main relay.
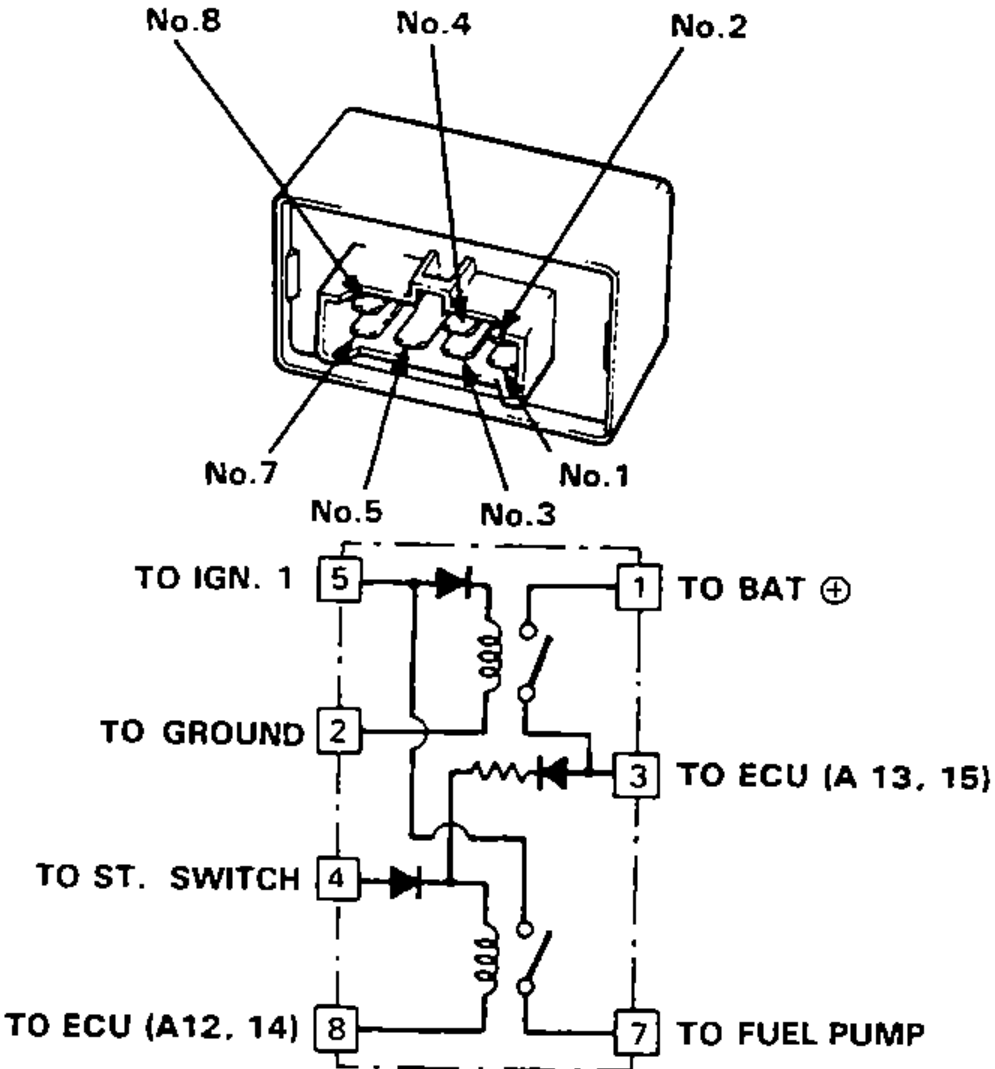
- 3Attach the battery positive terminal to the No. 5 terminal and the battery negative terminal to the No. 2 terminal of the main relay. Then check that there is continuity between the No. 1 terminal and No. 3 terminal of the main relay.
- 4Attach the battery positive terminal to the No. 3 terminal and battery negative terminal to the No. 8 terminal of the main relay. Then check that there is continuity between the No. 5 terminal and No. 7 terminal of the main relay.
No. 5
Connects toTO IGN. 1
No. 1
Connects toTO BAT ⊕
No. 2
Connects toTO GROUND
No. 3
Connects toTO ECU (A 13, 15)
No. 4
Connects toTO ST. SWITCH
No. 8
Connects toTO ECU (A12, 14)
No. 7
Connects toTO FUEL PUMP