
Fuel Supply System — Main Relay: Harness Testing
6-80prose procedureMain Relay
Harness Testing
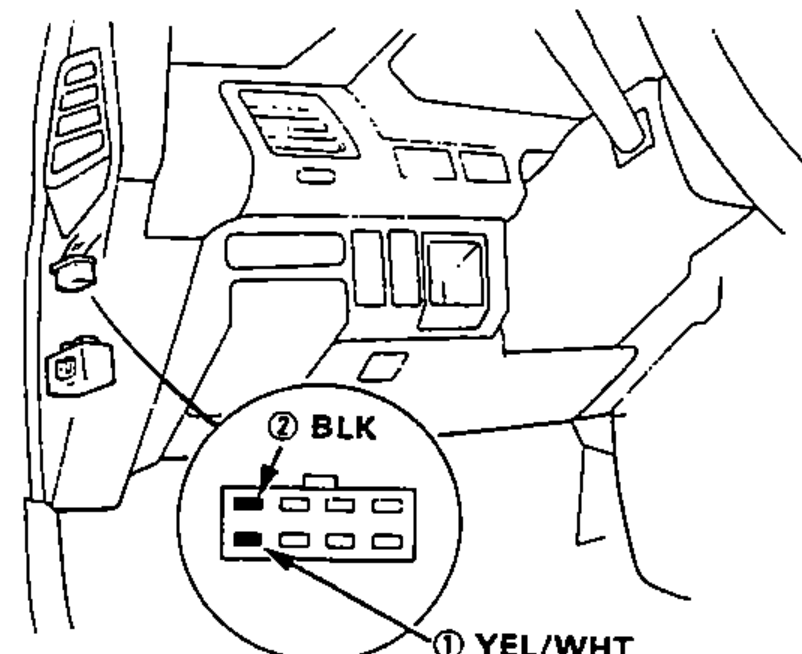
- 1Keep the ignition switch in the OFF position.
- 2Disconnect the main relay connector.
- 3Check for continuity between the BLK wire ② in the connector and body ground.
- 4Attach the positive probe of voltmeter to the YEL/WHT wire ① and the negative probe to the BLK wire ②. Battery voltage should be available.
- 5Attach the positive probe of voltmeter to the BLK/YEL wire ⑤ and the negative probe to the BLK wire ②.
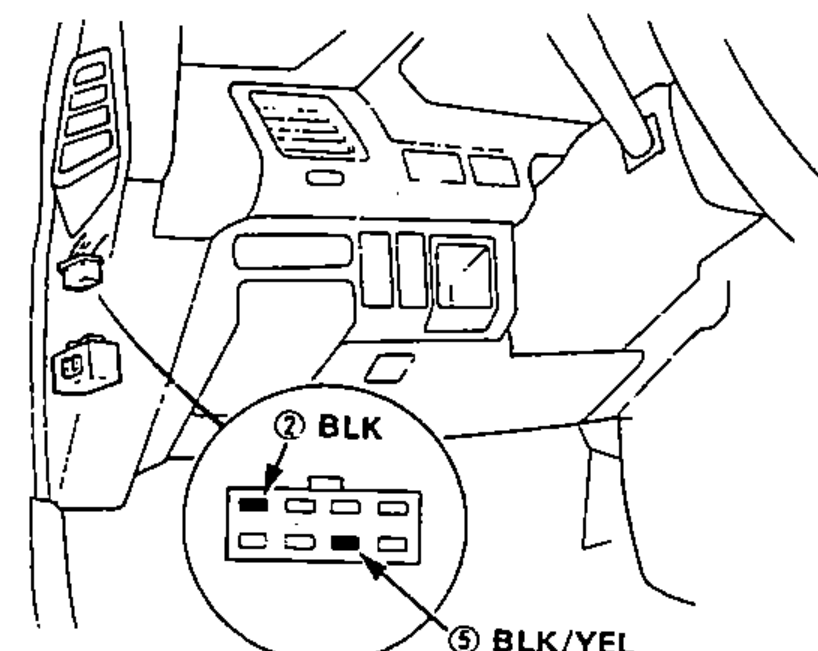
- 6Turn the ignition switch ON. Battery voltage should be available.
- 7Attach the positive probe of voltmeter to the BLU/WHT wire ④ and the negative probe to the BLK wire ②.
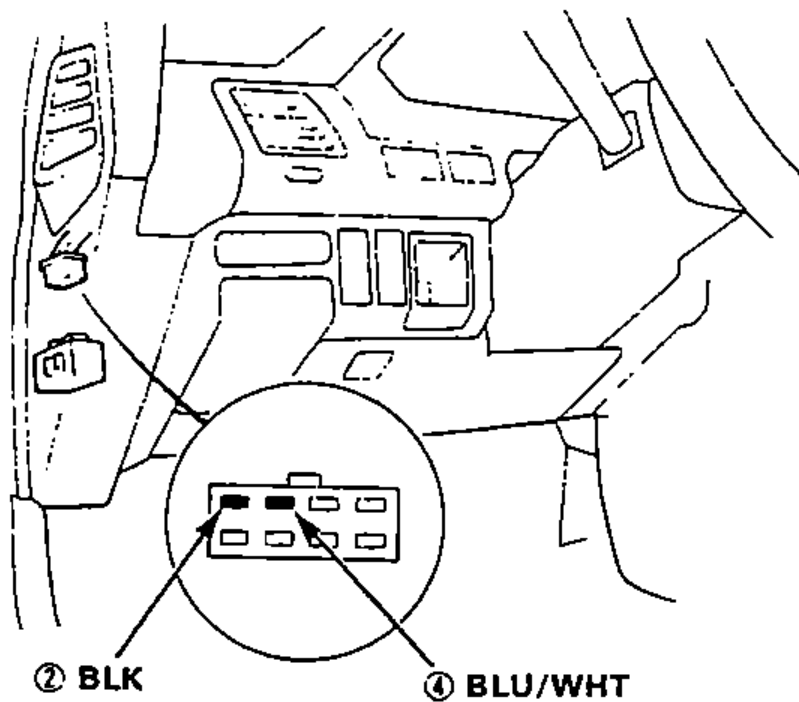
- 8Turn the ignition switch to START position. Battery voltage should be available.
- 9Connect a jumper wire between the BLK/YEL wire ⑤ and YEL/BLK wire ⑦.
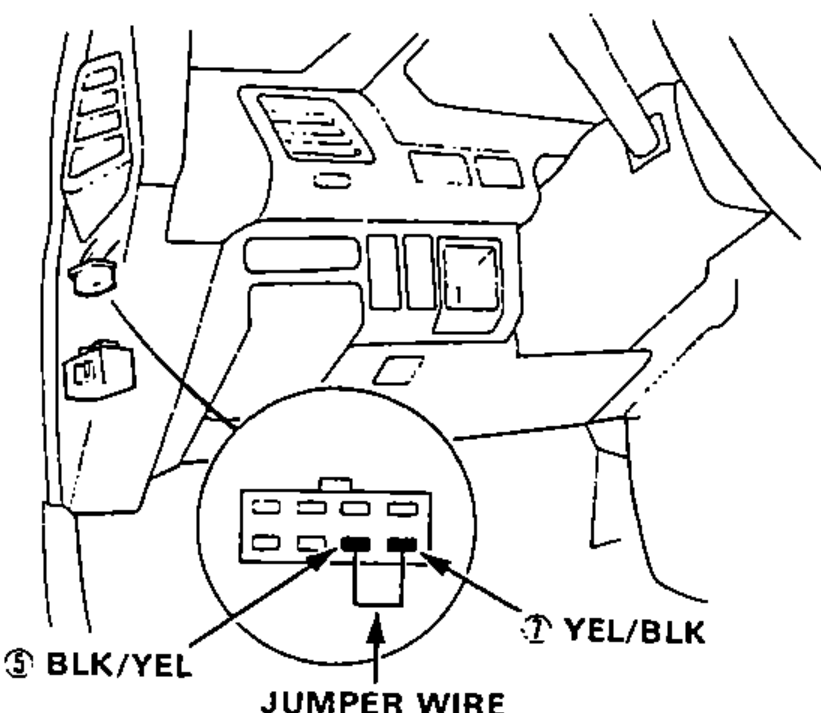
- 10Turn the ignition switch ON. The fuel pump should work.