
Throttle Cable
6-83prose procedureInspection/Adjustment
- 1Warm up the engine to normal operating temperature (cooling fan comes on).
- 2Check that the throttle cable operates smoothly with no binding or sticking. Repair as necessary.
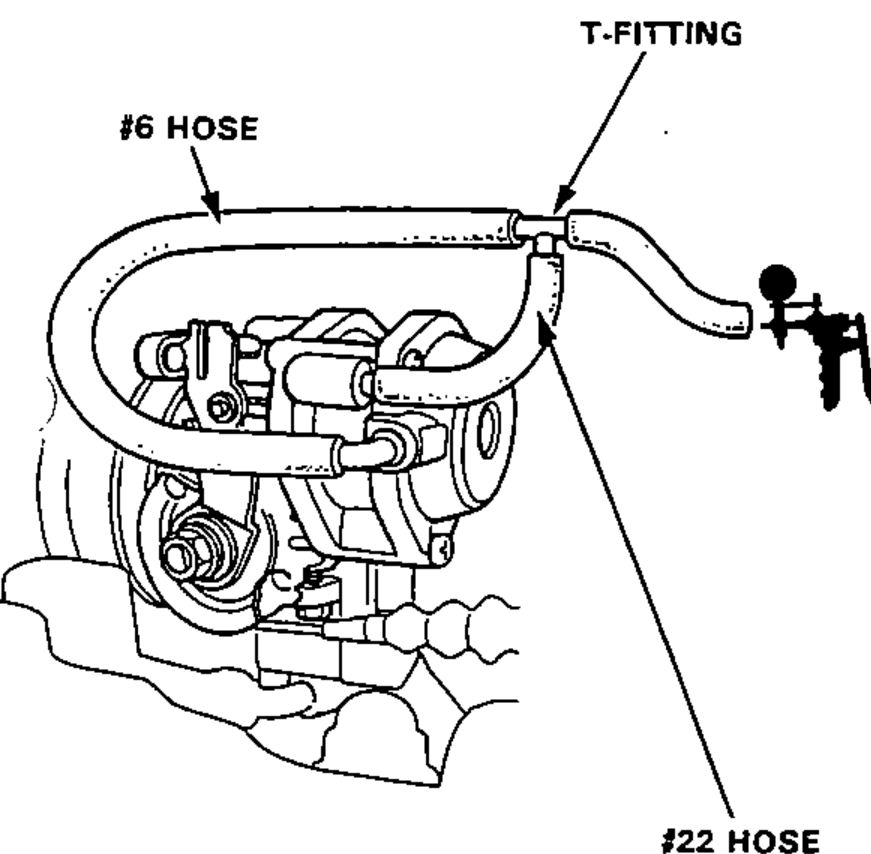
- 3Disconnect #6 and #22 hoses from the dashpot diaphragm and connect a vacuum pump to the diaphragm using a T-fitting as illustrated bellow. Apply vacuum.
- 4Check cable free play at the throttle linkage. Cable deflection should be 10–12 mm (0.39–0.47 in.)
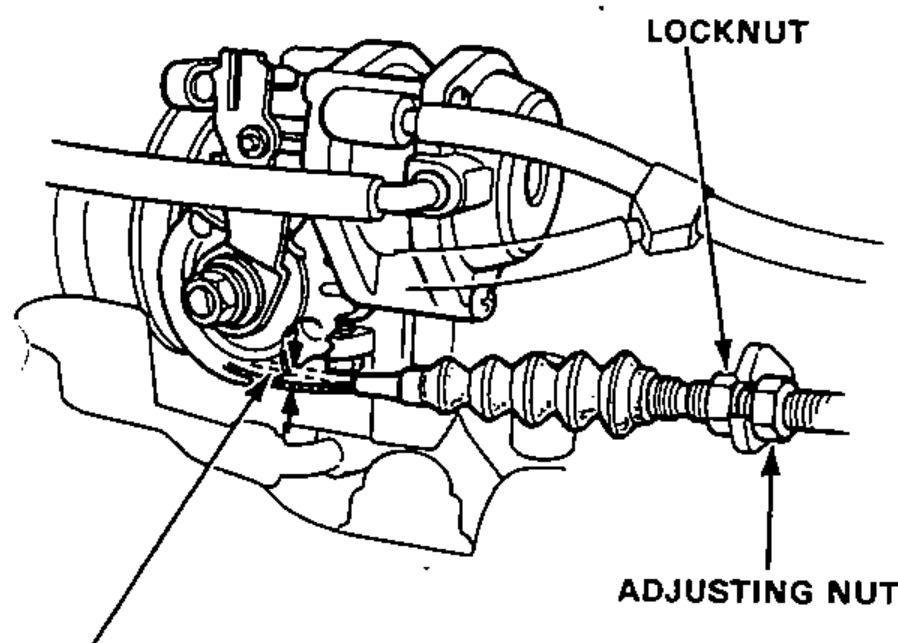
- 5If deflection is not within specs, loosen the locknut and turn the adjusting nut until the deflection is as specified.
- 6With the cable properly adjusted, check the throttle valve to be sure it opens fully when you push the accelerator pedal to the floor. Also check the throttle valve to be sure it returns to the idle position whenever you release the accelerator.
Installation
- 1Fully open the throttle valve, then install the throttle cable in the throttle linkage and install the cable housing in the cable bracket.
- 2Warm up the engine to normal operating temperature (the cooling fan comes on).
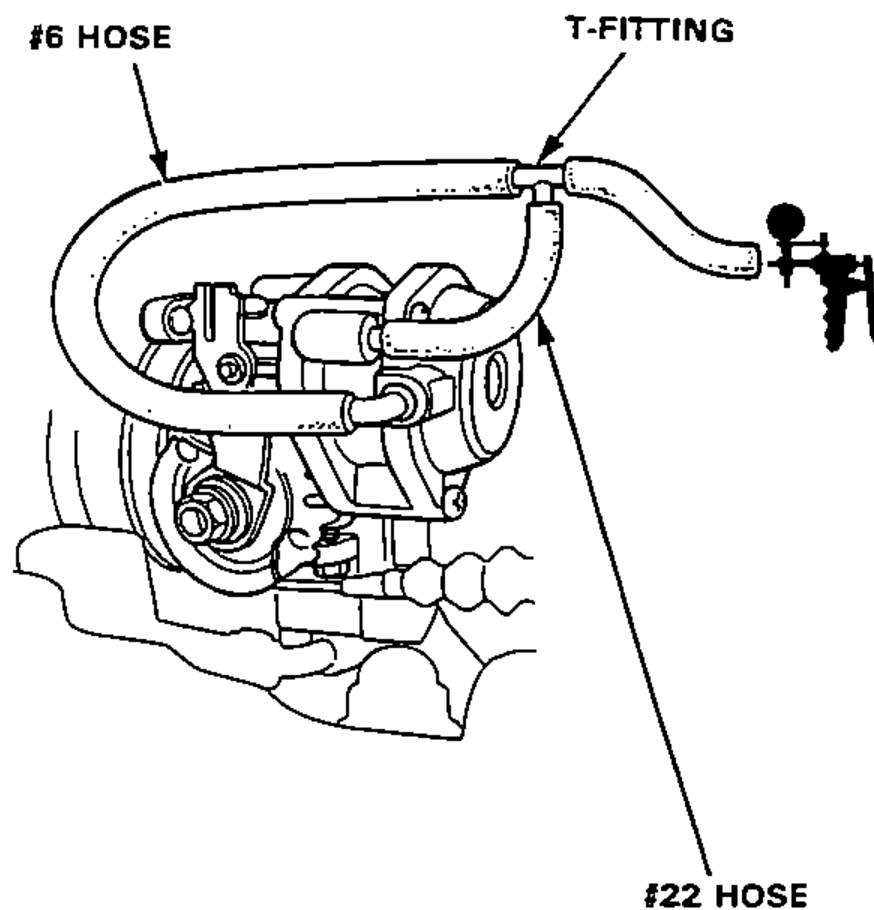
- 3Disconnect #6 and #22 hoses from the dashpot diaphragm and connect a vacuum pump to the diaphragm using a T-fitting as illustrated bellow. Apply vacuum.
- 4Hold the cable sheath, removing all slack from the cable.
- 5Turn the adjusting nut until it is 3 mm away from the cable bracket.
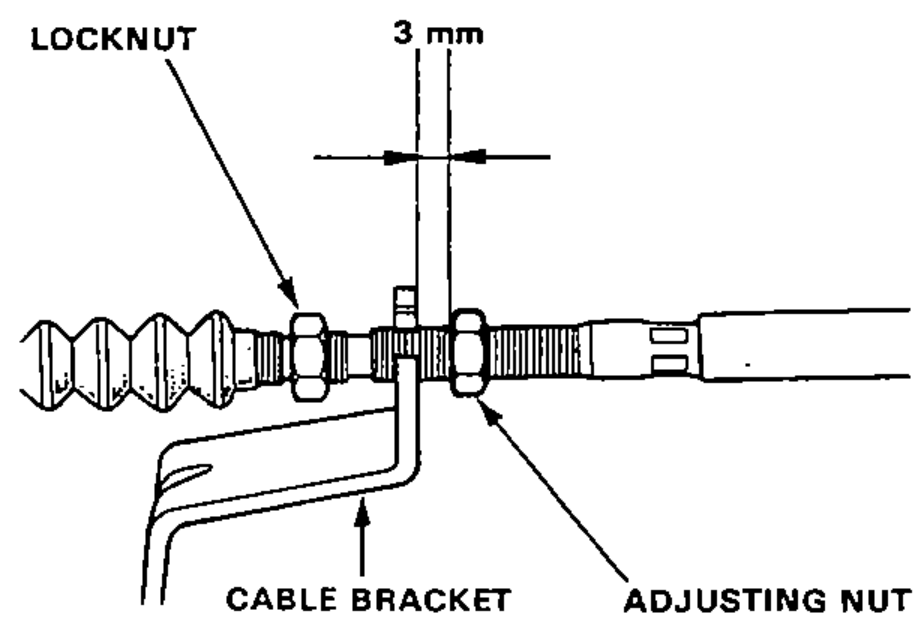
- 6Tighten the locknut.
- 7Disconnect the vacuum pump and connect the #6 and #22 vacuum hoses.