Knuckle/Hub Replacement (cont'd)
12-12prose procedureFront Suspension
Knuckle/Hub Replacement (cont'd)
- 10Remove the cotter pin and loosen the lower arm ball joint nut half the length of the joint threads.
- 11Separate the ball joint and lower arm using a puller with the pawls applied to the lower arm.Avoid damaging the ball joint boot.If necessary, apply penetrating type lubricant to loosen the ball joint.
- 12Remove the knuckle protector.
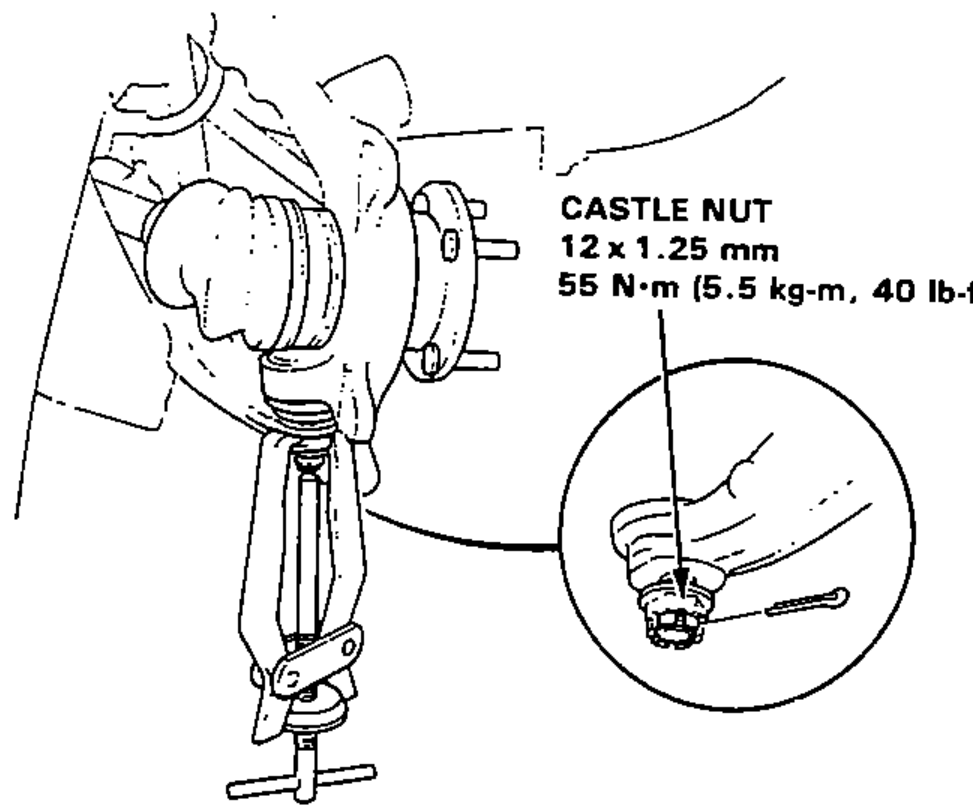
- 13Remove the cotter pin and remove the upper ball pin nut.
- 14Separate the upper ball joint and knuckle using the special tool.

- 15Remove the knuckle and hub by sliding them off the driveshaft.
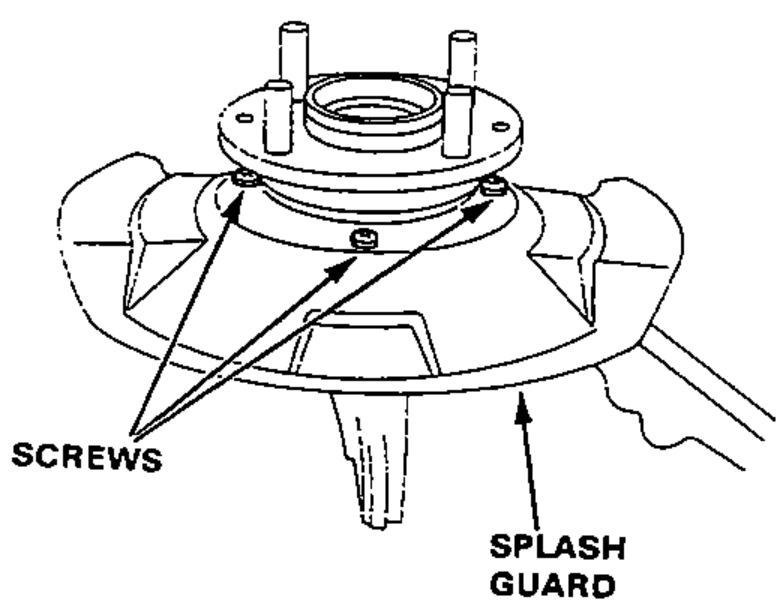
- 16Remove the splash guard screws from the knuckle.
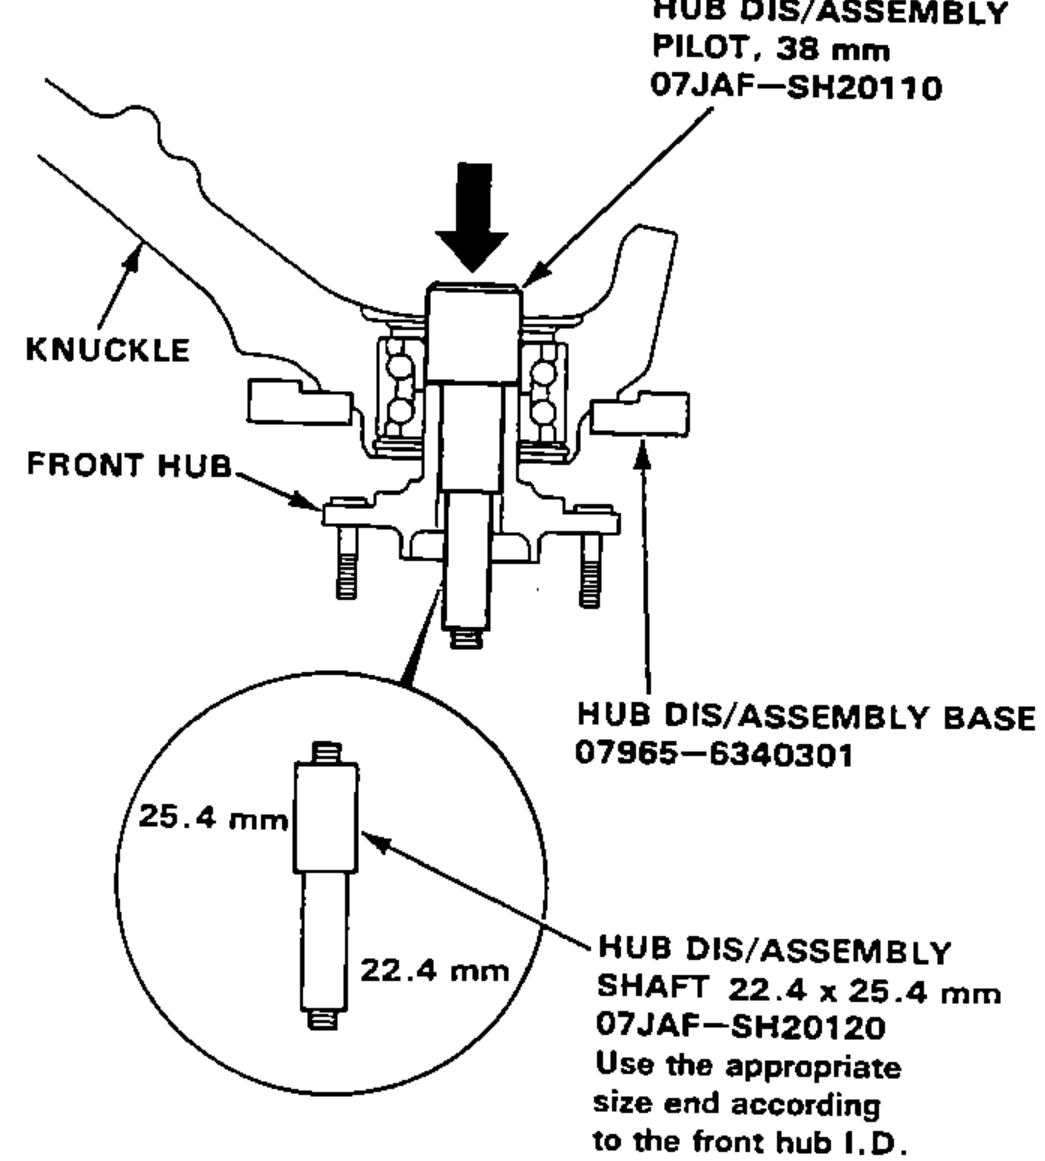
- 17Separate the hub from the knuckle using the special tools and a hydraulic press.Take care not to distort the splash guard.Hold onto the hub to keep it from falling when pressed clear.To prevent damage to the tool make sure the threads are fully engaged before pressing.