
Damper Removal / Damper Disassembly/Inspection
12-17prose procedure- 1Remove the brake hose clamps from the damper.
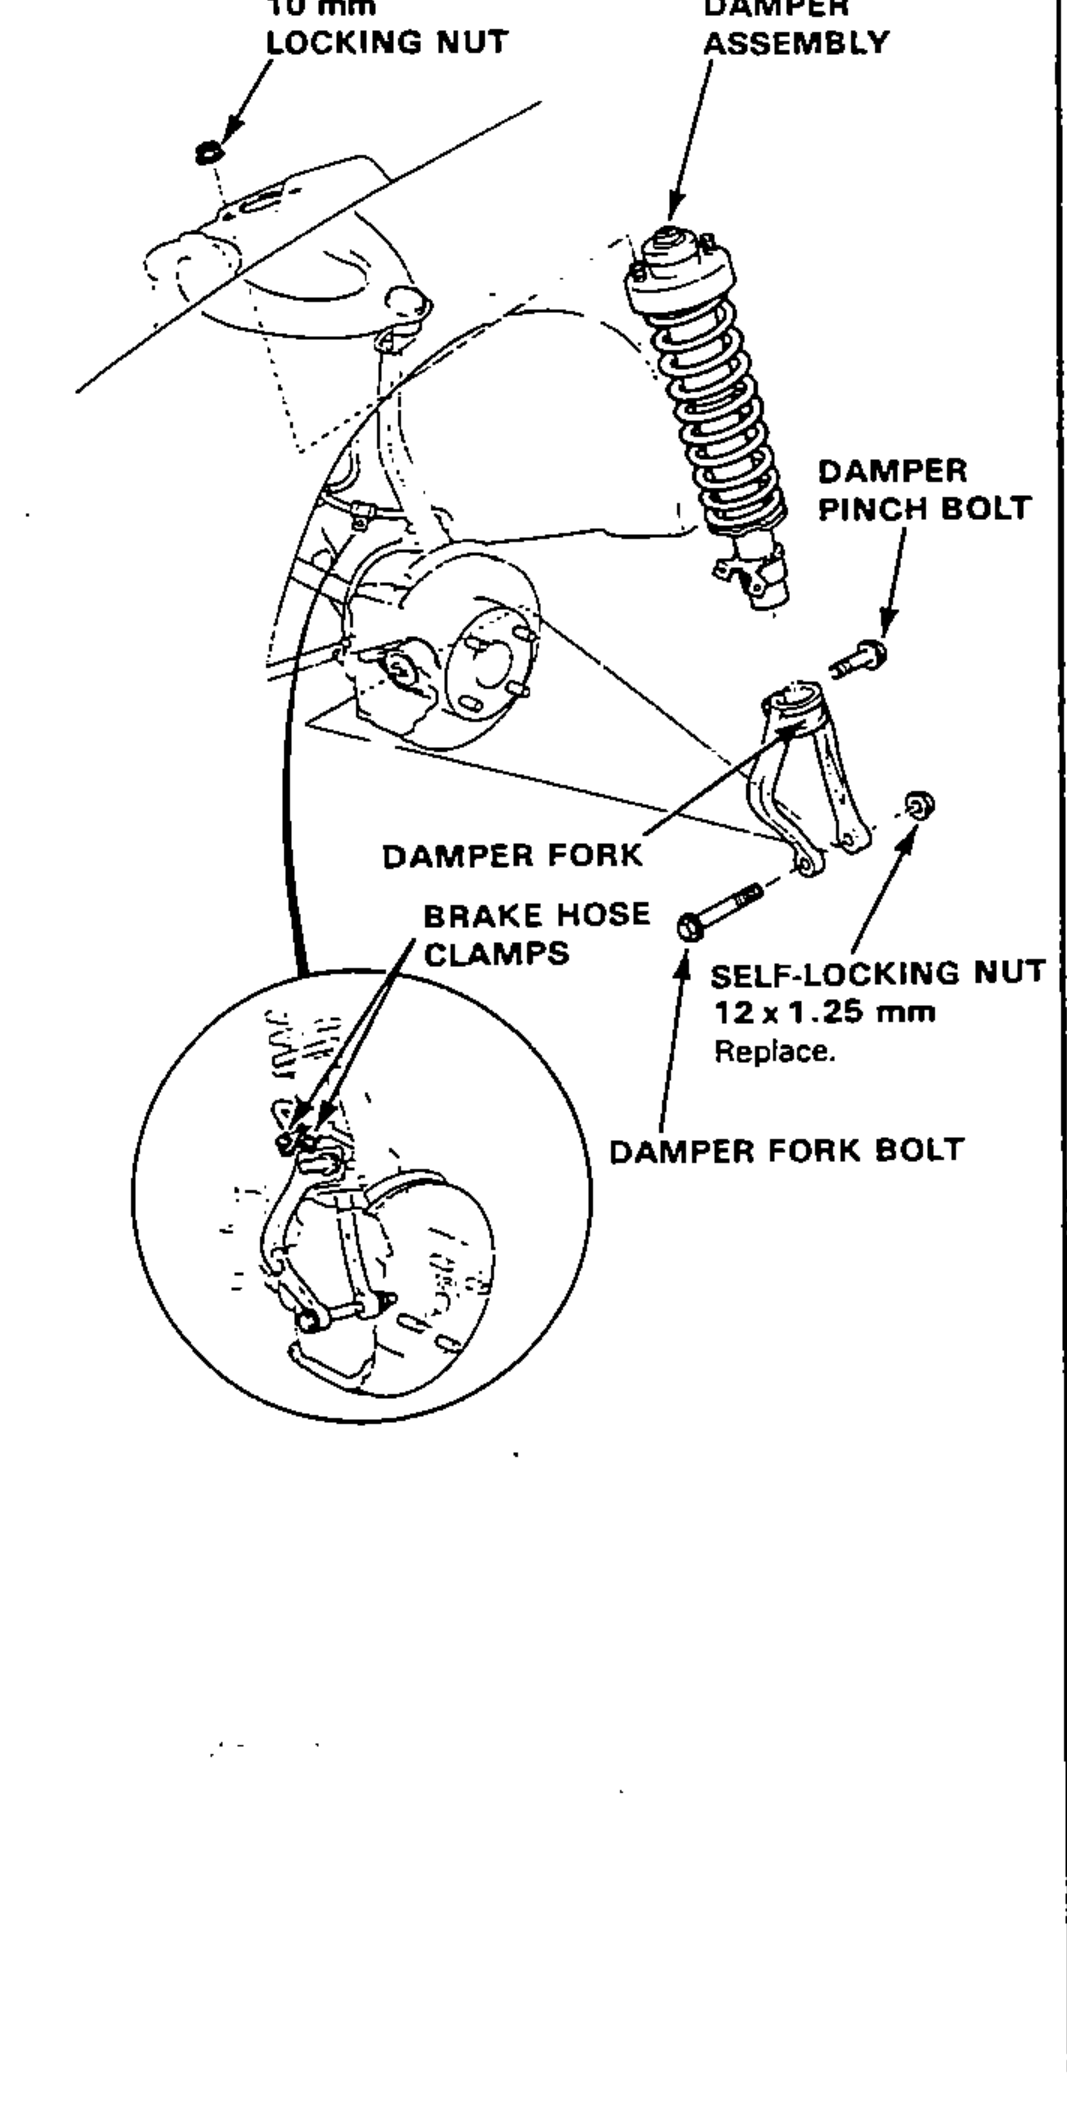
- 2Remove the damper pinch bolt.
- 3Remove the damper fork bolt and remove the damper fork.
- 4Remove the damper by removing the two 10 mm nuts.
Damper Disassembly/Inspection
- 1Compress the damper spring with the spring compressor according to the manufacturer's instructions, then remove the self locking nut.Do not compress the spring more than necessary to remove the nut.
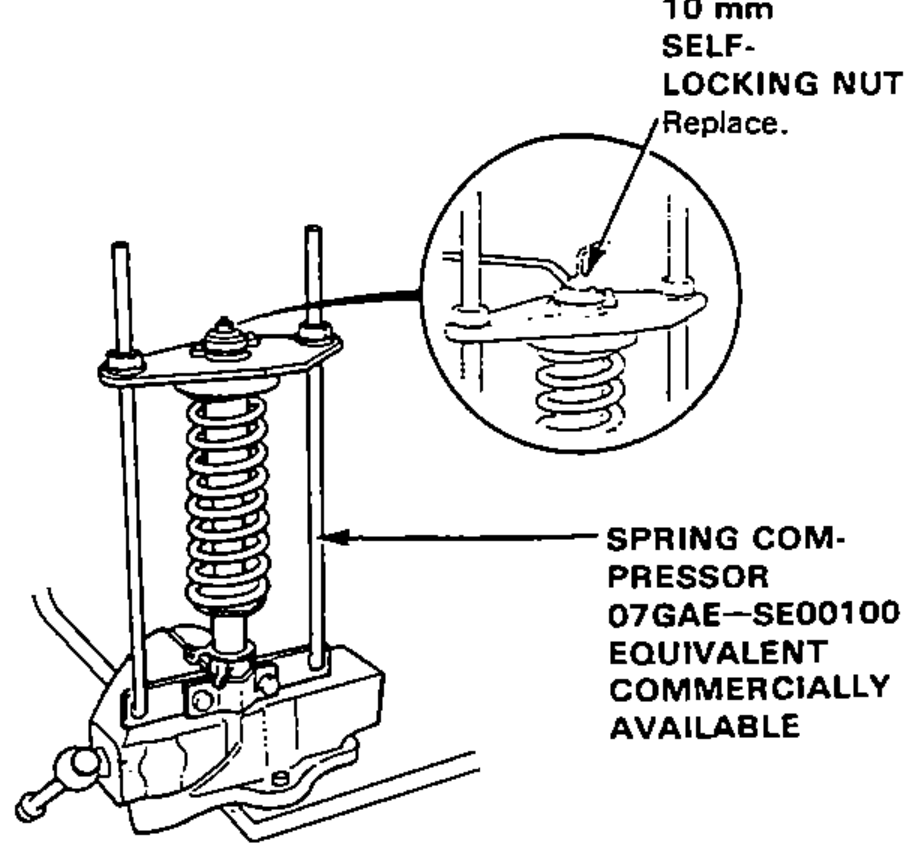
- 2Remove the spring compressor then disassemble the damper as shown on the next page.
- 3Check for smooth operation through a full stroke, both compression and extension.
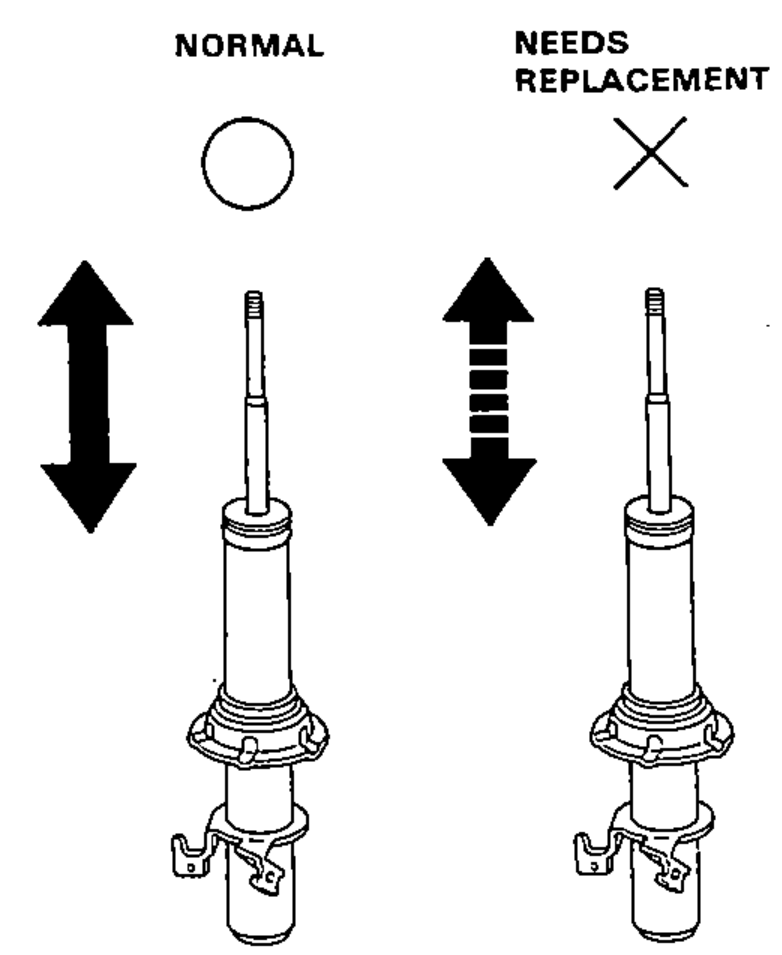
- 4Also check for smooth operation in short strokes of 5-10 cm (2-4 in). Replace the damper if resistance is uneven or jerky.
- 5Check for oil leaks abnormal noises or binding during these tests.