
Damper Reassembly / Damper Installation
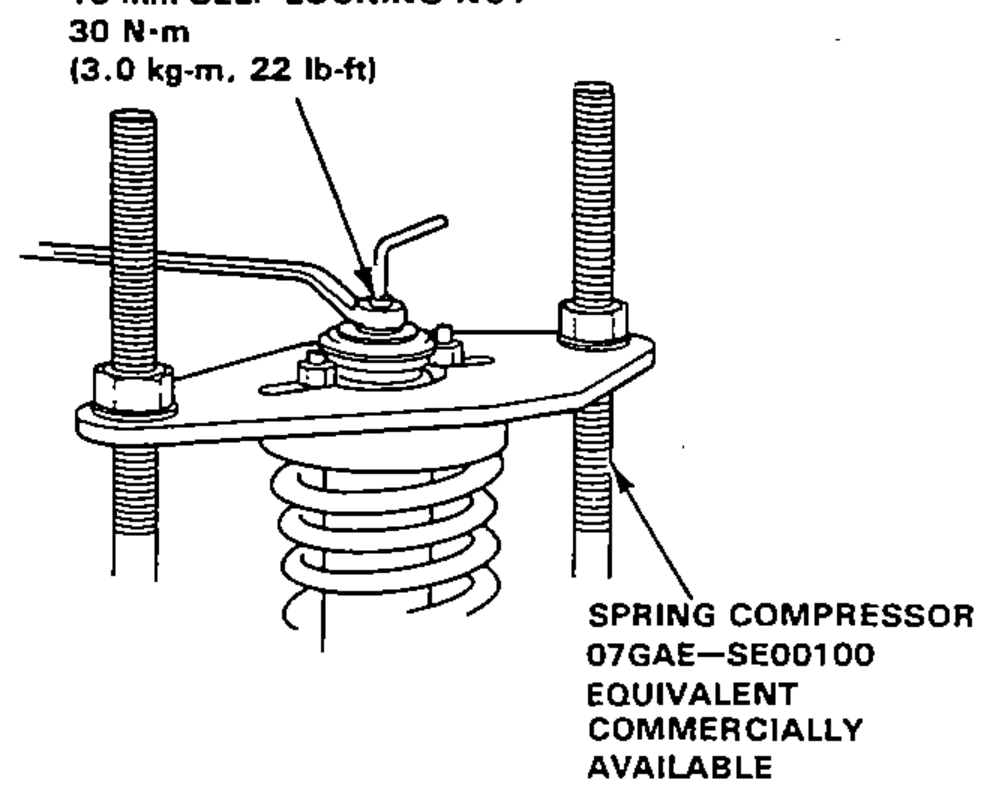
12-19prose procedure- 1Install the damper unit, damper spring, bump stop, boot, upper spring seat, damper bushings, and collar on the spring compressor.
- 2Mark the damper at two points by measuring around from the damper fork aligning tab. Align the two points with the stud bolts on the mounting base.Some damper units will have a projection at one of the alignment points.Left side shown, right side is opposite.

- 3Compress the damper spring.
- 4Install the damper mount washer and new 10 mm self-locking nut.
- 5Hold the damper shaft and tighten the 10 mm self-locking nut.
Damper Installation
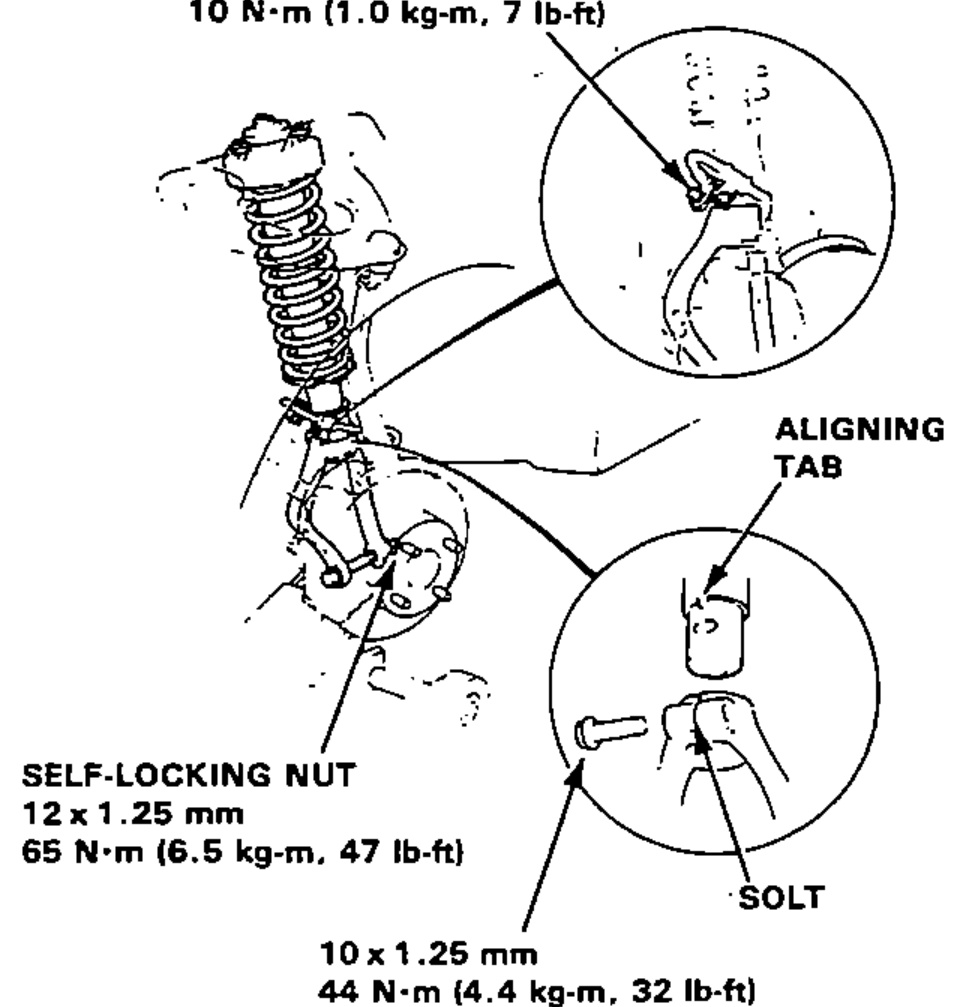
- 1Loosely install the damper on the frame with the aligning tab facing inside.
- 2Install the damper fork on the driveshaft and lower arm. Install the damper in the damper fork so the aligning tab is aligned with the slot in the damper fork. Hand tighten the bolts and nuts.
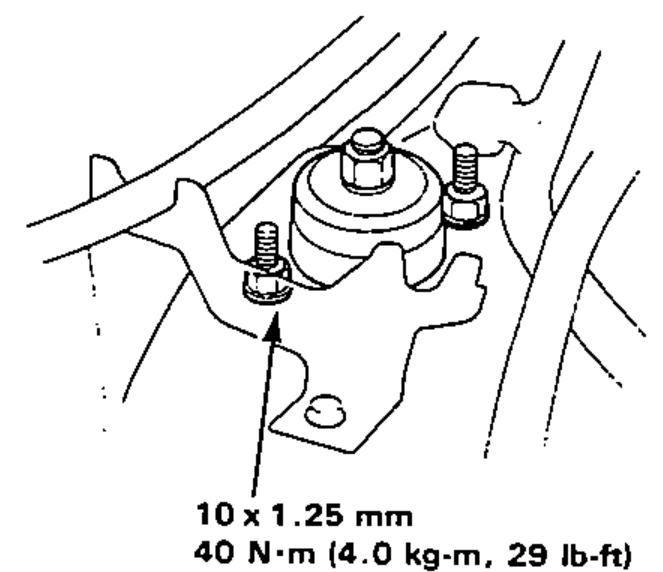
- 3Raise the knuckle with a floor jack until the car just lifts off the safety stand.The mount base nuts should be tightened with the damper under vehicle load.
- 4Tighten the damper pinch bolt.
- 5Secure the damper fork bolt with a new 12 mm self-locking nut.
- 6Install the brake hose clamps with the two bolts.
- 7Secure the damper assembly to the frame with the 10 mm locking nuts.
| Specification | Value |
|---|---|
| Damper mount 10 mm self-locking nut | 30N·m |
| Brake hose clamp bolt | 10N·m |
| Damper fork self-locking nut (12 x 1.25 mm) | 65N·m |
| Damper pinch bolt (10 x 1.25 mm) | 44N·m |
| Damper mount base nut (10 x 1.25 mm) | 40N·m |
Damper mount 10 mm self-locking nut
30N·m
Brake hose clamp bolt
10N·m
Damper fork self-locking nut (12 x 1.25 mm)
65N·m
Damper pinch bolt (10 x 1.25 mm)
44N·m
Damper mount base nut (10 x 1.25 mm)
40N·m