
Rear Suspension - Damper Reassembly / Damper Installation
12-26prose procedureDamper Reassembly
- 1Install the spring seat on the damper unit.
- 2Install the damper unit, dust cover, damper spring, bump stop, bump stop plate, damper mounting collar, damper mounting rubber and spring mounting rubber in the spring compressor.
- 3Install the damper mounting base on the damper unit so that the upper stud bolts are in line with the direction of the lower mount.
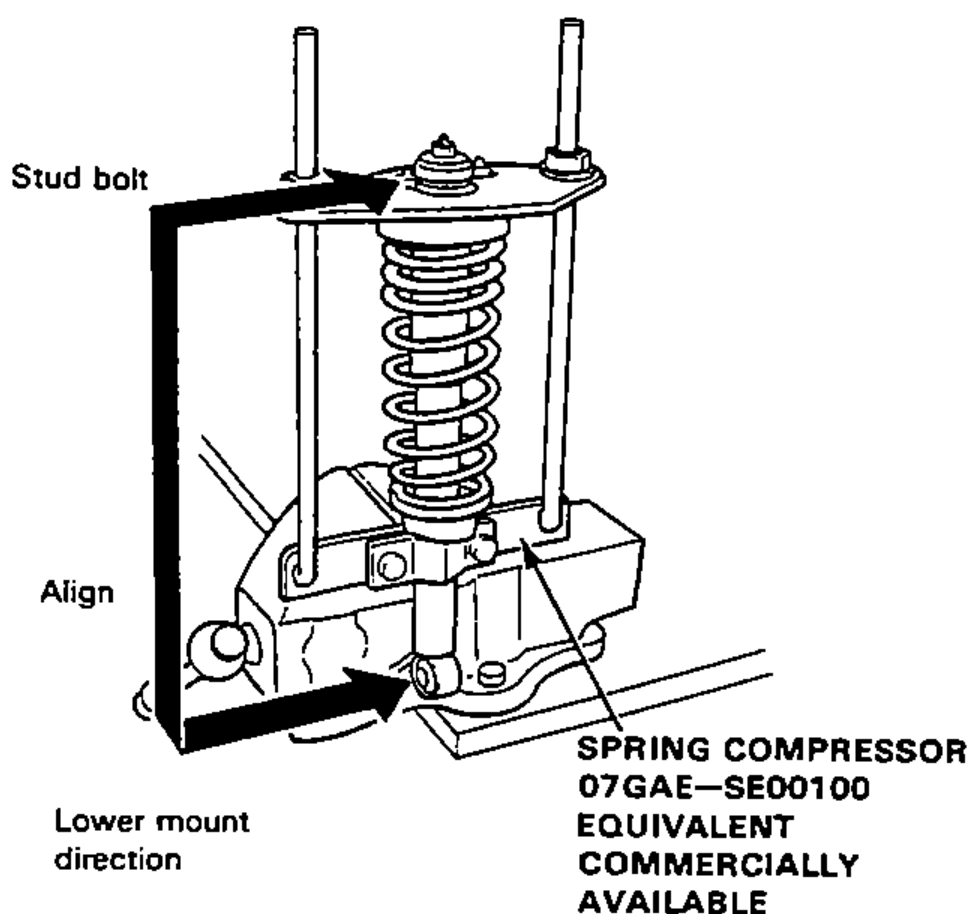
- 4Compress the coil spring.
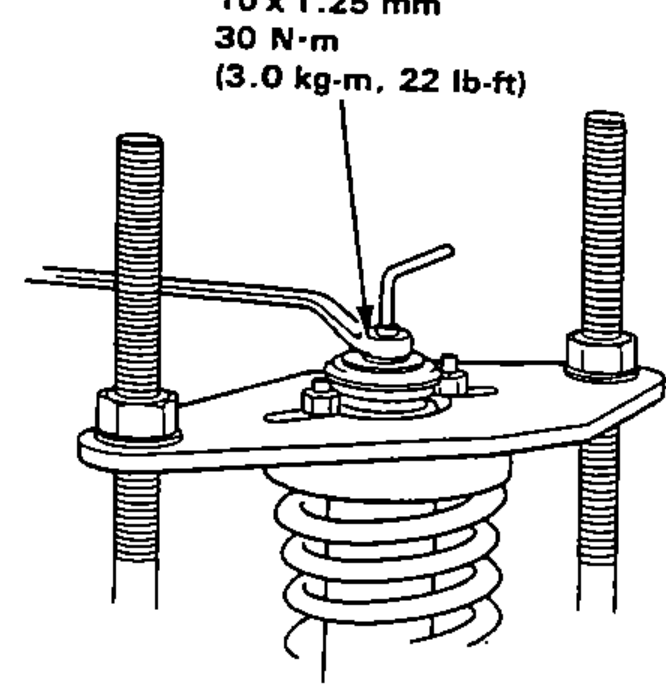
- 5Install the damper mounting rubber and damper mounting washer, and loosely install a new 10 mm self-locking nut.
- 6Hold the damper shaft and tighten the 10 mm self-locking nut.
Damper Installation
- 1Lower the rear suspension and set the damper unit in its original position.
- 2Loosely install the damper unit mounting bolt.
- 3Install the damper upper base mounting nuts and tighten them.
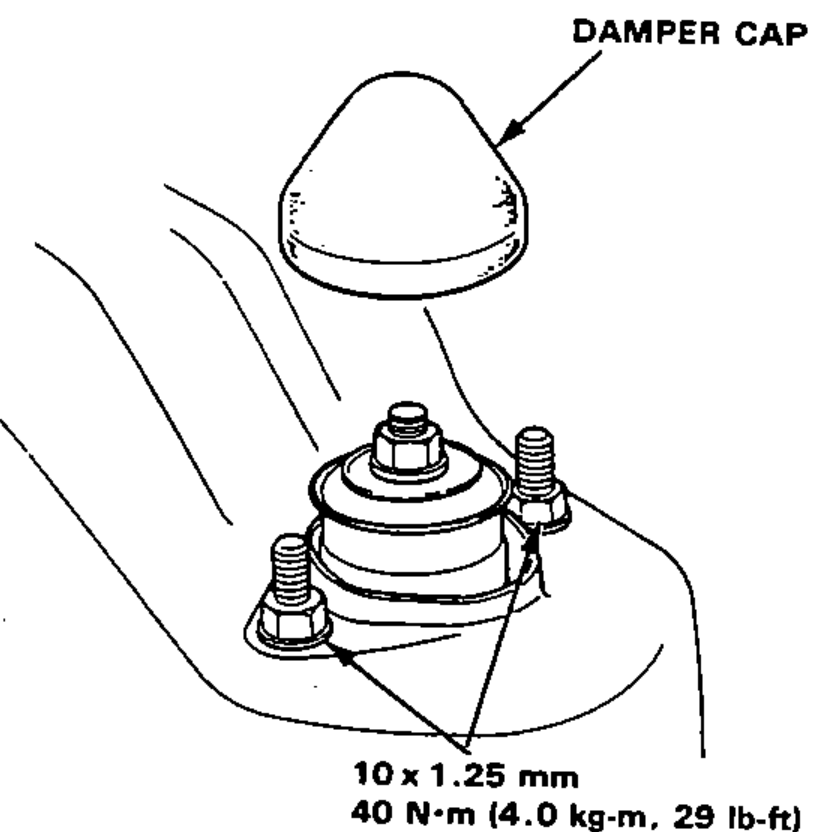
- 4Install the damper cap.
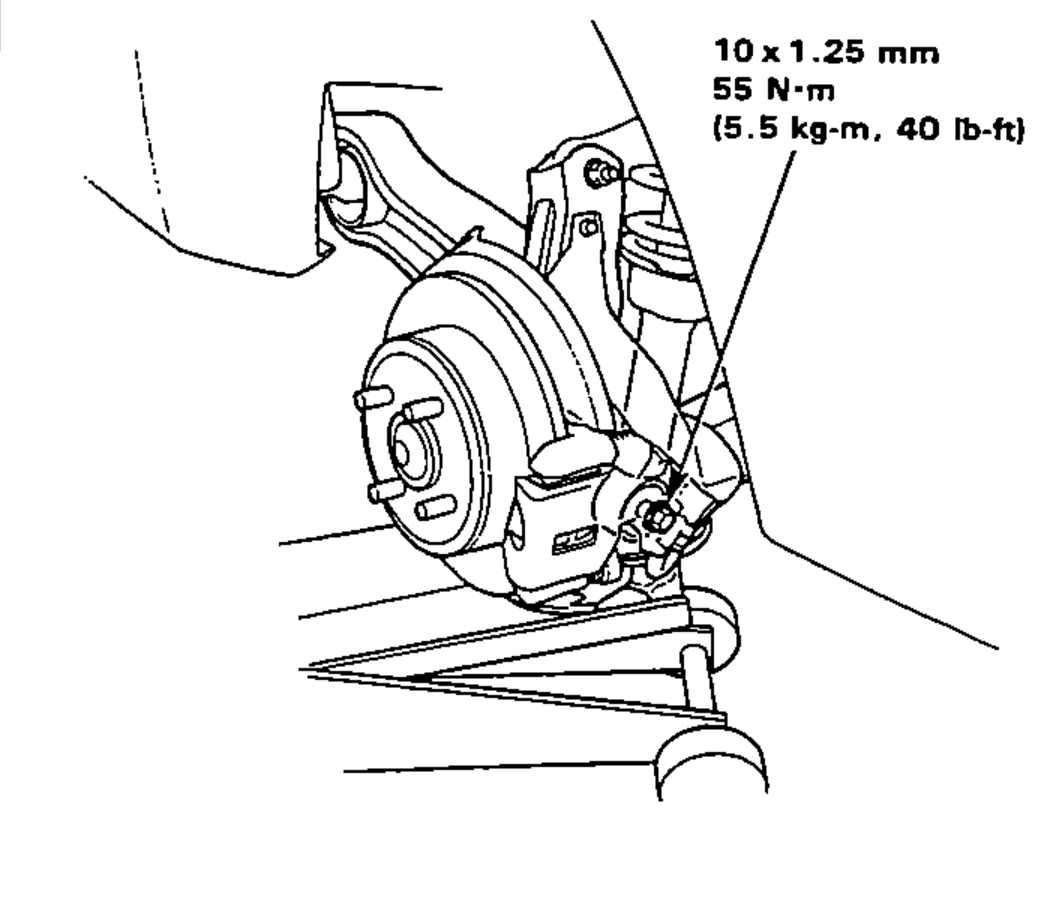
- 5Raise the rear suspension with a floor jack until the weight of the car is on the damper.The damper mounting bolts should be tightened with the damper under vehicle load.
- 6Tighten the damper mounting bolt.
| Specification | Value |
|---|---|
| Damper mount self-locking nut (10 x 1.25 mm) | 30N·m |
| Damper upper base mounting nut (10 x 1.25 mm) | 40N·m |
| Damper unit mounting bolt (10 x 1.25 mm) | 55N·m |
Damper mount self-locking nut (10 x 1.25 mm)
30N·m
Damper upper base mounting nut (10 x 1.25 mm)
40N·m
Damper unit mounting bolt (10 x 1.25 mm)
55N·m