
Front Suspension - Upper Arm Bushing Replacement
12-16prose procedureUpper Arm Bushing Replacement
- 1Remove the front wheels.
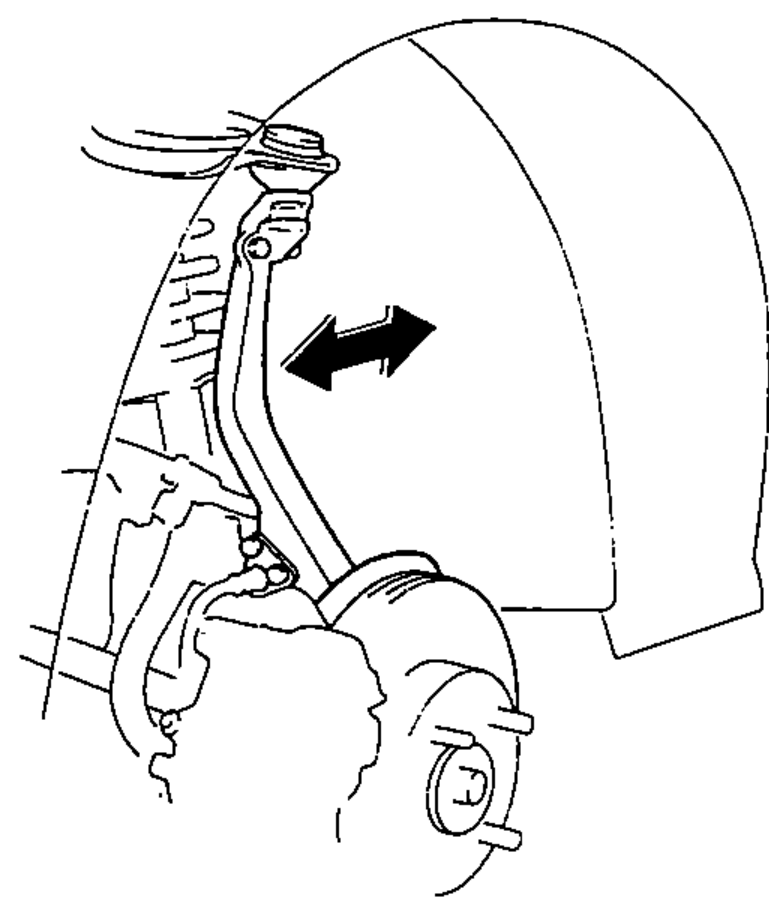
- 2Rock the upper ball joint front-to-back.
- 3Replace the upper arm bushings as follows if there is any play.
- 4Remove the self-locking nuts, upper arm bolts and upper arm anchor bolts.

- 5Place each upper arm anchor bolt in a vise and drive out the upper arm bushings.
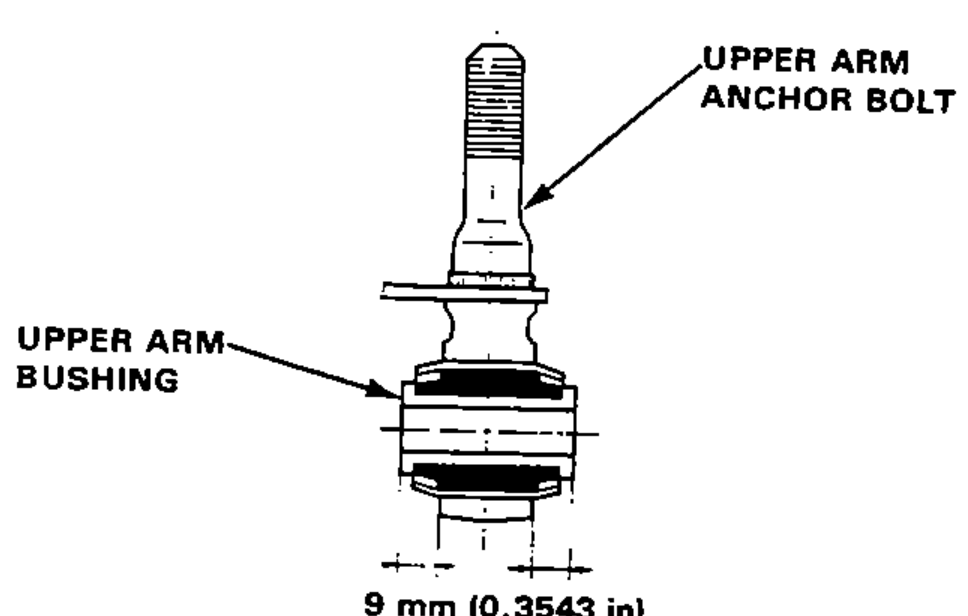
- 6Drive the new upper arm bushings into the upper arm anchor bolts.Center the bushing so that 9 mm (0.3543 in) protrudes from each side of the anchor bolt as shown.
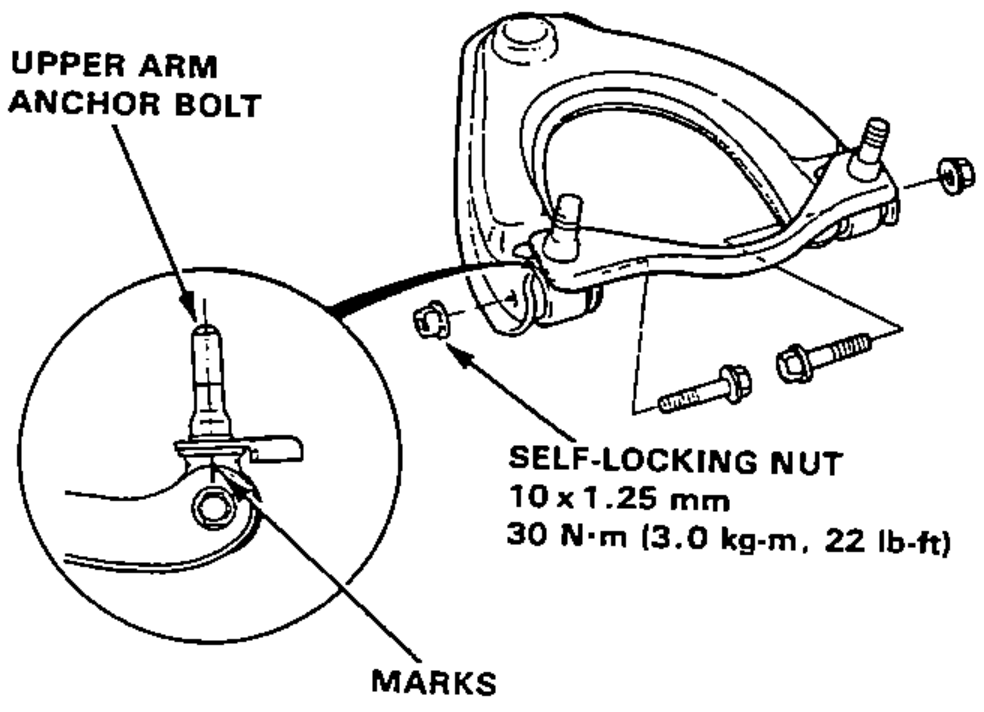
- 7Install the upper arm bolts and tighten the self-locking nuts.Align the upper arm anchor bolt with the mark on the upper arm.
- 9After installation, check the camber (page 12-4).