
Heater Assembly - Replacement
15-18prose procedureReplacement
WARNING
· Do not remove the radiator cap when the engine is hot, the coolant is under pressure and could severely scald you.
· Keep hands away from the radiator fan. The fan may start automatically without warning and run for up to 30 minutes, even after the engine is turned off.
CAUTION
Radiator coolant will damage paint. Quickly rinse any spilled coolant from painted surfaces.
- 1When the engine is cool, drain coolant from the radiator (Section 5).Do not remove the radiator cap when the engine is hot, the coolant is under pressure and could severely scald you.Keep hands away from the radiator fan. The fan may start automatically without warning and run for up to 30 minutes, even after the engine is turned off.CAUTION: Radiator coolant will damage paint. Quickly rinse any spilled coolant from painted surfaces.
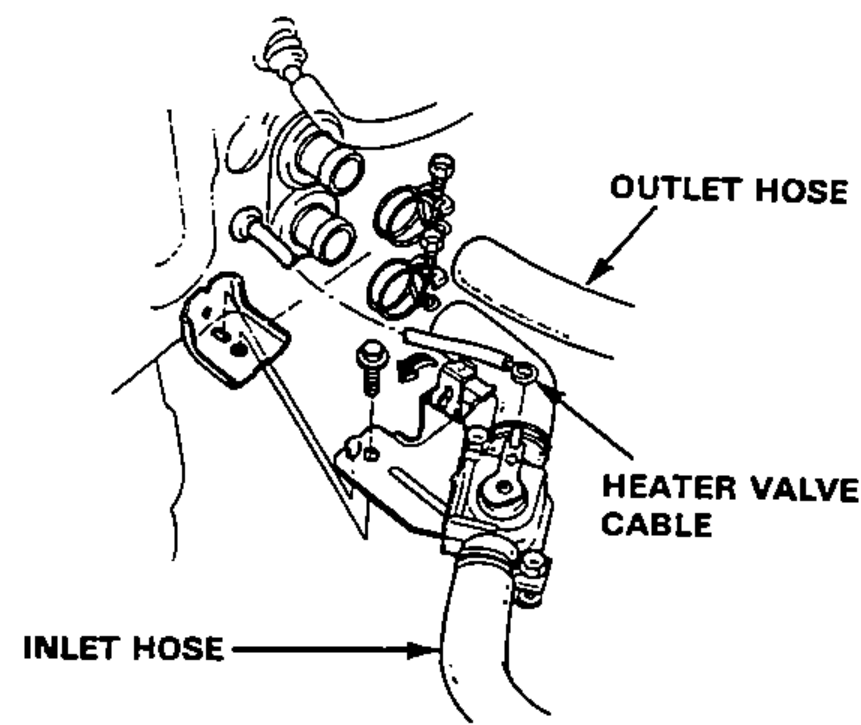
- 2Disconnect the heater hoses at the heater.NOTE: Coolant will run out when the hoses are disconnected, drain it into a clean drip pan.
- 3Disconnect the heater valve cable from the heater valve.
- 4Remove the dashboard (Section 14).
- 5Remove the heater duct (page 15-10).
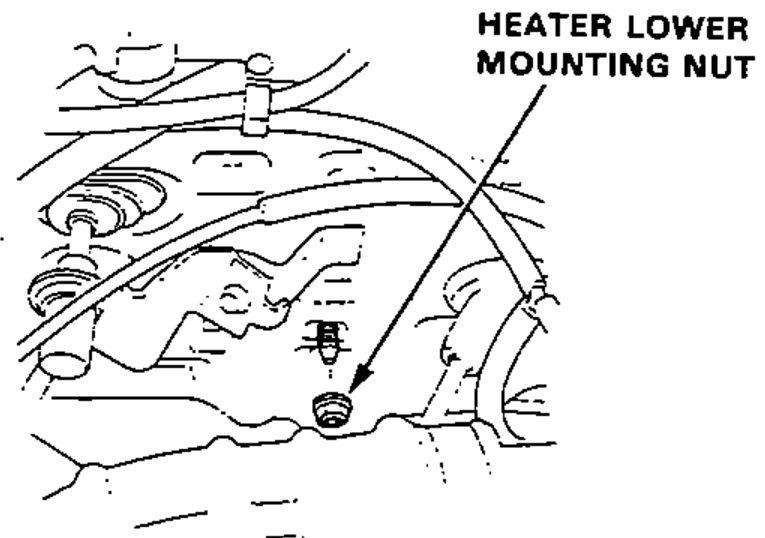
- 6Remove the heater lower mounting nut.
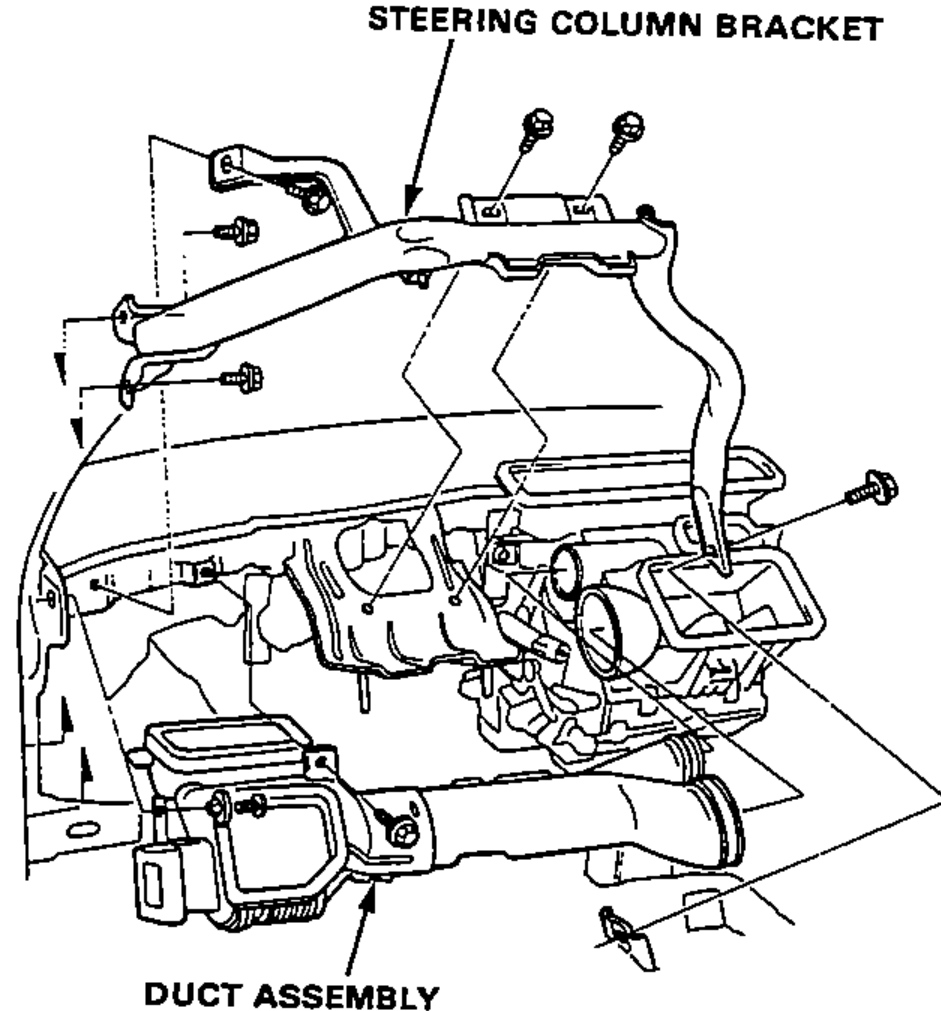
- 7Remove the steering column bracket and the duct assembly.
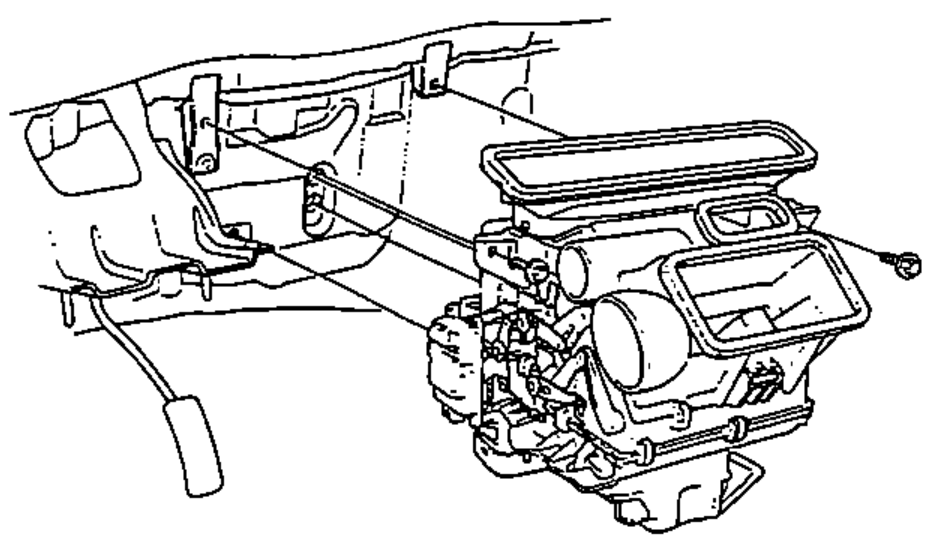
- 8Remove the heater mounting bolts (2), disconnect the wire harness connector from the function control motor, and then remove the heater assembly.
- 9Install in the reverse order of removal, and: