
System Charging - Charging Procedures
15-58prose procedureCharging Procedures
WARNING
Always wear eye protection when charging the system.
CAUTION
Do not overcharge the system; the compressor will be damaged.
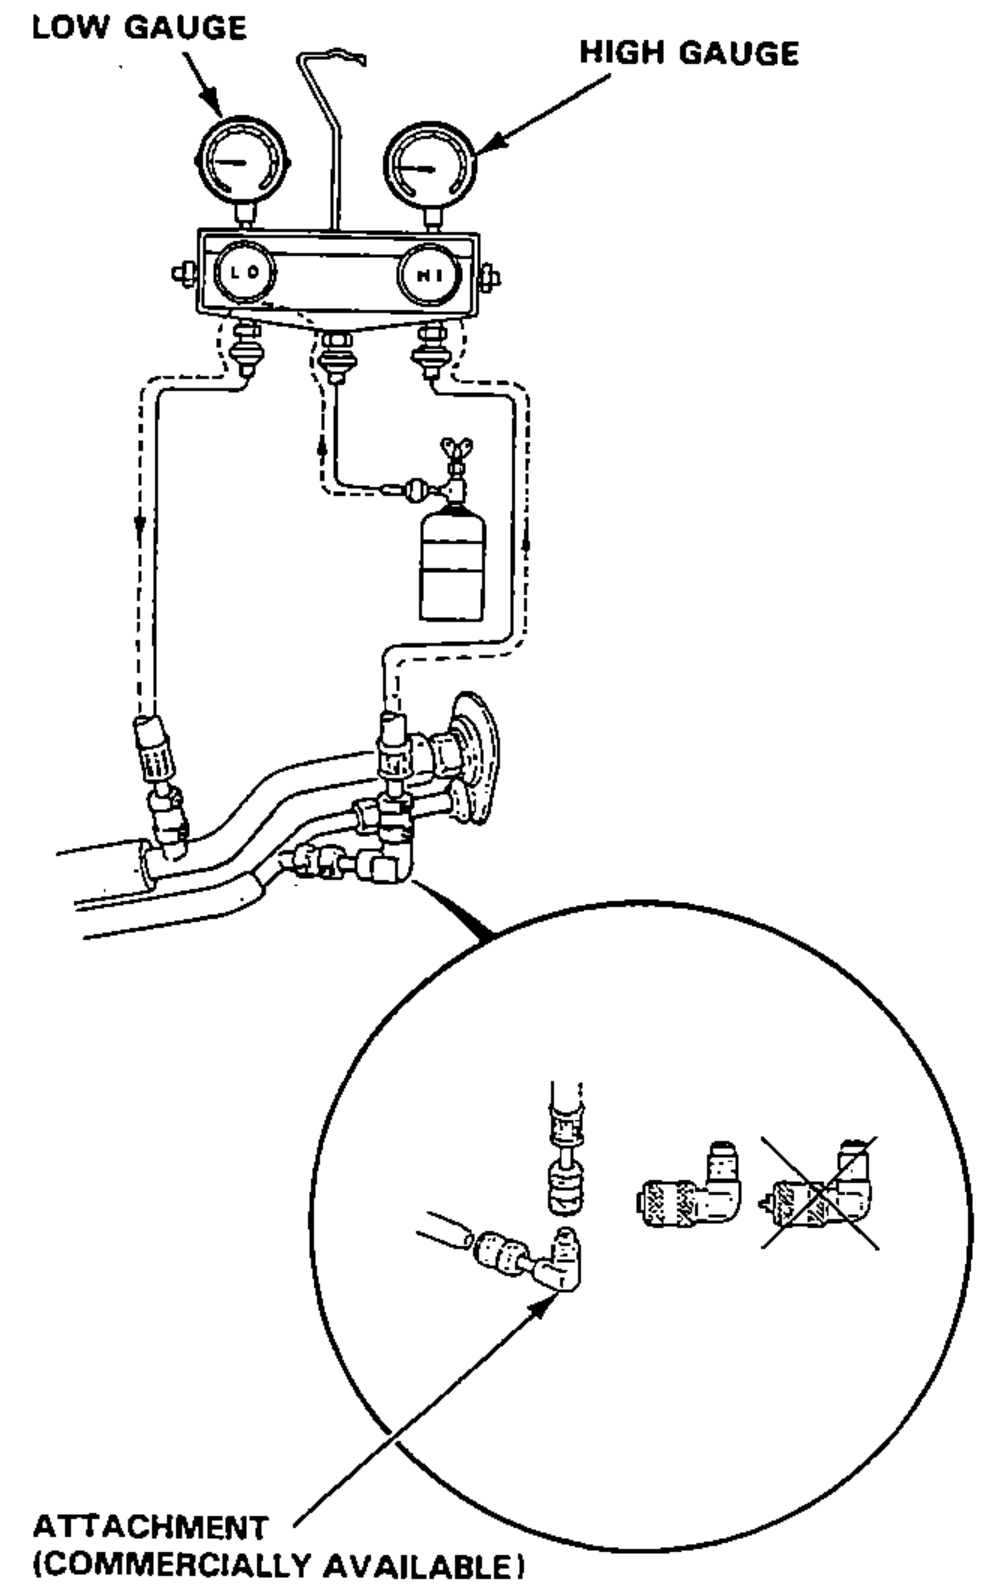
- 1Connect a gauge set and refrigerant can (right side up) as shown, with the gauge valves closed. Purge air from the charging hose by opening the refrigerant valve, then loosening the center connector at the gauge, letting it hiss for a few seconds, and retighten it.
- 2Open the high gauge valve and charge with approximately 300 g (10.5 oz) of refrigerant.Do not start the engine with high gauge valve open.Be sure to charge with 300 g (10.5 oz) refrigerant. If low, the vane in the compressor (if new compressor is installed) will not operate.Do not open the low gauge valve.
- 3After charging with 300 g (10.5 oz) refrigerant, close the high gauge valve.
- 4Start the engine and turn on the A/C switch and heater fan switch and turn the air mix lever to "COLD."
- 5Run the engine at 1500-2000 rpm, and check that the low gauge pressure suddenly drops.
- 6If the low pressure does not drop:
- 7Open the low gauge valve and charge refrigerant with the engine running at 2,500 rpm.Do not open the high gauge valve and keep the refrigerant can right side-up.
- 8Charge the system with 850-950 g (29-34 oz) of refrigerant until sight glass is free of any bubbles, indicating a full charge.
- 9When fully charged, close the gauge valves, then the valve on the can. Slowly disconnect the refrigerant hose from the center gauge connection to allow excess refrigerant to escape. Quickly remove the gauges from the system to minimize refrigerant loss.