
Compressor - Shaft Seal Replacement (cont'd)
15-55prose procedure- 7Insert the special tool into the compressor aligning the cutout of the remover with the metal pawl of the seal case.
 07HAF-SF10400
 - 8Rotate the special tool counter clock wise to make sure that the cutout is engaged with the metal pawl.
- 9Withdraw the remover.
- 10Lay down the compressor and clean the shaft seal contacting face of the compressor with cleaning solvent.Keep the cleaning solvent and dirt out of the compressor.Do not use any cloth for cleaning, clean only by rinsing with solvent.Do not spill the refrigerant oil from the compressor. Refill the same amount of the oil if the oil is spilled out.
- 11Clean the new shaft seal thoroughly with cleaning solvent.
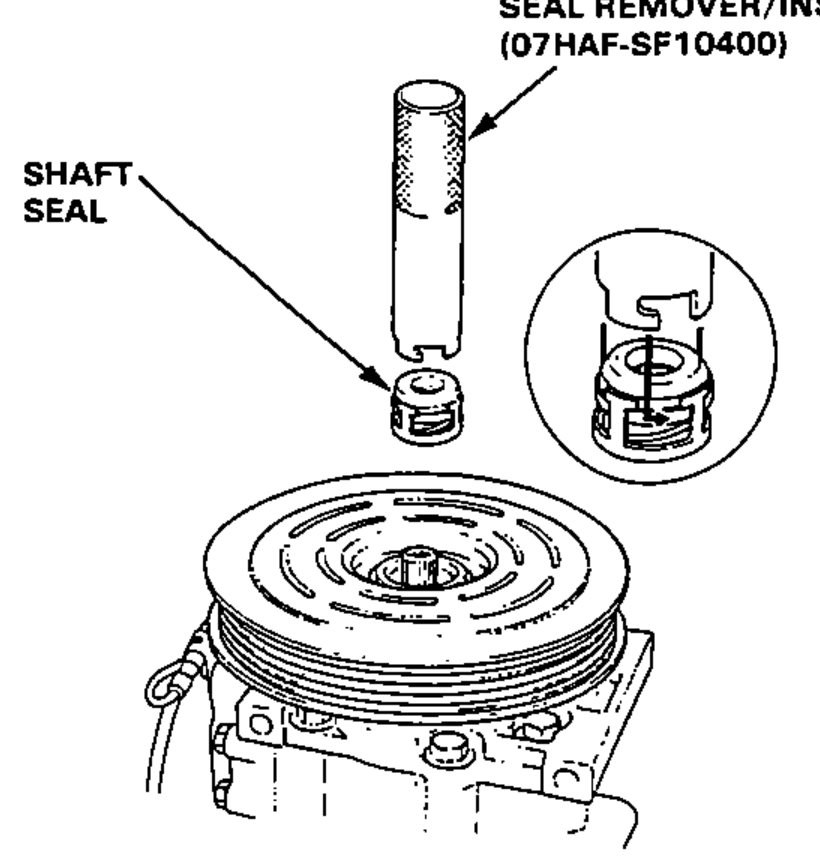
- 12Lubricate the shaft seal with refrigerant oil (SUNISO 5GS or equivalent) and install it on the shaft seal remover.Use only clean refrigerant oil.Do not touch the sealing surfaces of the shaft seal after lubricating.
- 13Liberally lubricate the compressor shaft with refrigerant oil.
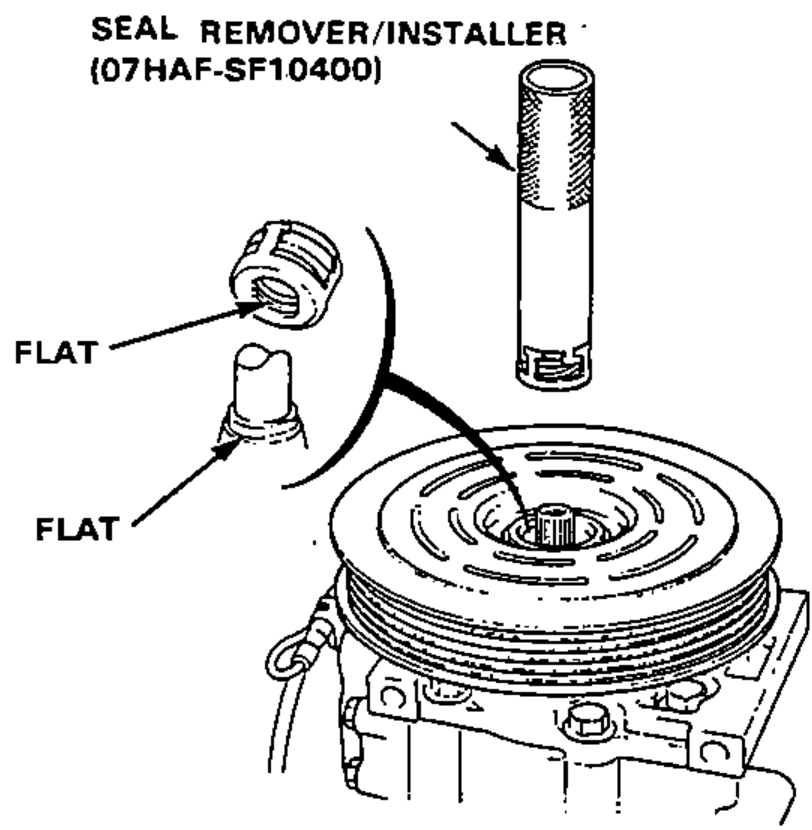
- 14Install the shaft seal onto the compressor shaft aligning the seal case flats with the shaft flats.
 07HAF-SF10400
 - 15Clean the seal seat with cleaning solvent, then lubricate the seal seat with refrigerant oil (SUNISO 5GS or equivalent).Use only clean refrigerant oil.Do not touch the sealing surface of the seal plate after lubricated.
- 16First slide the seal seat into the compressor by hand as far as possible.
- 17Press the seal seat with the grip side of the remover.
- 18Install the circlip with its chamfered edge inside.
- 19Press the circlip with the grip side of the remover, then install the felt seal.
- 20Install the shim(s).
- 21Install the pressure plate. Measure the clearance between the pulley and pressure plate all the way around. If the clearance is not within the specified limits, (0.3-0.45 mm (0.012-0.018 in)) shims must be added or removed as required.