
Discharge Procedure / Condenser Replacement
15-42prose procedureWARNING
• Keep away from open flames. The refrigerant, although nonflammable, will produce a poisonous gas if burned.
• Work in a well-ventilated area. Refrigerant evaporates quickly, and can force all the air out of a small enclosed area.
- 1Connect the gauges as shown.Set the attachment to the gauge hose at high pressure side first, then install the gauge set as shown. When disconnecting the gauge hose at high pressure side, remove the attachment from the high pressure charging valve.
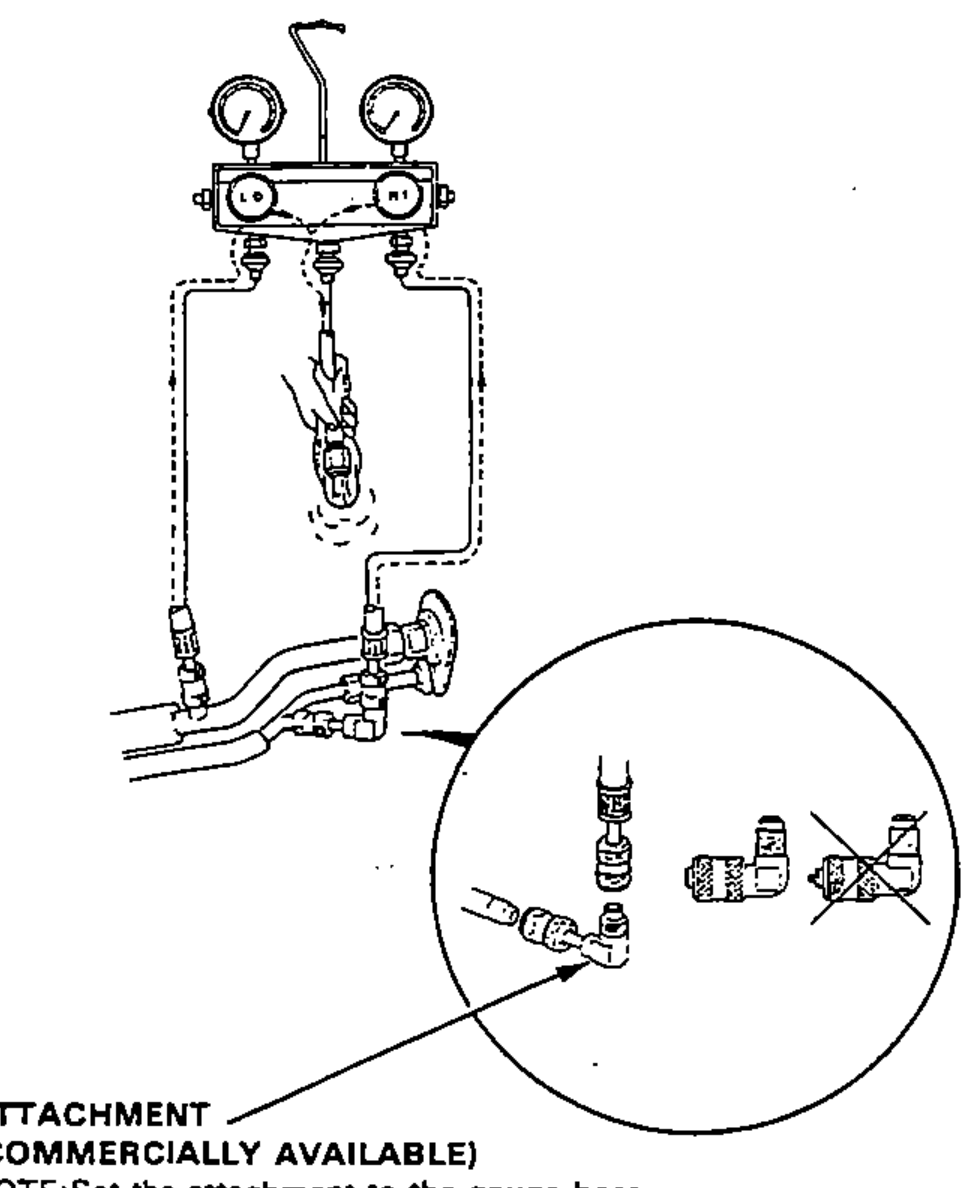
- 2Disconnect the center hose of the gauge set and place the free end in a shop towel.
- 3Slowly open the high side manifold valve slightly to let refrigerant flow from the center hose only. Do not open the valve too wide. Check the shop towel to make sure no oil is being discharged with the refrigerant.CAUTION: If refrigerant is allowed to escape too fast, compressor oil will be drawn out of the system.
- 4After the high pressure gauge reading has dropped below 1000 kPa (142 psi), open the low side valve to discharge both high and low sides of the system.
- 5Note the gauge readings and, as system pressure drops, gradually open both high and low side valves fully until both gauges indicate 0 kPa (0 psi).
Condenser — Replacement
- 1Discharge the refrigerant.
- 2Disconnect the engine ground cable.
- 3Remove the radiator reservoir tank and the air intake tube.
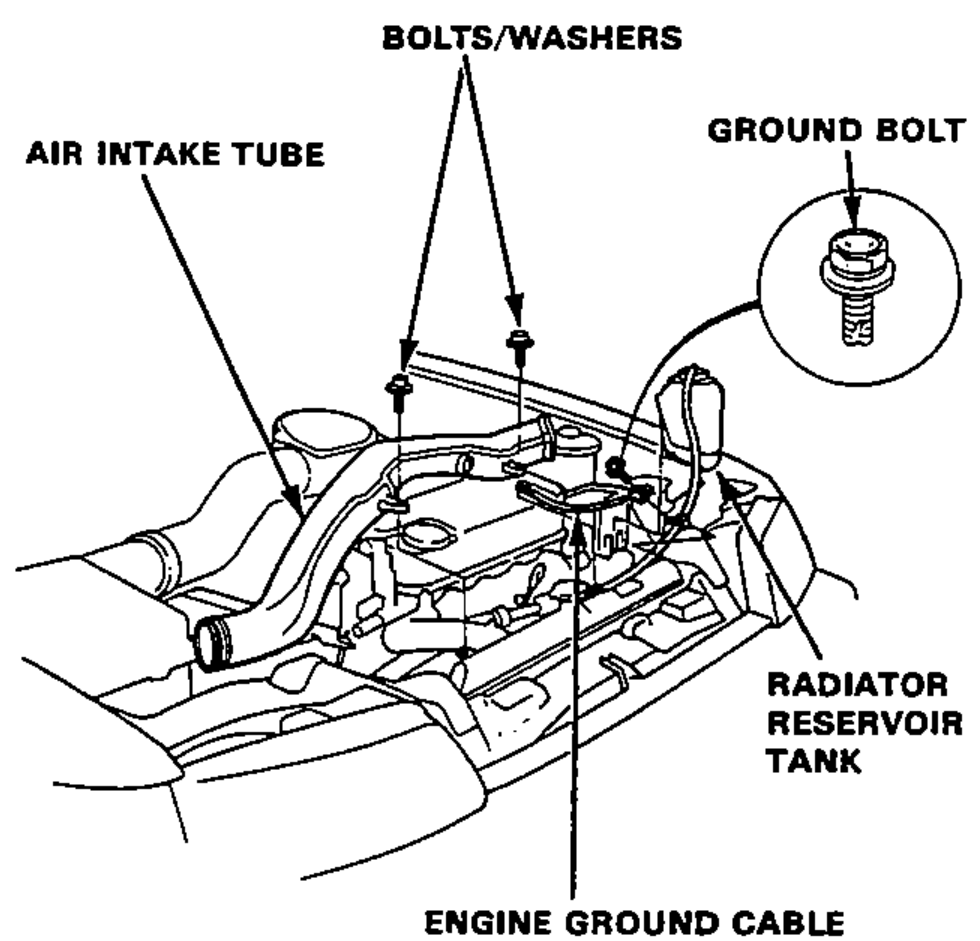
- 4Remove the condenser fan with the two bolts.
