
Compressor - Thermal Protector Replacement / Shaft Seal Replacement
15-54prose procedureThermal Protector Replacement
- 1Remove the pressure plate and field coil (page 15-51).
- 2Pull the rubber cap out from the thermal protector.
- 3Remove the screws and wire clips.
- 4Remove the circlip and thermal protector.
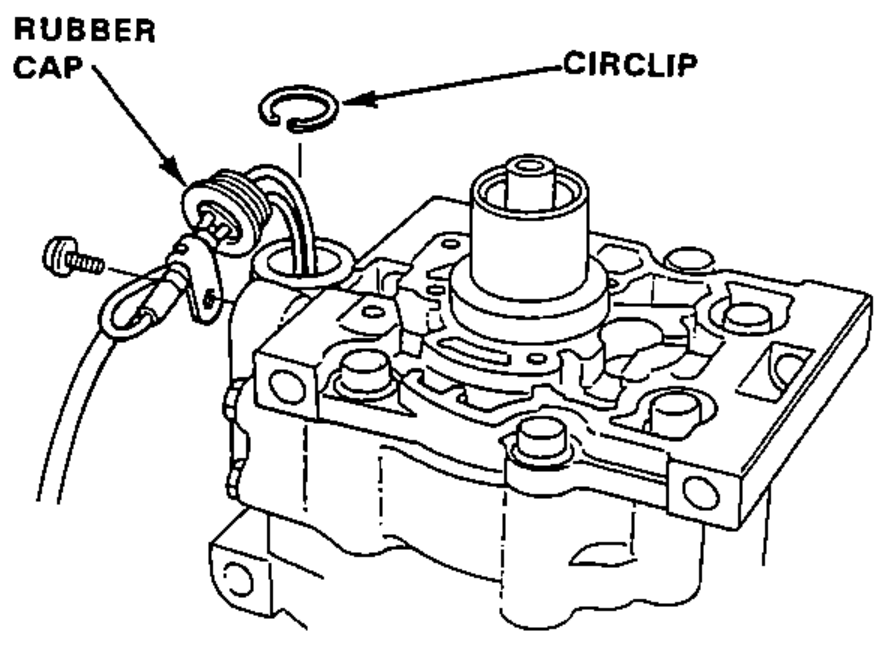
- 5Install in the reverse order of removal.NOTE:

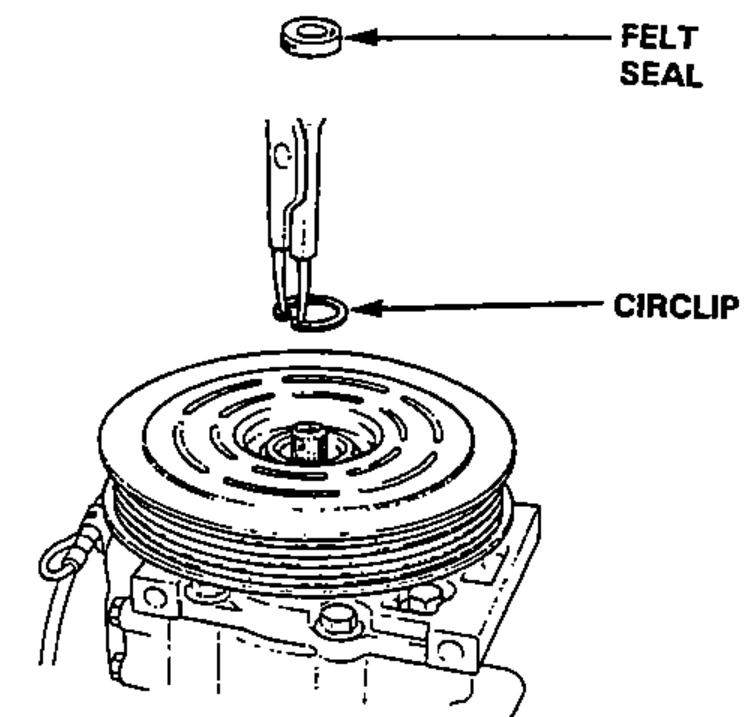
Shaft Seal Replacement
NOTE
Make sure that the suction and discharge joints are plugged with the caps.
- 1Remove the pressure plate (page 15-51).NOTE: Removal of the clutch pulley and coil is not necessary.
- 2Remove the felt seal and circlip.
- 3Remove the shim(s).NOTE: After removing, place shim(s) safely in a parts rack.
- 4Insert the Special tool into the compressor aligning the cutout of the remover with the groove of the seal seat.
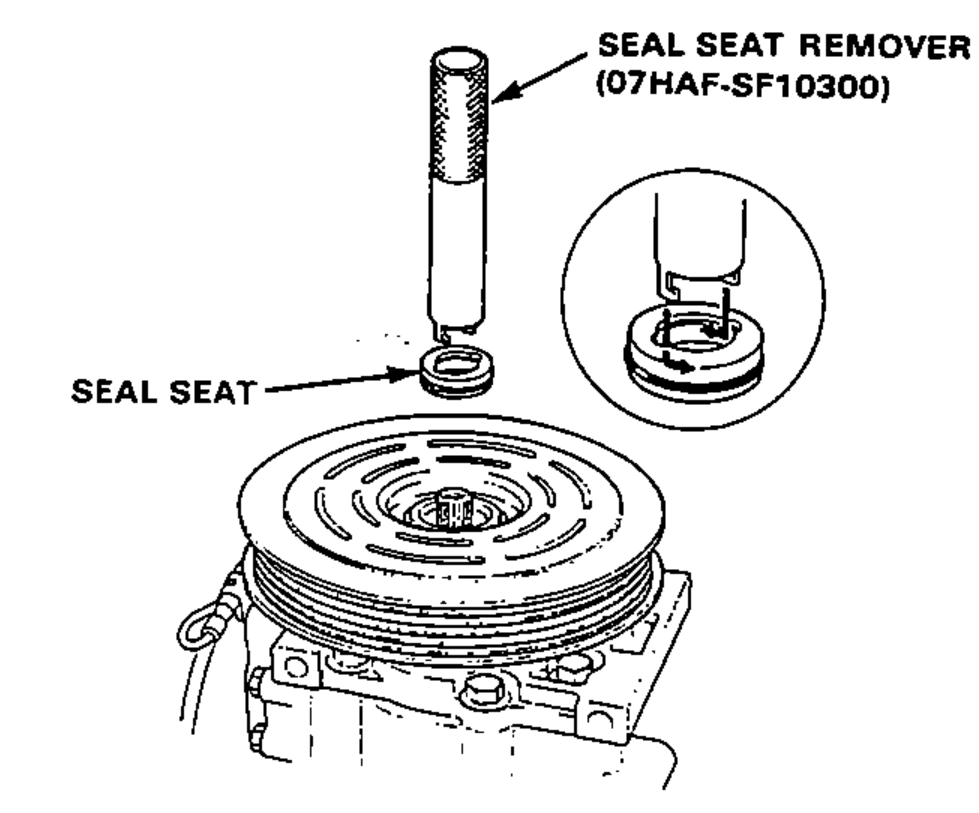 07HAF-SF10300
 - 5Rotate the Special tool counterclockwise to make sure that the cutout is engaged with the seal seat.
- 6Pull out the seal seat.