
System Charging - Leak Test
15-57prose procedureLeak Test
WARNING
When handling refrigerant (R-12):
• Always wear eye protection.
• Do not let refrigerant get on your skin or in your eyes. If it does:
— Do not rub your eyes or skin.
— Splash large quantities of cool water in your eyes or on your skin.
— Rush to a physician or hospital for immediate treatment. Do not attempt to treat it yourself.
• Keep refrigerant containers (cans of R-12) stored below 40°C (100°F).
• Keep away from open flame. Refrigerant, although non-flammable, will produce poisonous gas if burned.
• Work in well-ventilated area. Refrigerant evaporates quickly, and can force all the air out of a small, enclosed area.
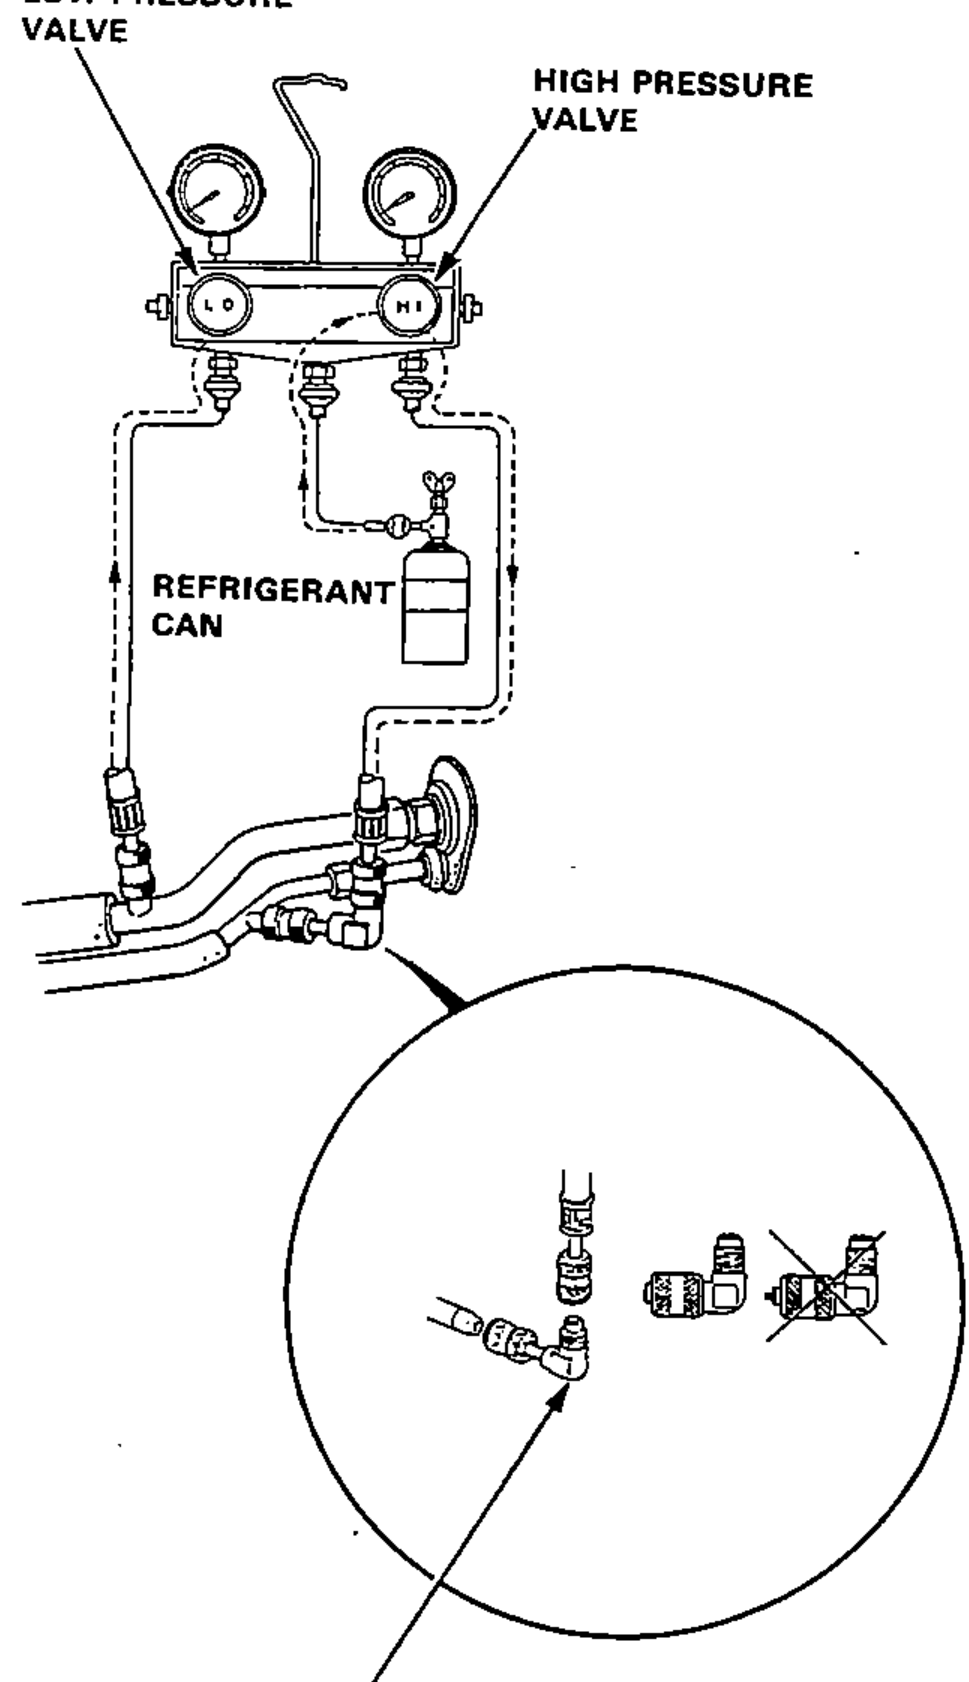
- 1Attach a refrigerant supply and gauge set as shown, with all valves closed. Then open the refrigerant supply valve on the can.
- 2Loosen the center charging hose fitting at the gauge to purge any air from the hose, until it hisses for a few seconds, then tighten it again.
- 3Open high pressure valve to charge the system to about 100 kPa (14 psi), then close the supply valve.
- 4Check the system for leaks using a leak detector.
- 5If you find leaks that require the system to be opened (to repair or replace hoses, fittings, etc.), release any charge in the system according to the Discharge Procedure on page 15-42.
- 6After checking and repairing leaks, the system must be evacuated (see System Evacuation on page 15-56).