
Master Cylinder - Disassembly
13-13prose procedureDisassembly
CAUTION
Avoid spilling fluid on painted, plastic or rubber parts as it may damage the finish. Plug the end of the brake hose with a shop rag to prevent brake fluid from flowing out of the brake hose after disconnecting. Use only new clean brake fluid. Clean all parts thoroughly with brake fluid. Blow out all passages with compressed air. Do not allow foreign matter to enter the system. Be careful not to bend or damage the brake pipe when removing the master cylinder.
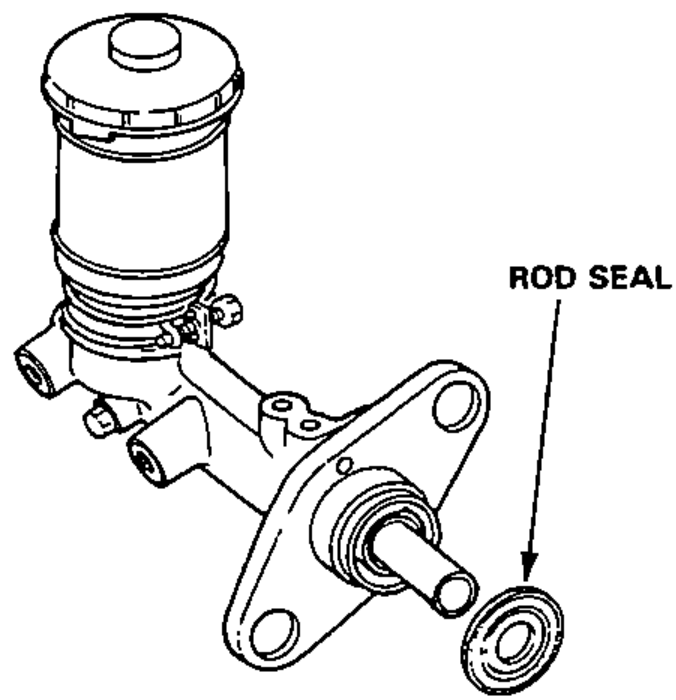
- 1Remove the rod seal.
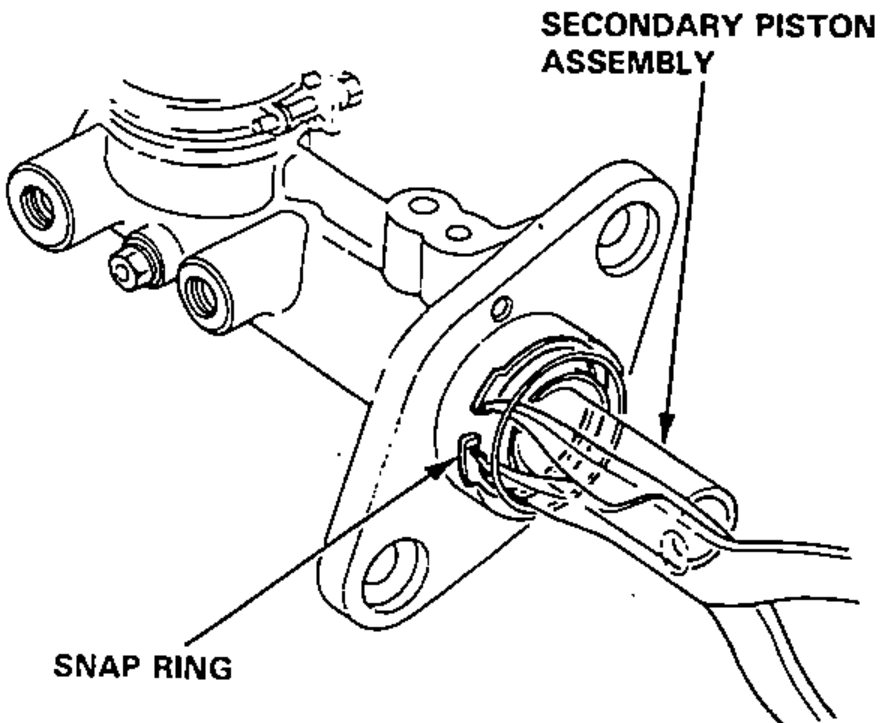
- 2Push the secondary piston assembly, then remove the snap ring.Avoid damaging the master cylinder wall.
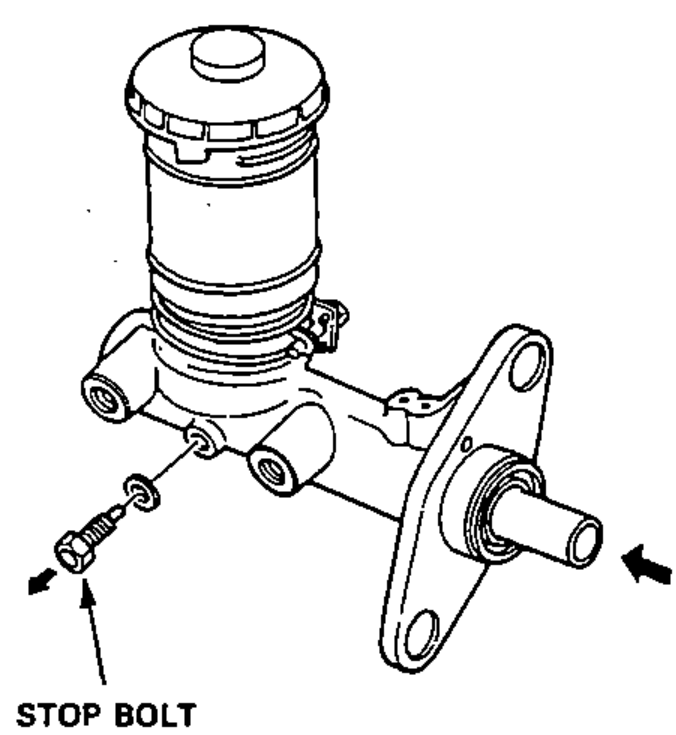
- 3Remove the stop bolt while pushing in the secondary piston assembly.
- 4Remove the piston guide, secondary piston assembly and primary piston assembly.Do not use high pressure air or bring the nozzle too close to the inlet.Place a shop rag over the master cylinder to prevent the primary piston from becoming a projectile.If the primary piston assembly is difficult to remove, apply compressed air from the primary piston side outlet.
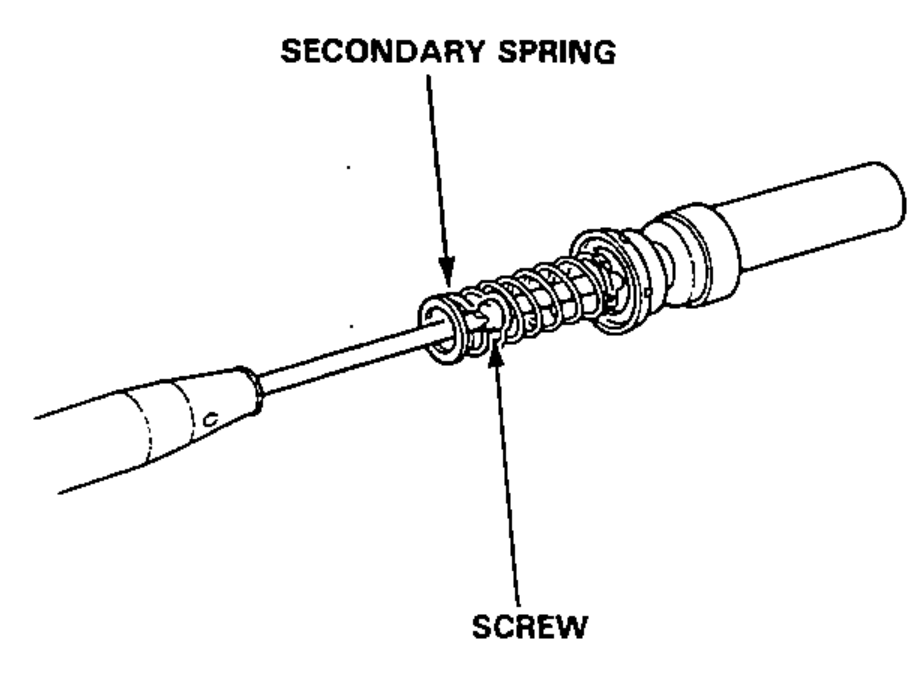
- 5Remove the screw from the secondary piston assembly, then remove the secondary spring.
- 6Clean all parts with brake fluid.