
Pedal Height Adjustment / Parking Brake Adjustment
13-4prose procedurePedal height differs by steering side: LHD 153 mm (6.02 in), RHD 161 mm (6.34 in). Measure without floormat.
Adjustment
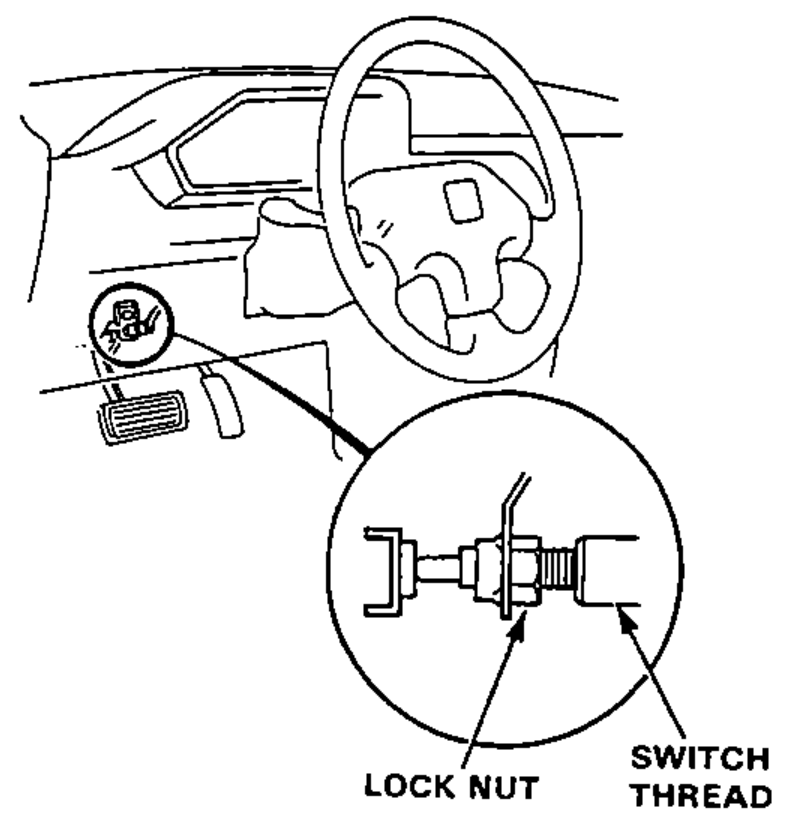
- 1Loosen brake light switch locknut and back off brake light switch until it is no longer touching brake pedal.
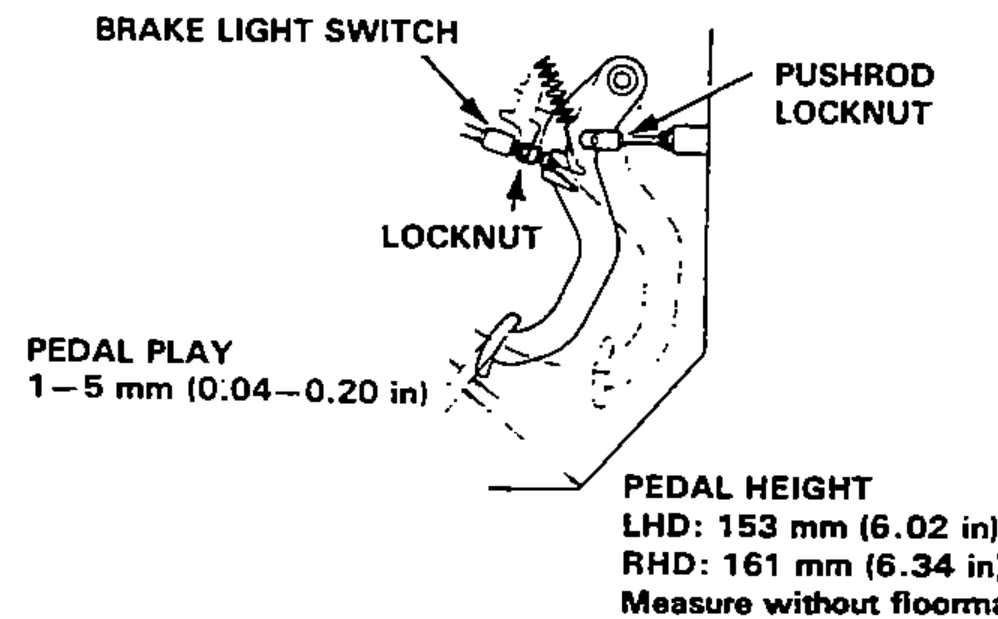
- 2Loosen pushrod locknut and screw pushrod in or out with plier until the pedal height from the floor is 153 mm (6.02 in). After adjustment, tighten the locknut firmly.

- 3Screw in the brake light switch until its plunger is fully depressed (threaded end touching pad on pedal arm). Then back off switch 1/2 turn and tighten locknut firmly.
CAUTION
Check that brake lights go off when pedal is released.
| Specification | Value |
|---|---|
| Pedal play | 1-5 mm (0.04-0.20 in) |
| Pedal height (LHD) | 153 mm (6.02 in) |
| Pedal height (RHD) | 161 mm (6.34 in) |
| Pushrod locknut | 15N·m |
Pedal play
1-5 mm (0.04-0.20 in)
Pedal height (LHD)
153 mm (6.02 in)
Pedal height (RHD)
161 mm (6.34 in)
Pushrod locknut
15N·m
Parking Brake
Adjustment
NOTE
• Be sure the rear brakes are properly adjusted before adjusting the parking brake.
• Incorrectly adjusted rear brakes affect the parking brake adjustment.
• If rear brake adjustment is required repair the rear adjuster first.
• If doing this adjustment after brake drum installation, start the engine and depress the brake pedal several times to set self-adjusting brakes before adjusting parking brake cable.
WARNING
Block the front wheels before jacking up the rear of the car.
- 1Raise the rear wheels off the ground.
- 2Pull the parking brake lever up one notch.
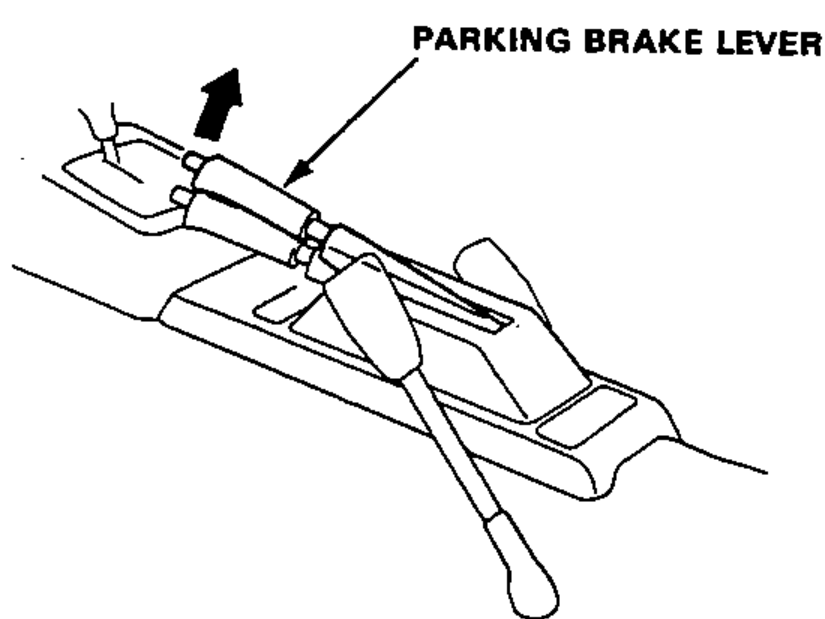
- 3Tighten the equalizer adjusting nut until rear wheels drag slightly when turned.

- 4Release brake lever and check that rear wheels do not drag when turned. Readjust if necessary.
- 5With the equalizer properly adjusted, the rear brakes should be fully applied when the parking brake lever is pulled up 6 to 10 clicks.