Brake Booster - Test
13-16prose procedureTest
Leak Test
- 1Install the Brake Power Kit (07504-6340100) as shown.
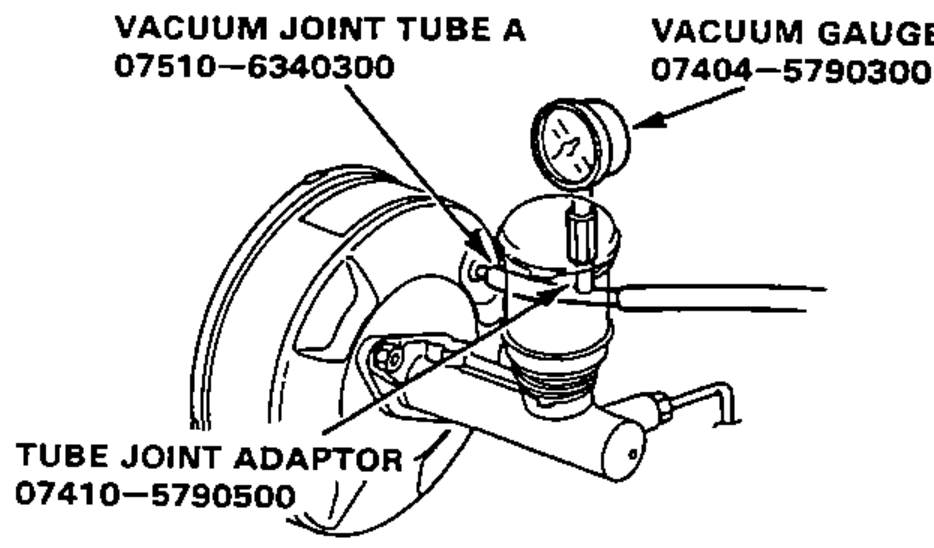
- 2Start the engine, adjust the engine speed with the accelerator pedal so that the vacuum gauge readings show 300-500 mmHg (11.8-19.7 inHg), then stop the engine.
- 3Read the vacuum gauge. If the vacuum readings decreases 20 mmHg (0.8 inHg) or more after 30 seconds, check following parts for leaks.
- 4Start the engine.
- 5Depress the brake pedal with a 200 N (20 kg, 44 lbs) of pressure. The following pressures should be observed at the pressure gauges in each vacuum.
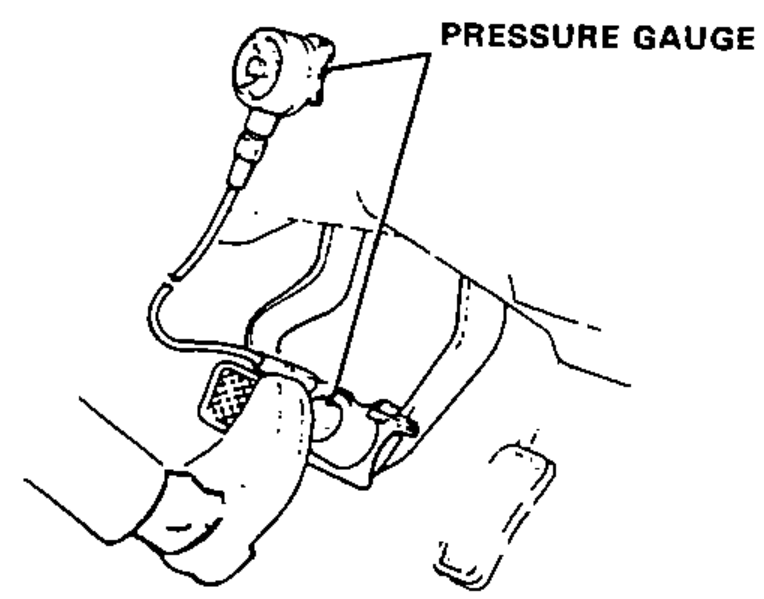
- 6Inspect the master cylinder pistons and cups in the readings do not fall within the limits shown above.
0
Line Pressure kpa (kg/cm2, psi)1363 (13.9, 198)
300
Line Pressure kpa (kg/cm2, psi)4511 (46, 654)
500
Line Pressure kpa (kg/cm2, psi)6610 (67.4, 958)
Function Test
- 1Install the vacuum gauge as same the leak test.
- 2Connect the oil pressure gauges to the master cylinder using the attachments as shown.

- 3Bleed air through the valves.Avoid spilling brake fluid on painted, plastic or rubber partsas it may damage the finish.
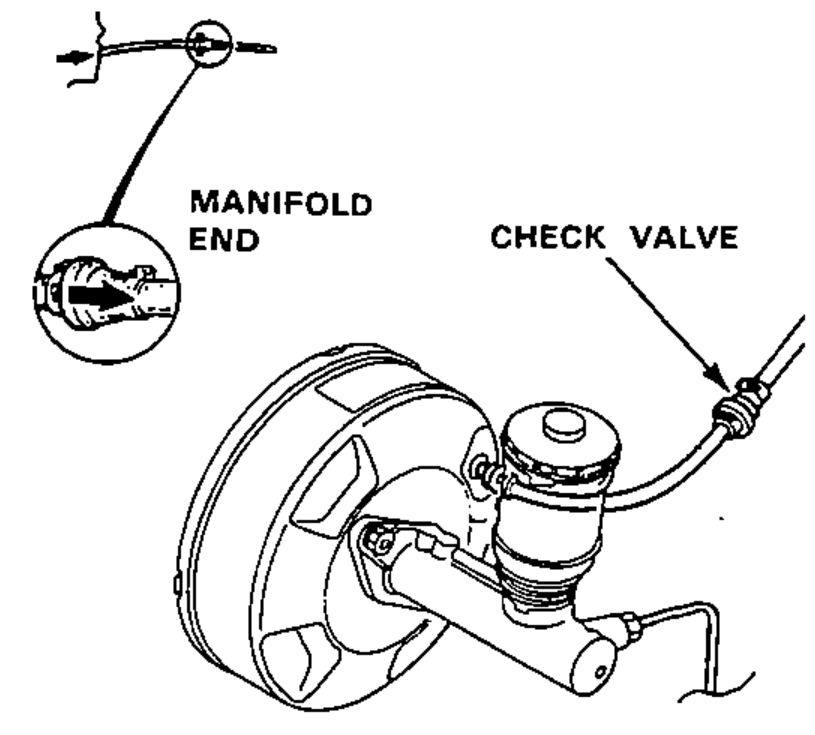
Check Valve Test
- 1Remove the check valve, blow on one end of the hose and then the other; if you can blow through the booster end, but not through the manifold end, the check valve is OK.