
Cylinder Head - Removal (engine removal not required) (cont'd)
5-39prose procedureDOHC engine. P/S pump belt and P/S pump bracket steps are KQ model only.
Removal (engine removal not required) (cont'd)
- 14Remove the power steering (P/S) pump belt (KQ only) and the alternator belt.
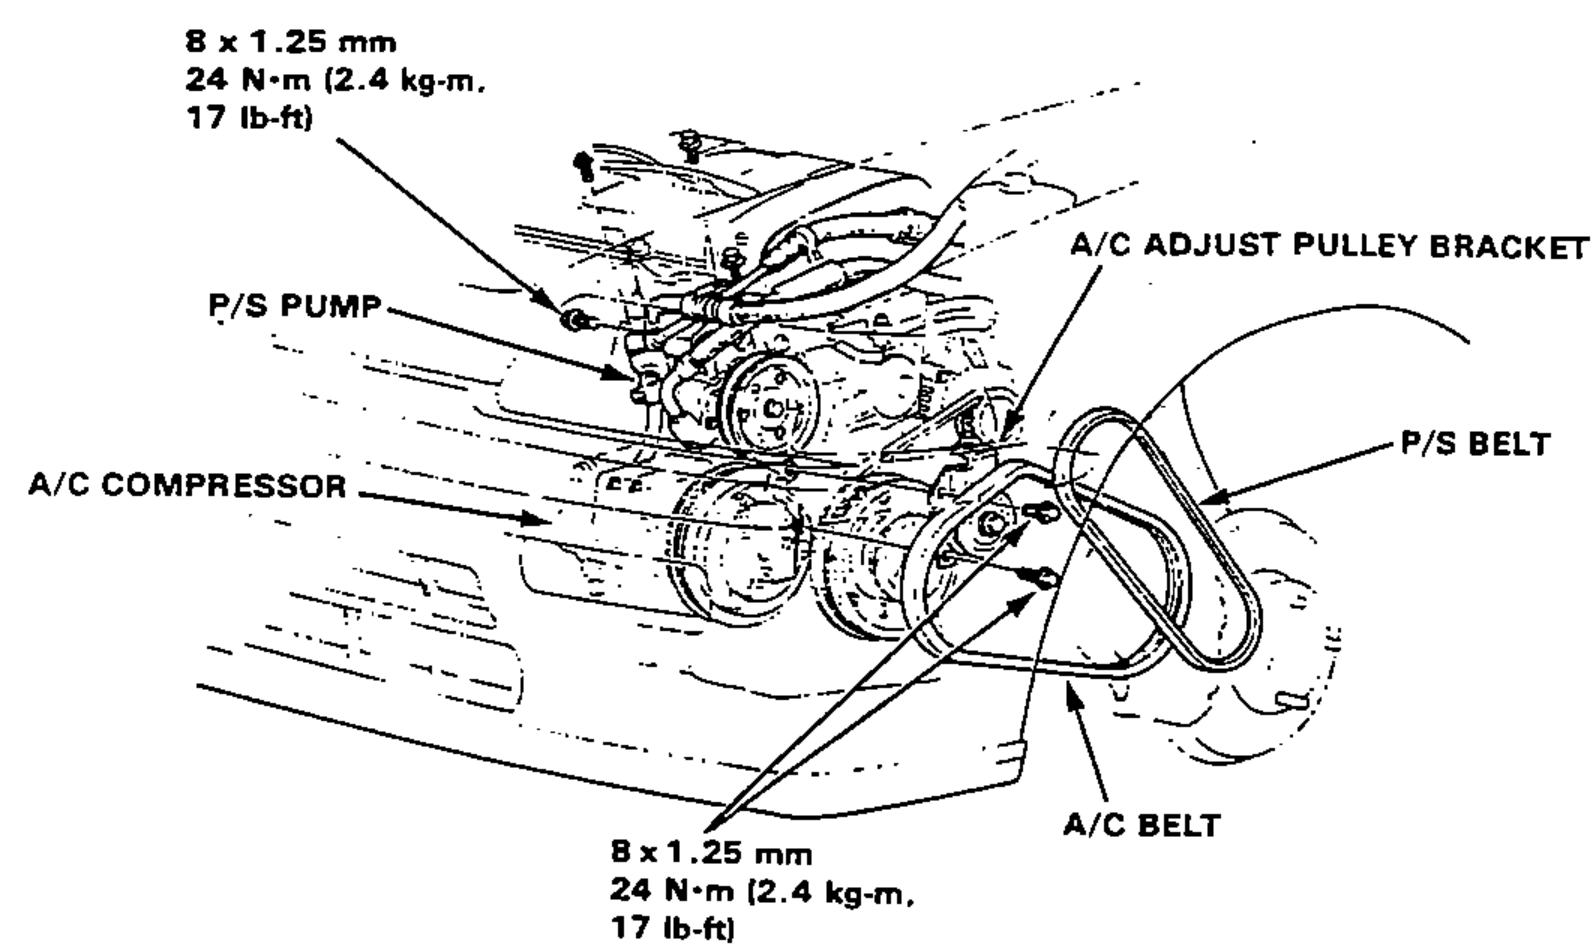
- 15Loosen the air conditioning (A/C) idle pulley and remove the A/C belt.
- 16Remove the P/S pump bracket (KQ only).

- 17Remove the bolts from the intake manifold bracket.
- 18Remove the exhaust manifold shroud.
- 19Remove the bolts from the exhaust manifold bracket.
- 20Remove the self lock nut from the exhaust header pipe.
- 21Remove the exhaust manifold assy.
- 22Remove the timing belt upper cover.
- 23Remove the valve cover.
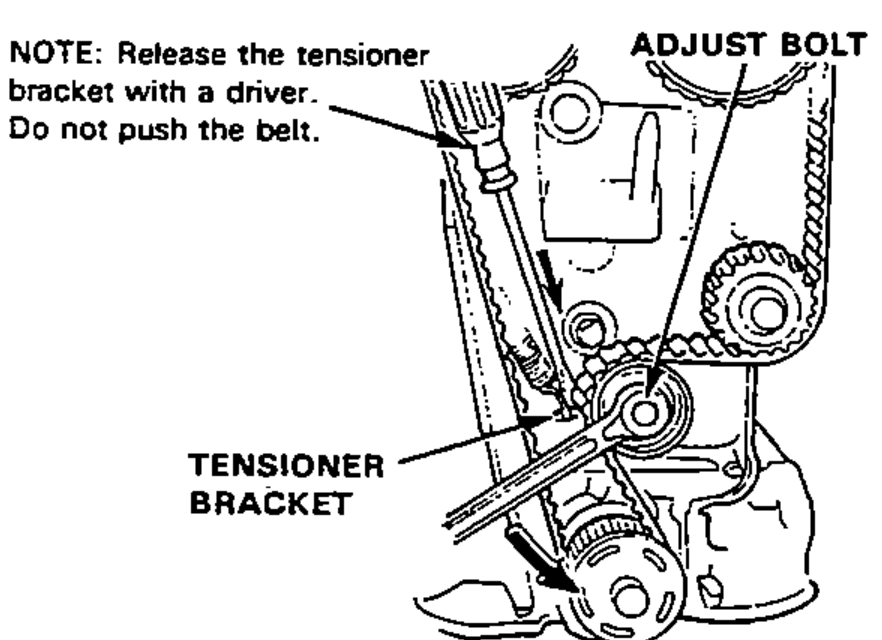
- 24Loosen the timing belt adjust bolt, releasing the timing belt, and fix the bolt.NOTE: Release the tensioner bracket with a driver. Do not push the belt.
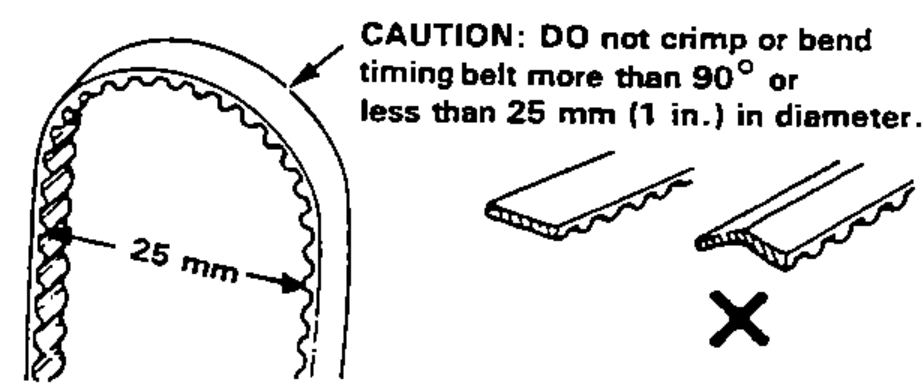
- 25Remove the timing belt from the driven pulleys.CAUTION: DO not crimp or bend timing belt more than 90° or less than 25 mm (1 in.) in diameter.
- 26Remove the cylinder head.CAUTION: Loosen the head bolts diagonally from the inside to outside.
- 27Remove the intake manifold from the cylinder head.