Cylinder Head - Installation
5-40prose procedureDOHC engine. Heading printed as "Cylidner Head" (typo for Cylinder Head).
Cylidner Head
Installation
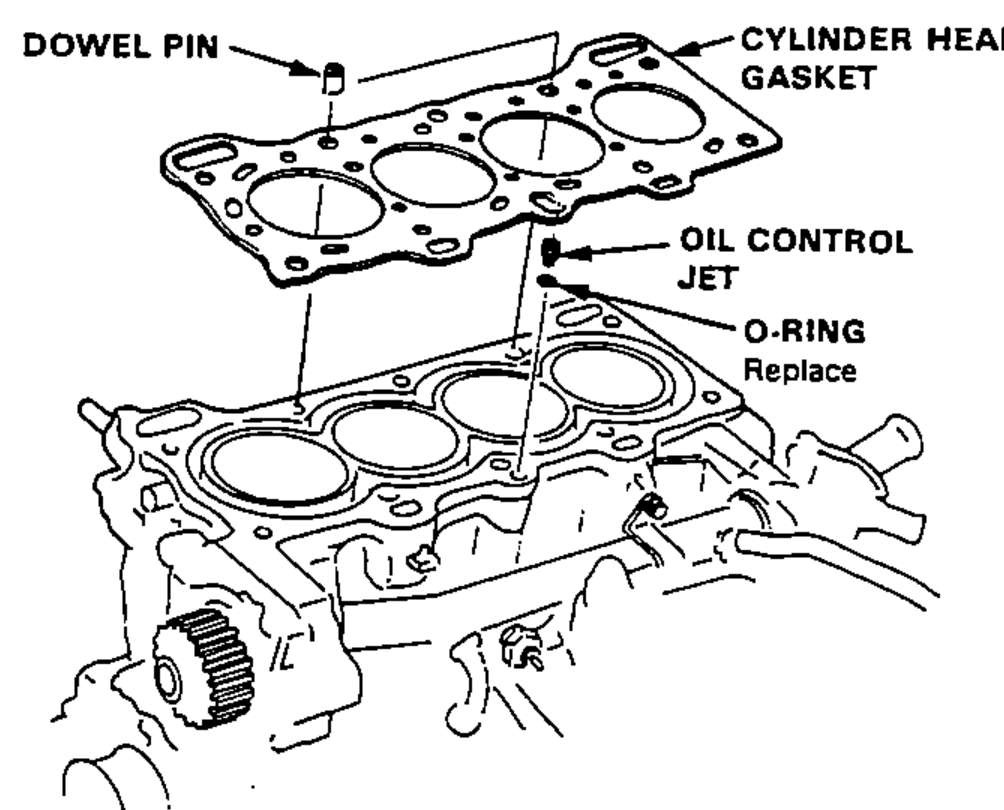
- 1Install the cylinder head in reverse order of removal:NOTE: Cylinder head dowel pins and oil control jet must be aligned.
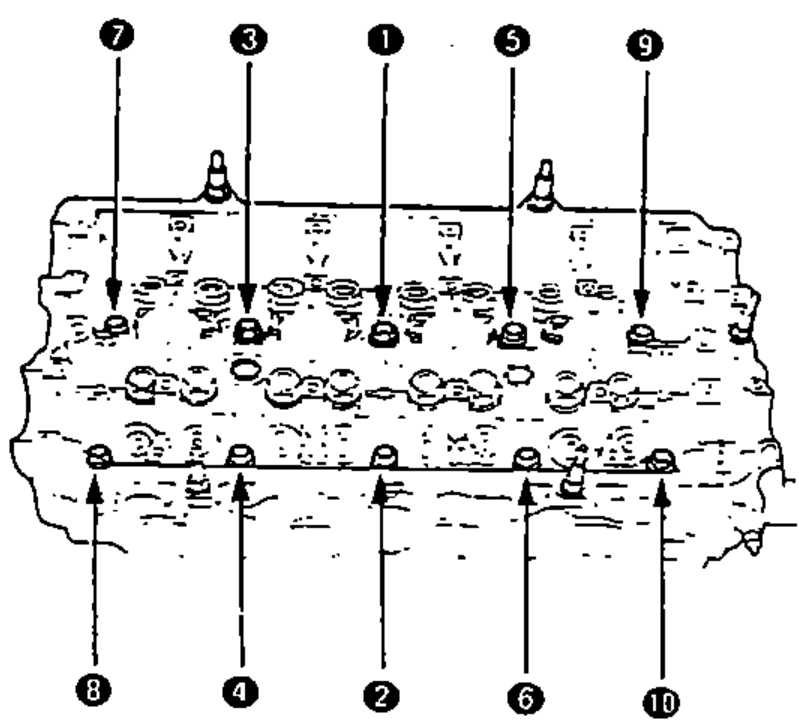
- 2Tighten cylinder head bolts in two steps. In the first step tighten all bolts, in sequence, to about 30 N·m (3.0 kg-m, 22 lb-ft); in the final step tighten, in same sequence, to 68 N·m (6.8 kg-m, 49 lb-ft).NOTE: Apply engine oil to the cylinder head bolts and the washers.Use the longer bolts at the position No.1 and No.2 as shown.
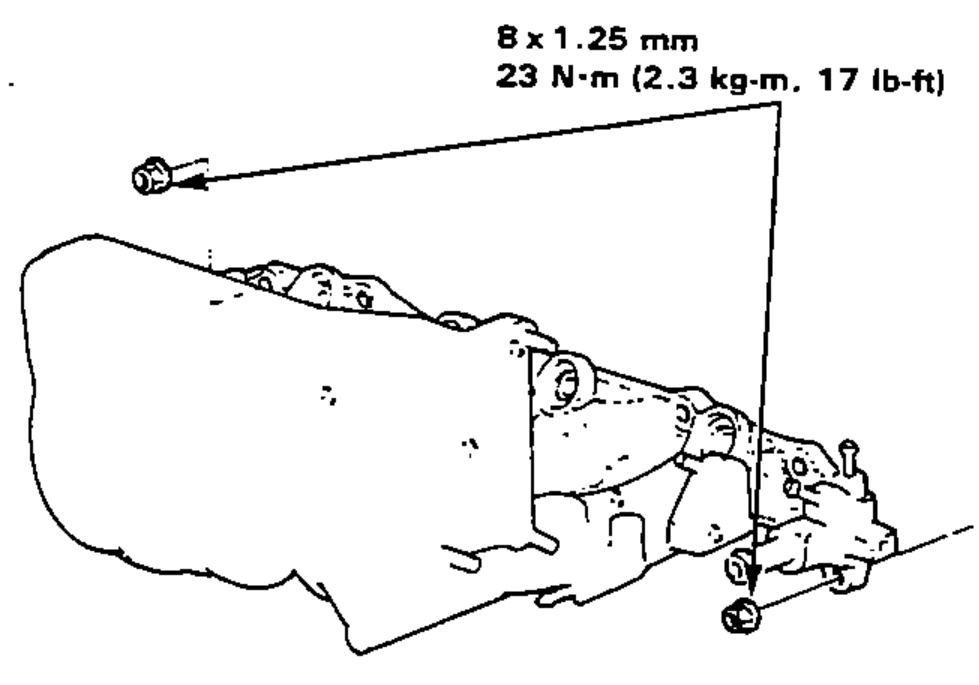
- 3Install the intake manifold and tighten the nuts in a criss-cross pattern in 2 or 3 steps, beginning with the inner nuts.
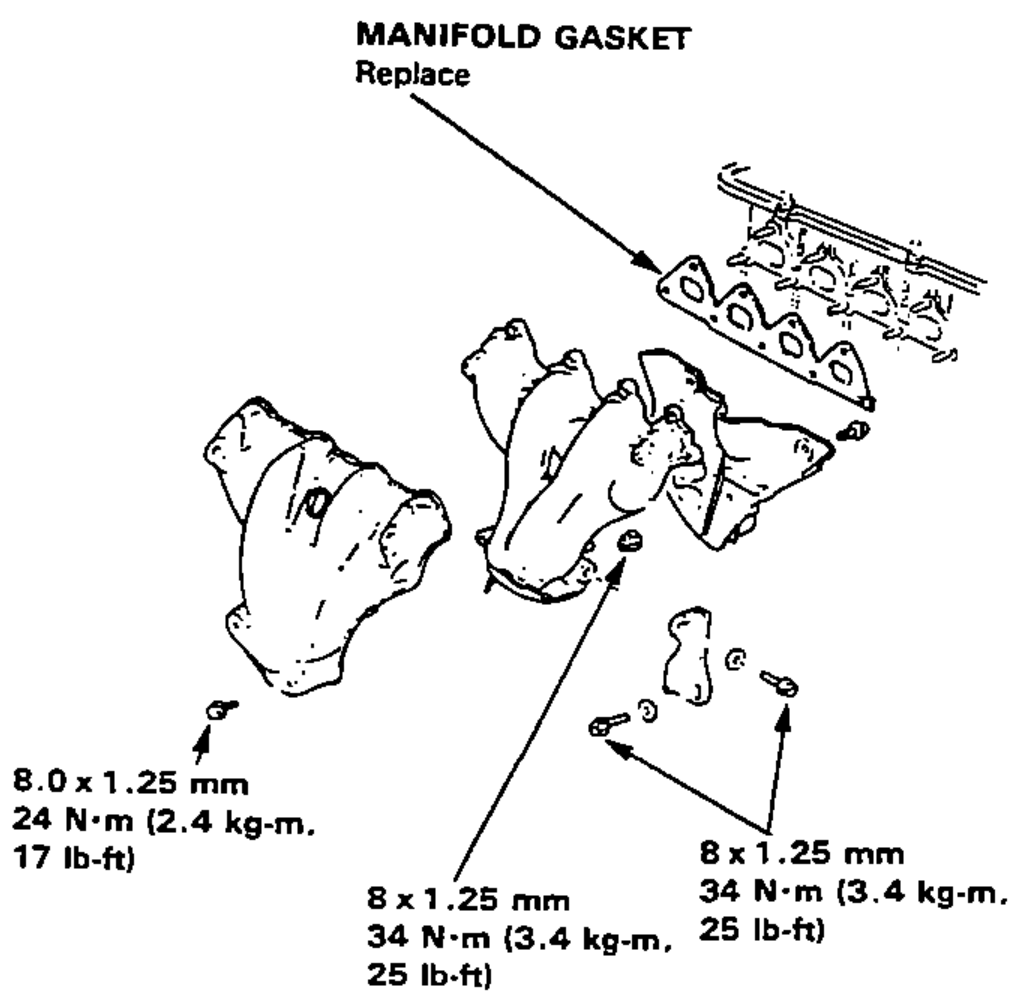
- 4Install the exhaust manifold and bracket.