
Steering Gearbox — Valve Body Unit Overhaul (cont'd)
11-49prose procedure- 14Remove the rollers from the control valve by pushing the valve out one side of the valve body, and then the other.When removing the rollers, hold the plungers with your fingers to keep them from popping out.
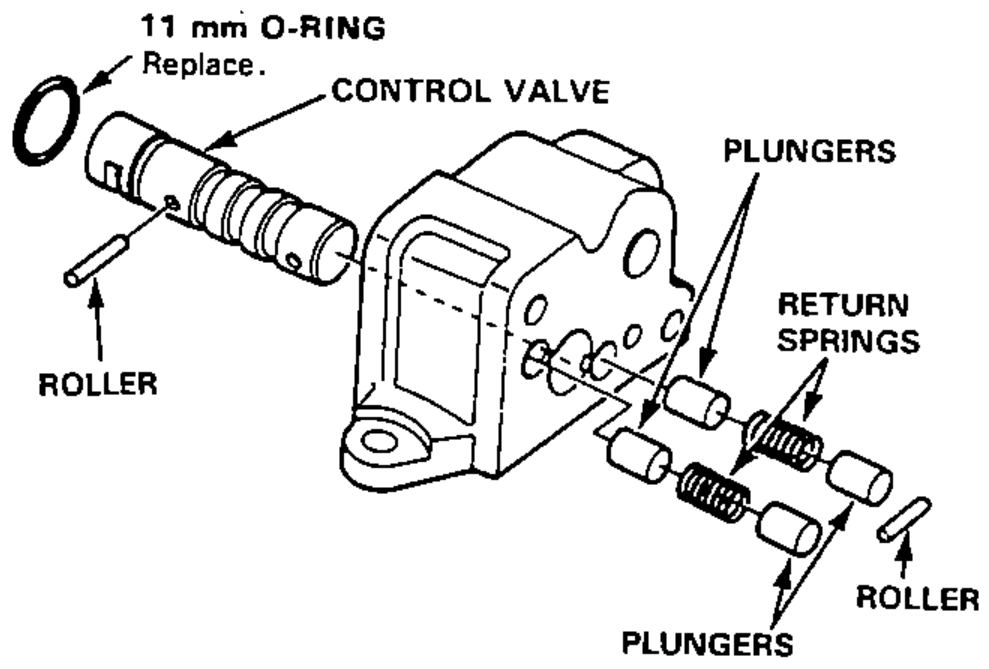
- 15Remove the plungers, return springs and control valve from the valve body.
- 16Remove the 11 mm O-ring from the control valve.
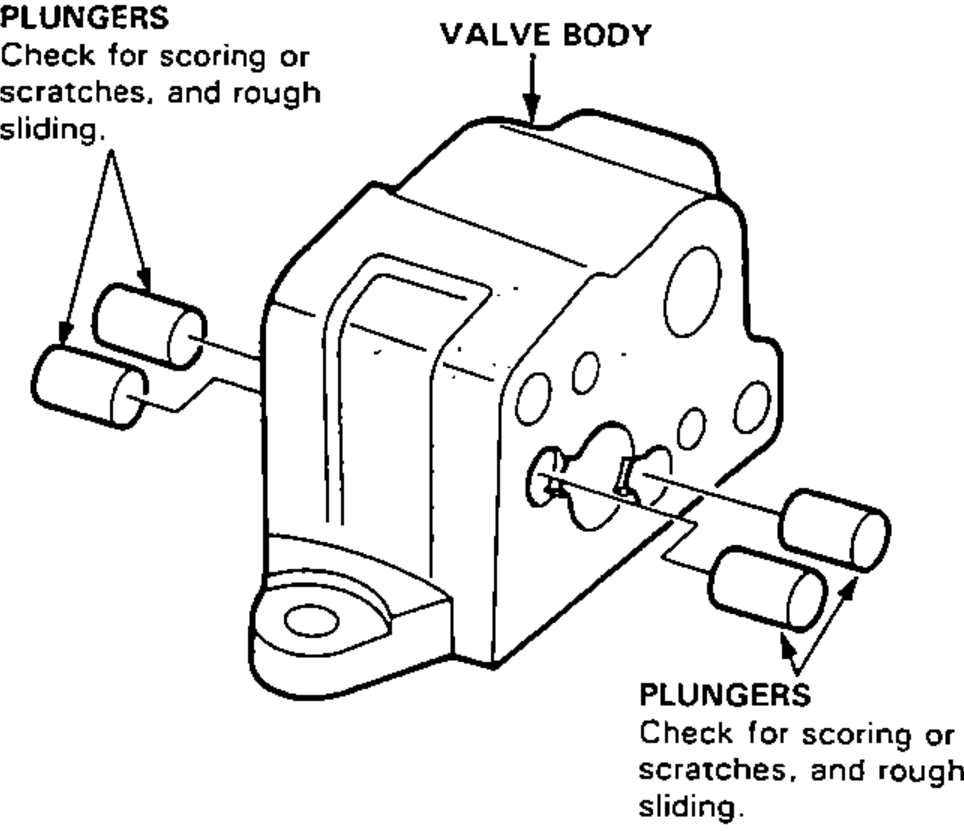
- 17Check the plungers.If the valve body is damaged, replace all three parts (valve body, cut-off valve and control valve) as a set.
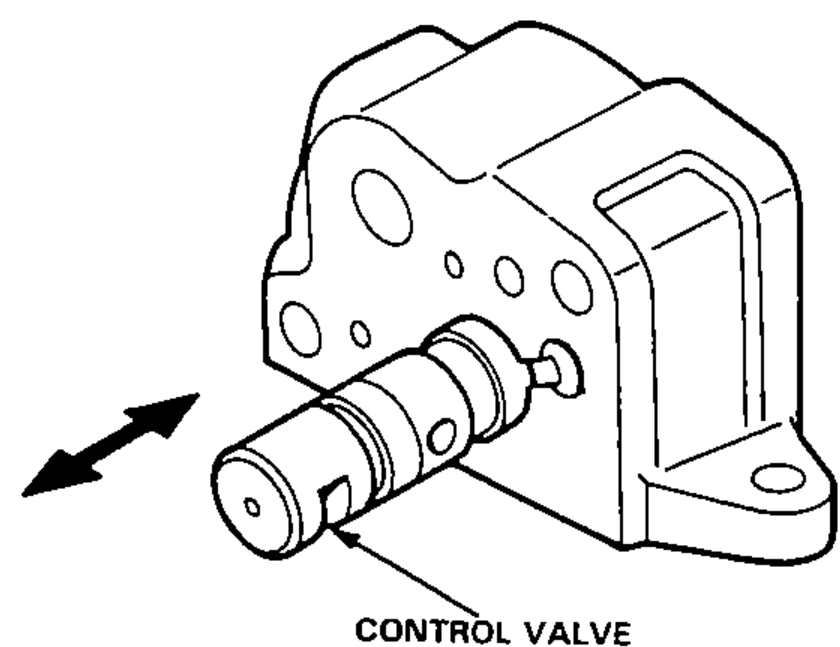
- 18Check the control valve.The control valve is sized to fit the valve body, so, if you replace it, make sure the new valve has the same identification mark on it.If the valve body is damaged, replace all three parts (valve body, control valve and cut-off valve) as a set.
X
Outside diameter13.998-14.003 mm (0.5511-0.5513 in)
Part number53646-SH3-950
Y
Outside diameter13.993-13.998 mm (0.5509-0.5511 in)
Part number53647-SH3-950
Z
Outside diameter13.988-13.993 mm (0.5507-0.5509 in)
Part number53648-SH3-950
(cont'd)