
Gearbox - Removal/Inspection (cont'd)
11-6prose procedureRemoval/Inspection (cont'd)
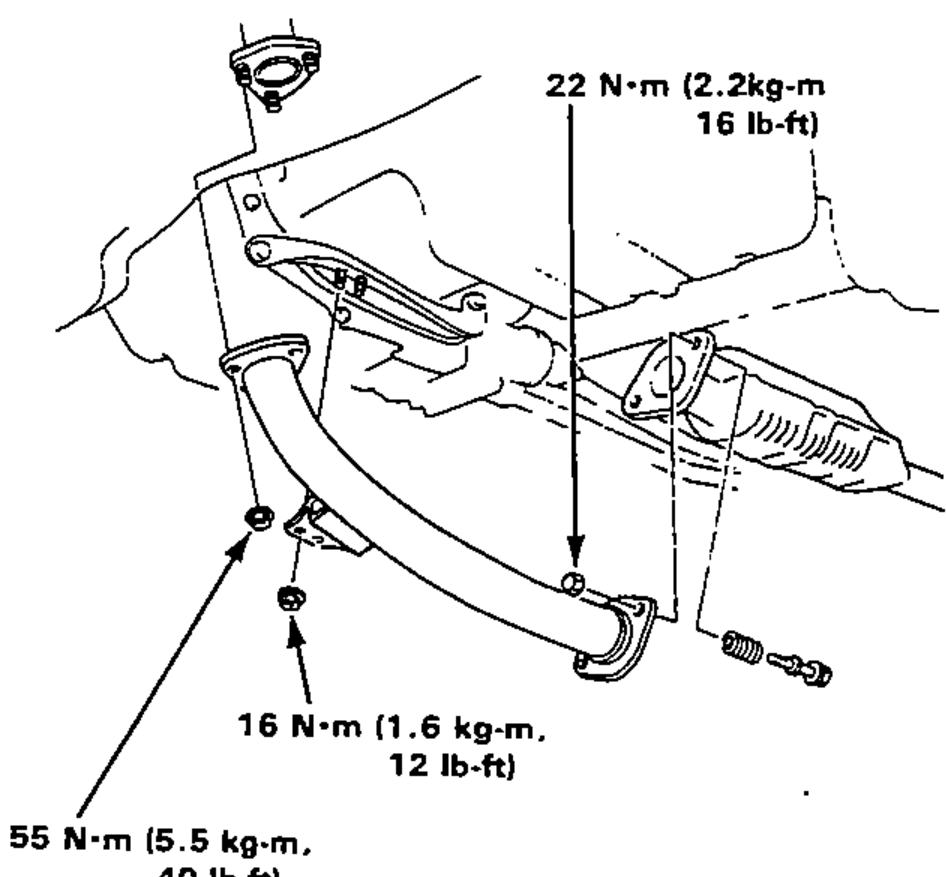
- 8Remove the self-locking nuts connecting exhaust header pipe to exhaust pipe B, then separate exhaust pipe B from the header pipe.CAUTION: Replace the exhaust gasket and self-locking nuts when you reinstall the pipe.
- 9Remove the header pipe.
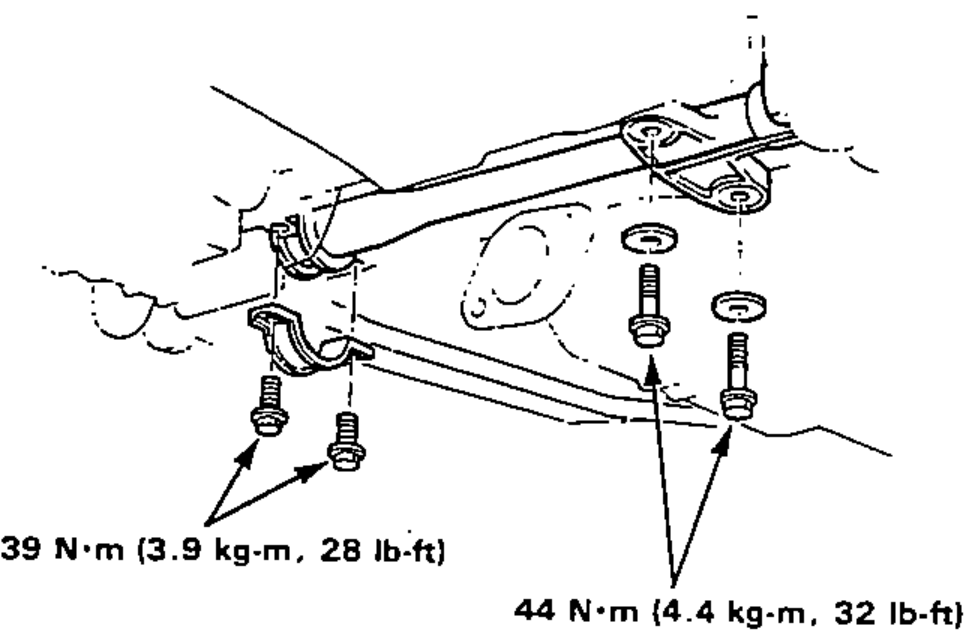
- 10Remove the steering gearbox brackets.
- 11Remove the steering gearbox mounting bolts.
- 12Slide tie rod all the way to the right side.
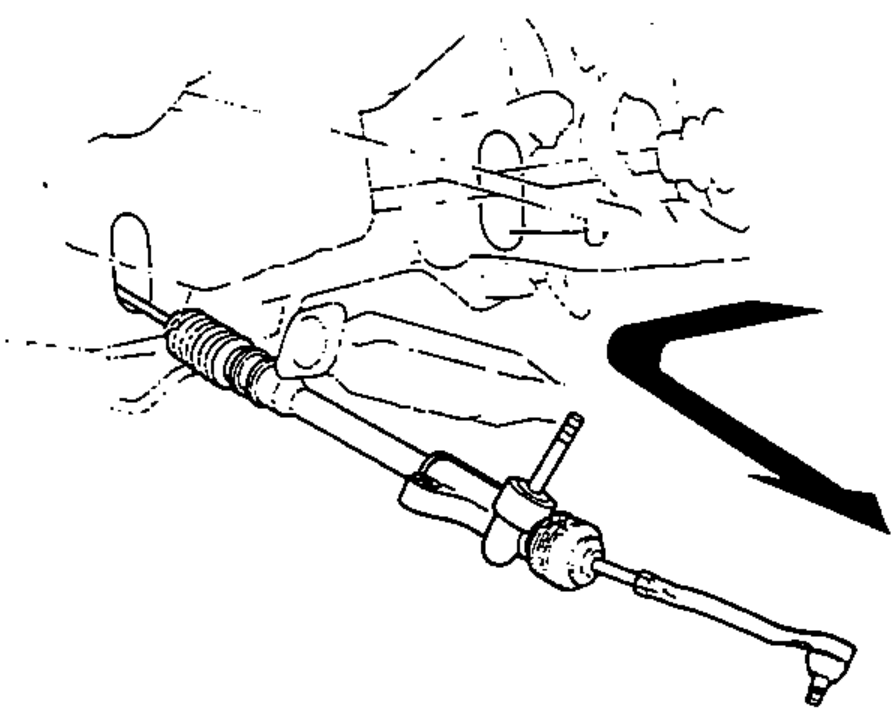
- 13Slide the gear box right so that the left tie rod clears the bottom of the rear beam, then remove the gearbox.
- 14Re-install is in the reverse order of removal.
| Specification | Value |
|---|---|
| Exhaust header pipe nut/bolt | 22N·m |
| Exhaust pipe bracket | 16N·m |
| Header pipe flange | 55N·m |
| Steering gearbox bracket | 39N·m |
| Steering gearbox mounting bolt | 44N·m |
Exhaust header pipe nut/bolt
22N·m
Exhaust pipe bracket
16N·m
Header pipe flange
55N·m
Steering gearbox bracket
39N·m
Steering gearbox mounting bolt
44N·m