
Disassembly/Inspection
11-7parts diagram- 1Carefully clamp the gearbox in a vise.
- 2Loosen the bands, then pull the boots away from the ends of the gearbox and unbend the tie-rod lock washers.Unbend lock washer first.
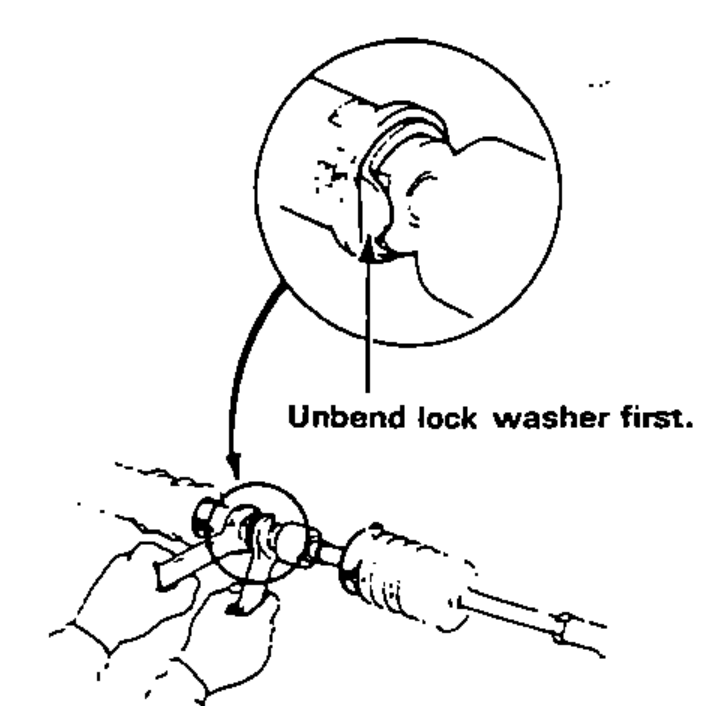
- 3Hold the rack with a 22 mm wrench and unscrew the tie-rods with a 17 mm wrench.
- 4Remove the rack guide components from the gearbox.
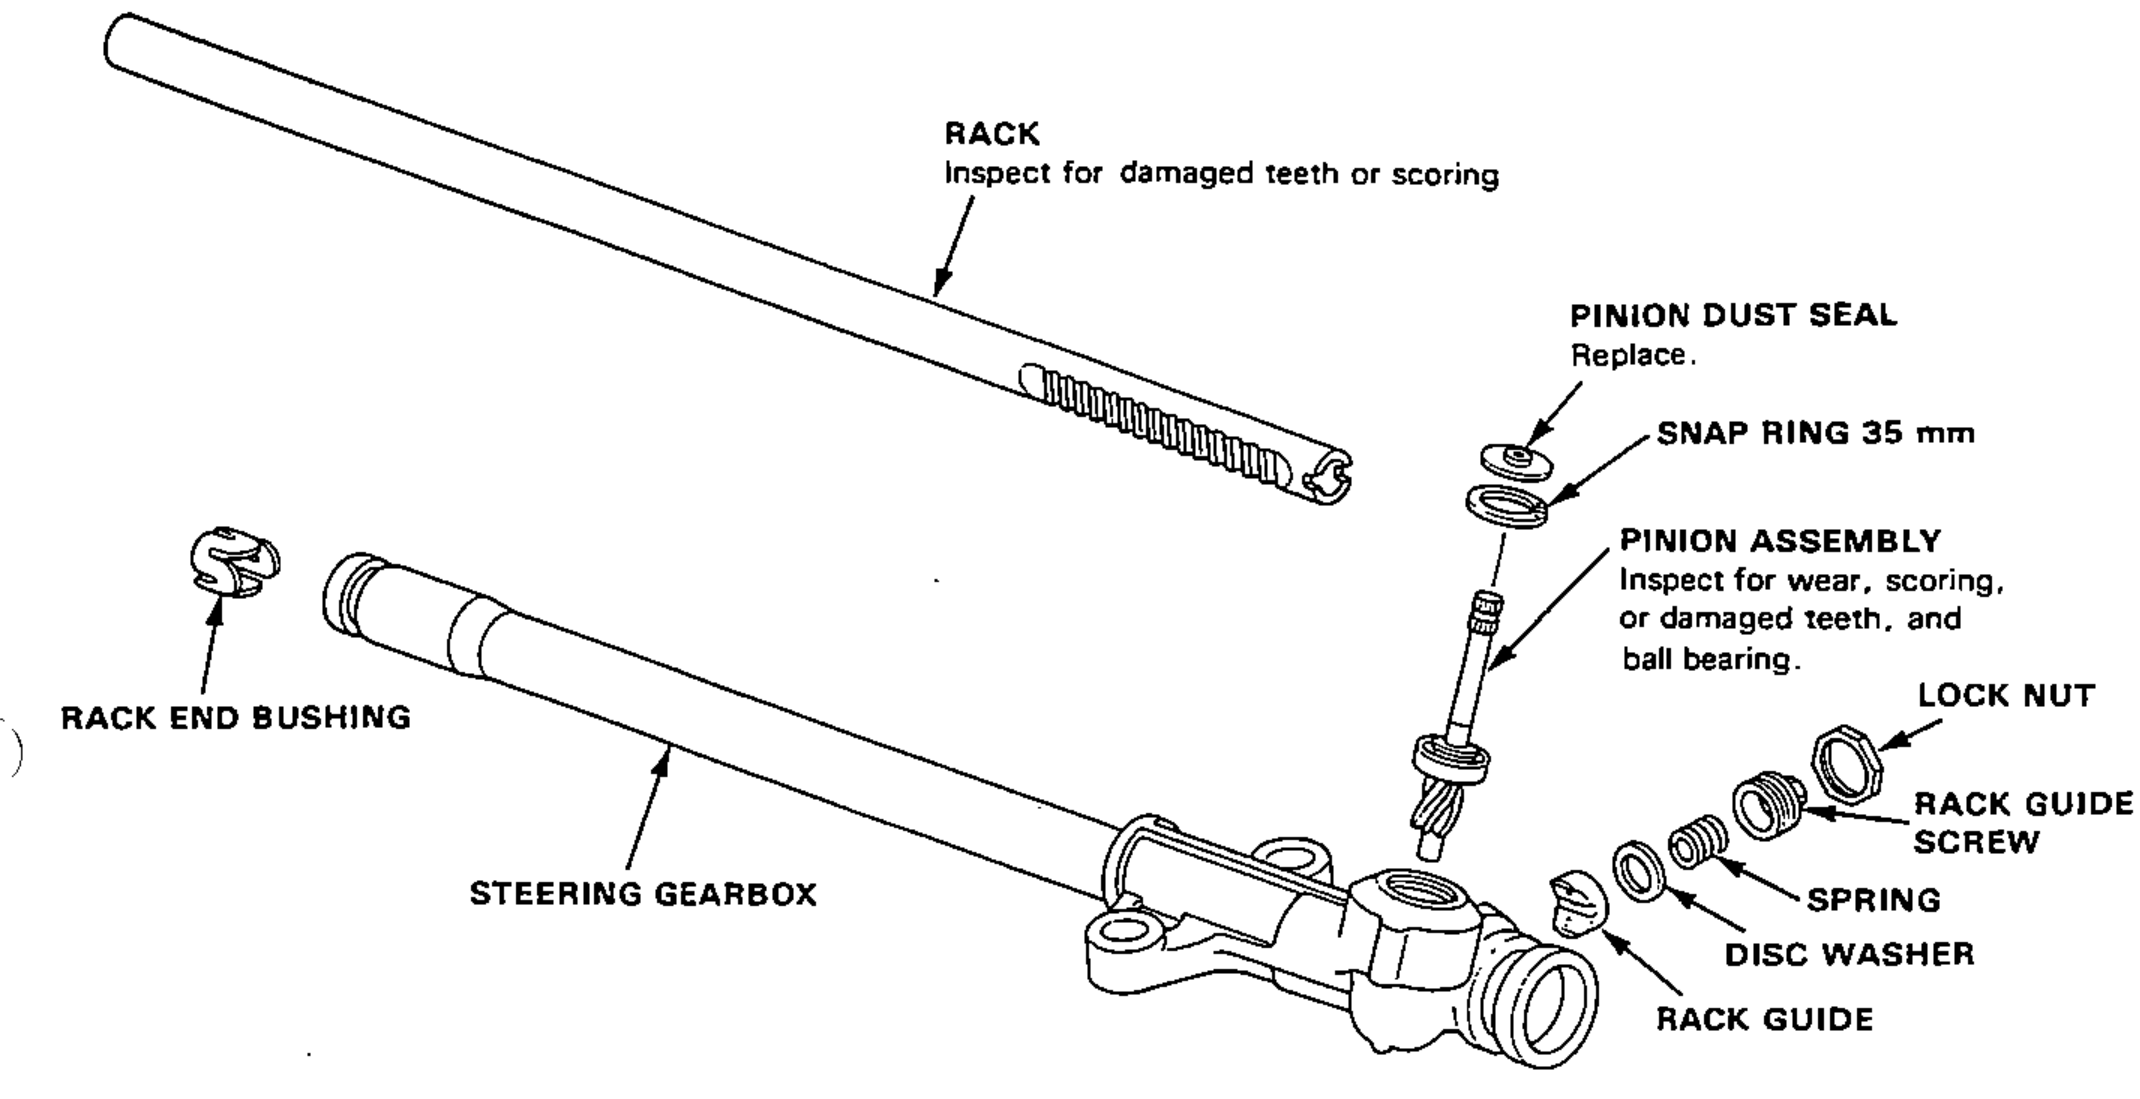
- 5Remove the pinion boot, pinion dust seal, and 35 mm snap ring, then pull the pinion out of the gearbox.
- 6Slide the rack out of the gearbox.
Parts Diagram
Diagram image not available
NOTE
The pinion assembly bearing cannot be removed. If the bearing must be replaced, replace as an assembly.