
Gearbox - Removal/Installation
11-5prose procedureRemoval/Installation
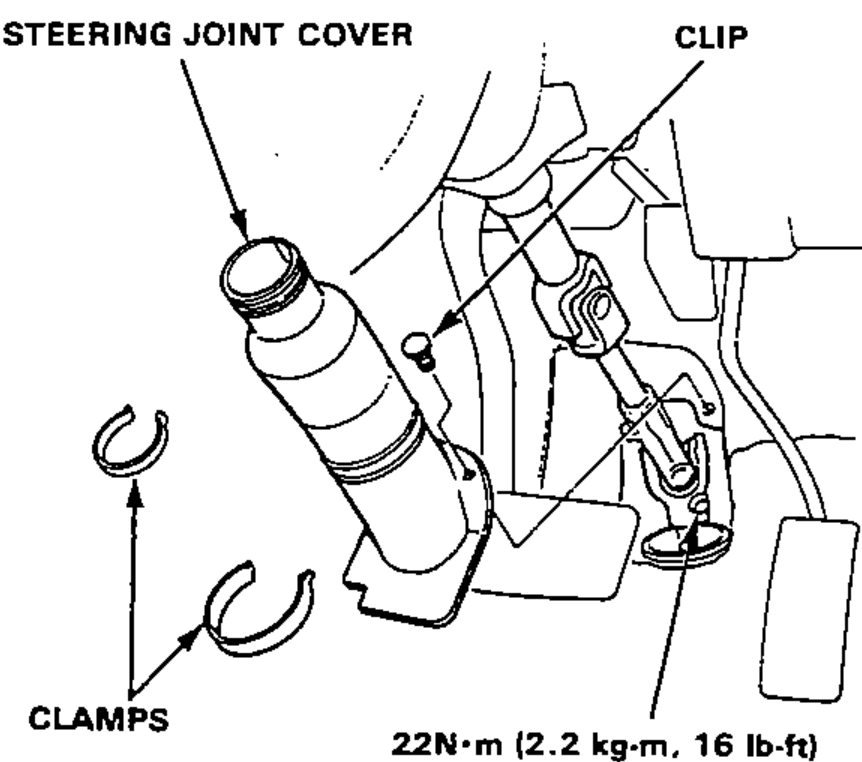
- 1Remove the cover panel and steering joint cover, then disconnect the steering shaft from the gearbox.
- 2Raise the front of car on jack stands and remove the front wheels.
- 3Remove the cotter pins, and unscrew the tie-rod end ball joint nuts halfway.
- 4Break the ball joints loose using the ball joint remover.
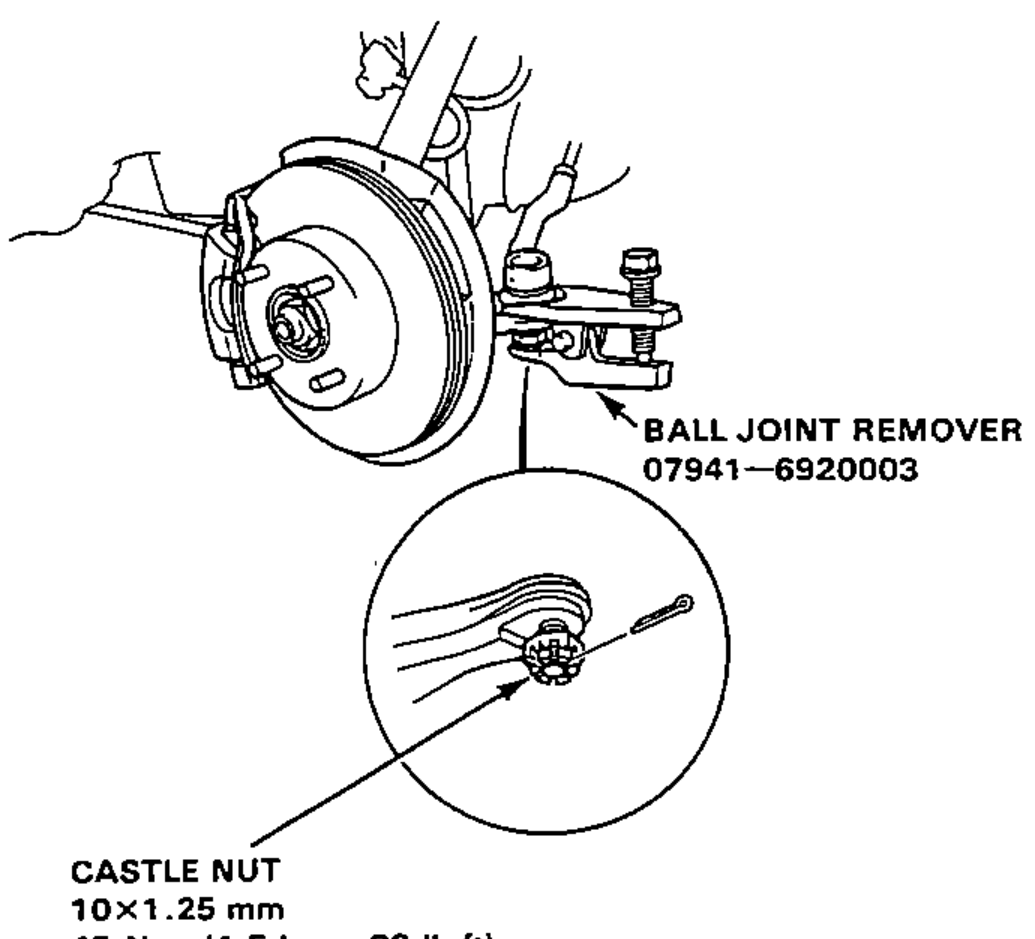 07941-6920003
 - 5Then remove the nuts, and lift the tie-rod ends out of the steering knuckles.
- 6Disconnect the shift lever torque rod from the clutch housing.

- 7Remove the pin retainer, drive out spring pin with punch, then disconnect the shift rod.On reassembly, reinstall the pin retainer after driving in pin and be sure that the projection on the pin retainer is in the hole.

| Specification | Value |
|---|---|
| Steering joint bolt | 22N·m |
| Tie-rod end castle nut | 45N·m |
| Shift lever torque rod bolt | 22N·m |
Steering joint bolt
22N·m
Tie-rod end castle nut
45N·m
Shift lever torque rod bolt
22N·m