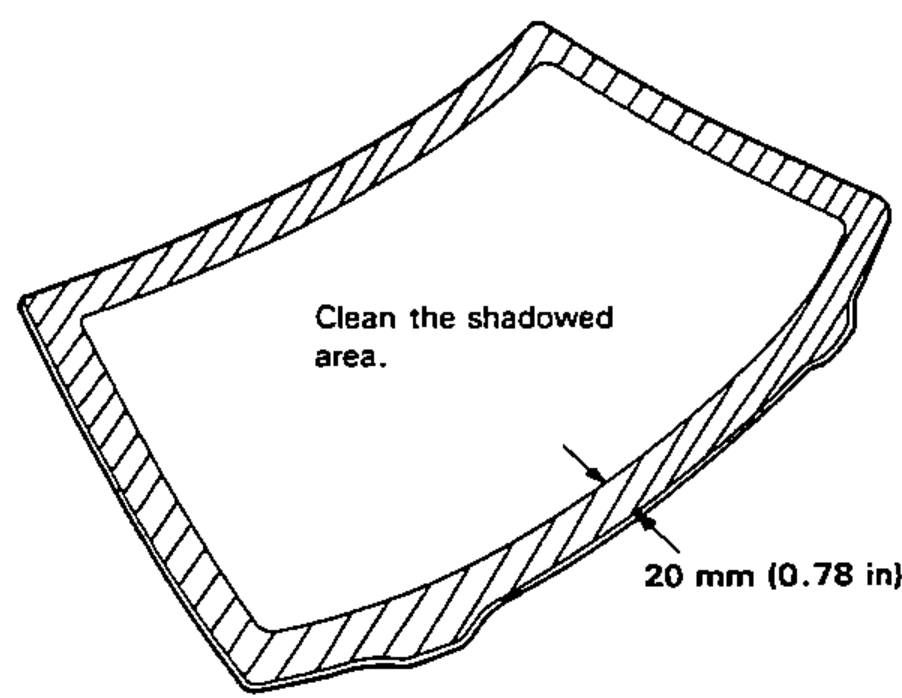
Honda CRX silhouetteCRX

Windshield

14-15prose procedure
  1. 4
    If the glass is to be reinstalled, use a putty knife to scrape off all traces of old adhesive, then clean the glass surface with alcohol where new adhesive is to be applied.
    Avoid setting the glass on its edges; small chips may later develop into cracks.
    Make sure the bonding surface is kept free of water, oil and grease.
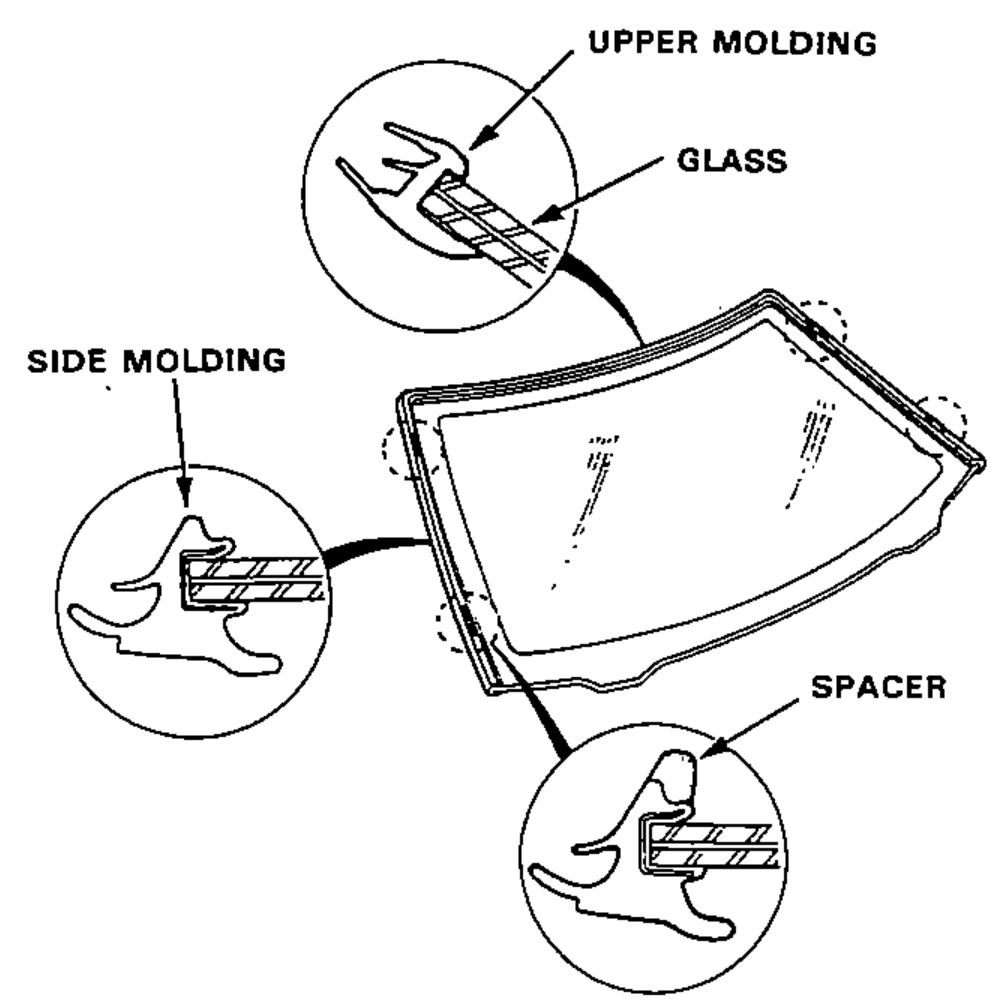
    The windshield glass (inside face) with the perimeter bonding band shaded ('Clean the shadowed area'), a 20 mm (0.78 in) wide band around the edge to be cleaned of old adhesive.
  2. 5
    Apply the windshield moldings to the glass as shown.
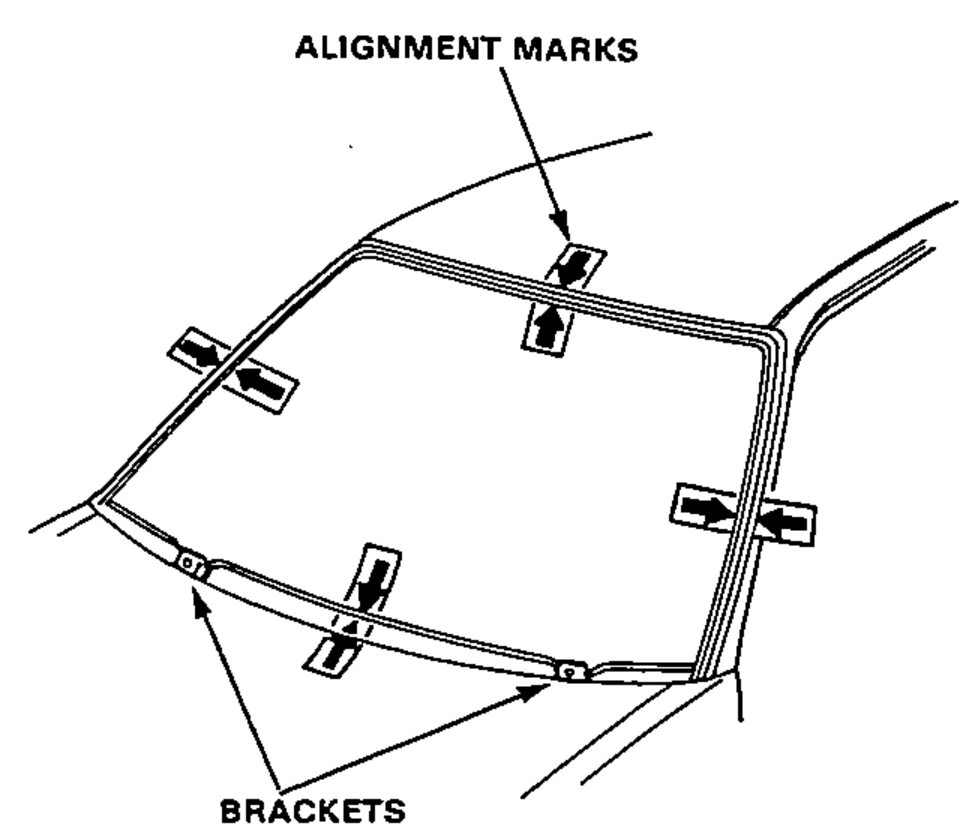
    Windshield glass with the upper molding, side molding and spacer being applied; inset cross-sections show how the upper molding, glass, side molding and spacer fit together.
  3. 6
    Set the glass upright on the spacers, and center it in the opening. Mark the location by marking lines across the glass and body with a grease pencil at the four points shown.
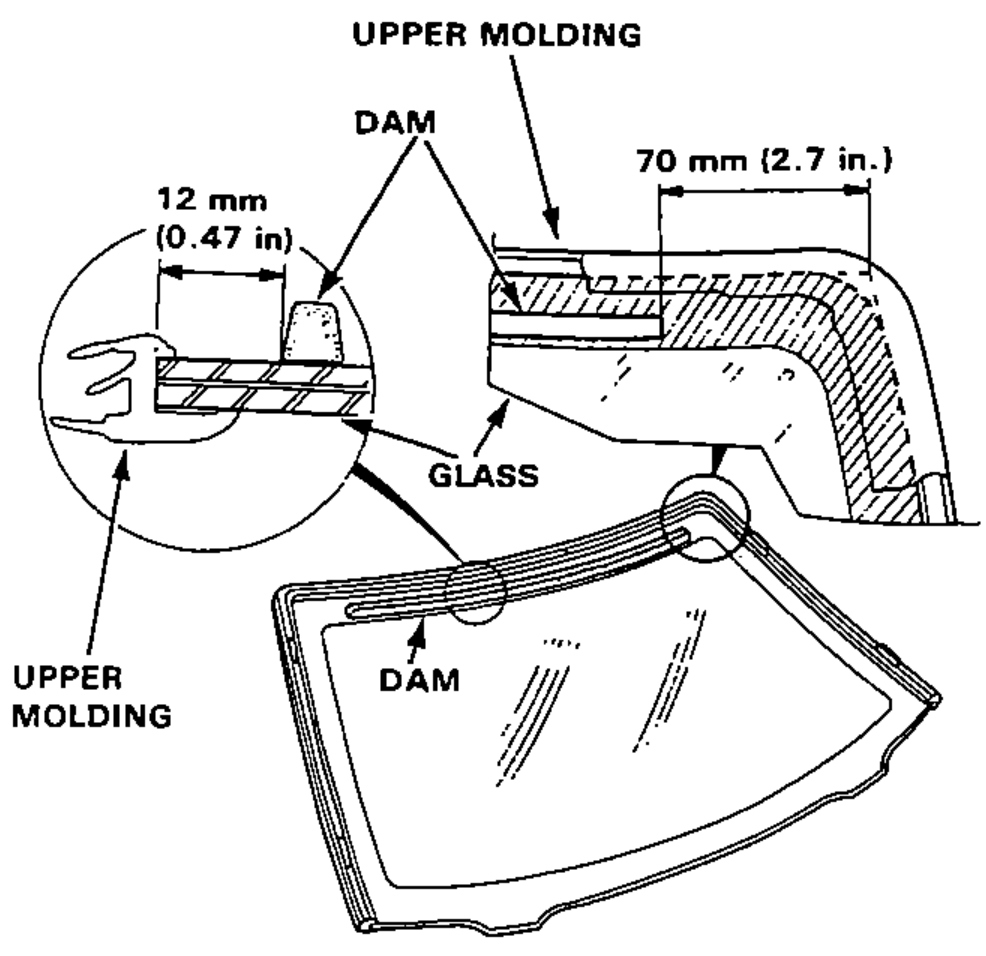
    Windshield opening viewed from inside with alignment marks (arrows) at four points across the glass and body, and the lower brackets indicated.
  4. 7
    Center and glue the rubber dam to the inside face of the glass as shown, to contain the adhesive during installation.
    Be careful not to touch the glass where adhesive will be applied.
    Mask off surrounding surfaces before applying primer.
    Cross-section detail of the rubber dam glued to the inside face of the glass with dimensions: dam set 12 mm (0.47 in) from the edge, and 70 mm (2.7 in) from the upper molding. Shows upper molding, glass and dam.

Search Manual

Search pages, specs, and procedures