
Rear Window - Removal
14-20prose procedureRemoval
CAUTION
- Wear gloves to remove and install the glass.
- Do not damage the defroster grid lines.
- 1To remove the rear window glass, first remove the:
- 2Remove the upper molding by prying it upward.Do not damage the painted surface.
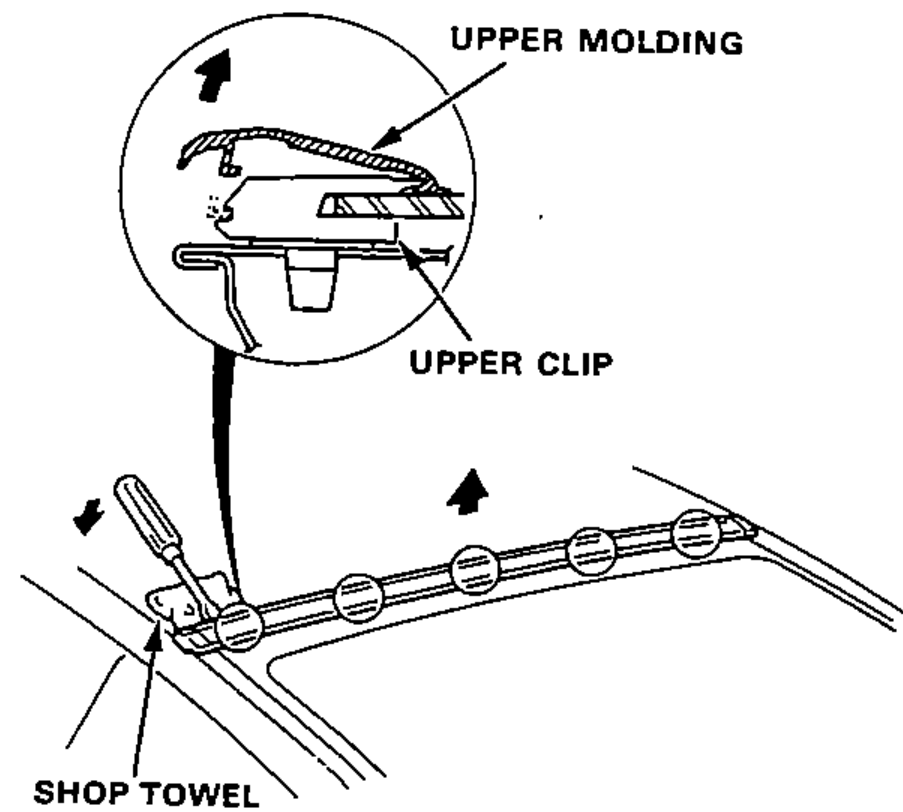
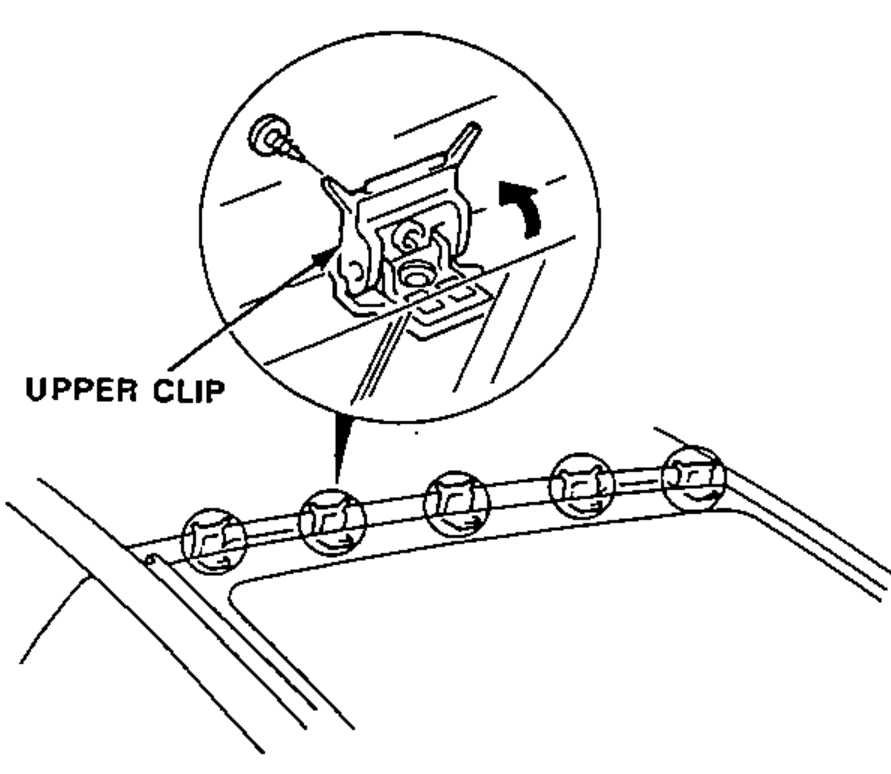
- 3Remove the screw, then raise the upper clips as shown.
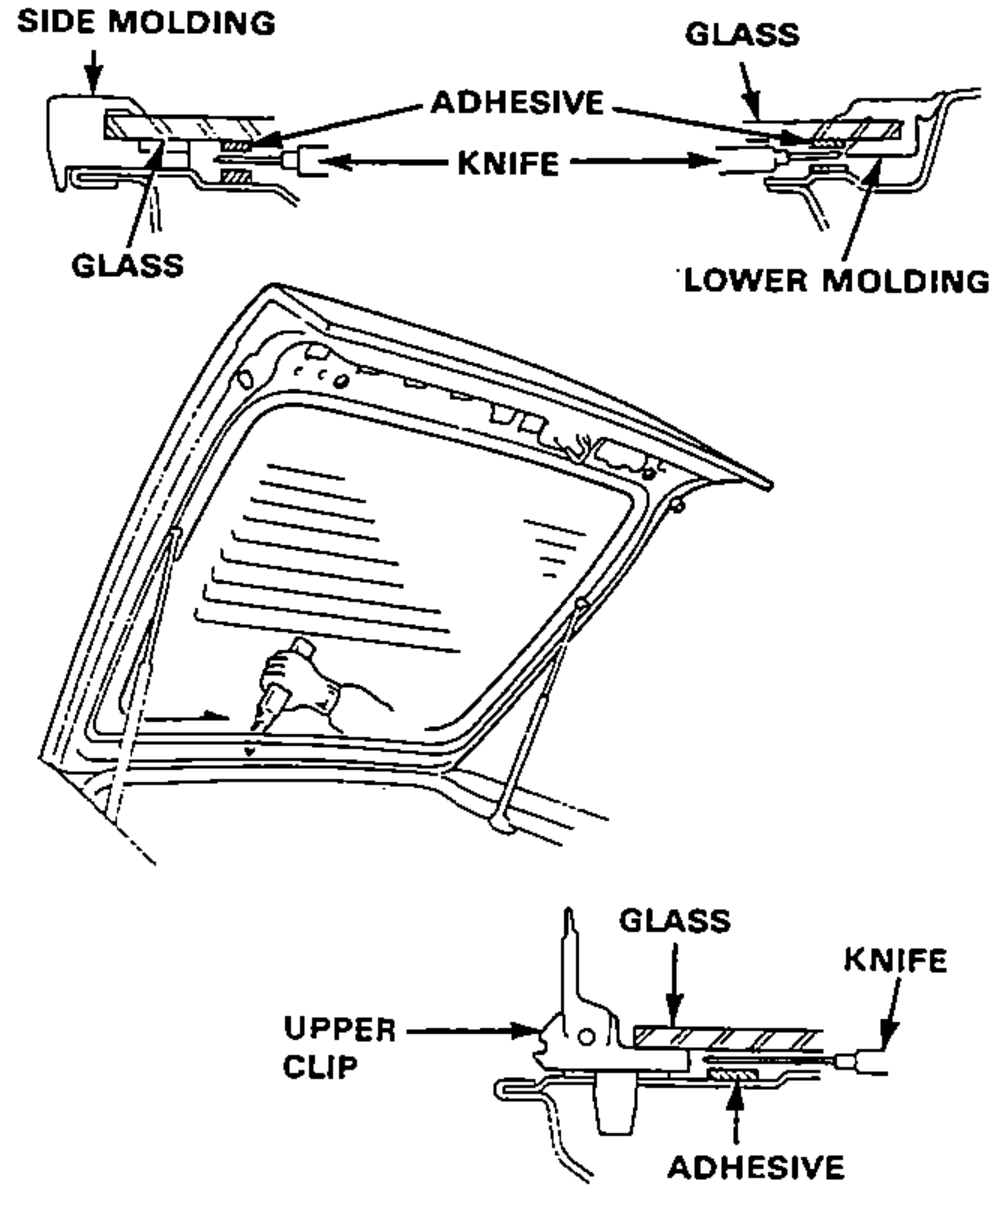
- 4Remove the rear window trim, and remove the rear window lower molding clip B mount bolts.Take care not to scratch or score the glass.

- 5From inside the car, use a knife to cut through the glass adhesive all the way around the glass area.
- 6Remove the rear window molding when the glass is to be reused.