
Tailgate - Replacement/Adjustment
14-62prose procedureTailgate procedure applies to the CRX (hatchback) body.
Replacement/Adjustment
- 1Remove the screws and detach the clips, then remove the tailgate upper and lower trim panel.
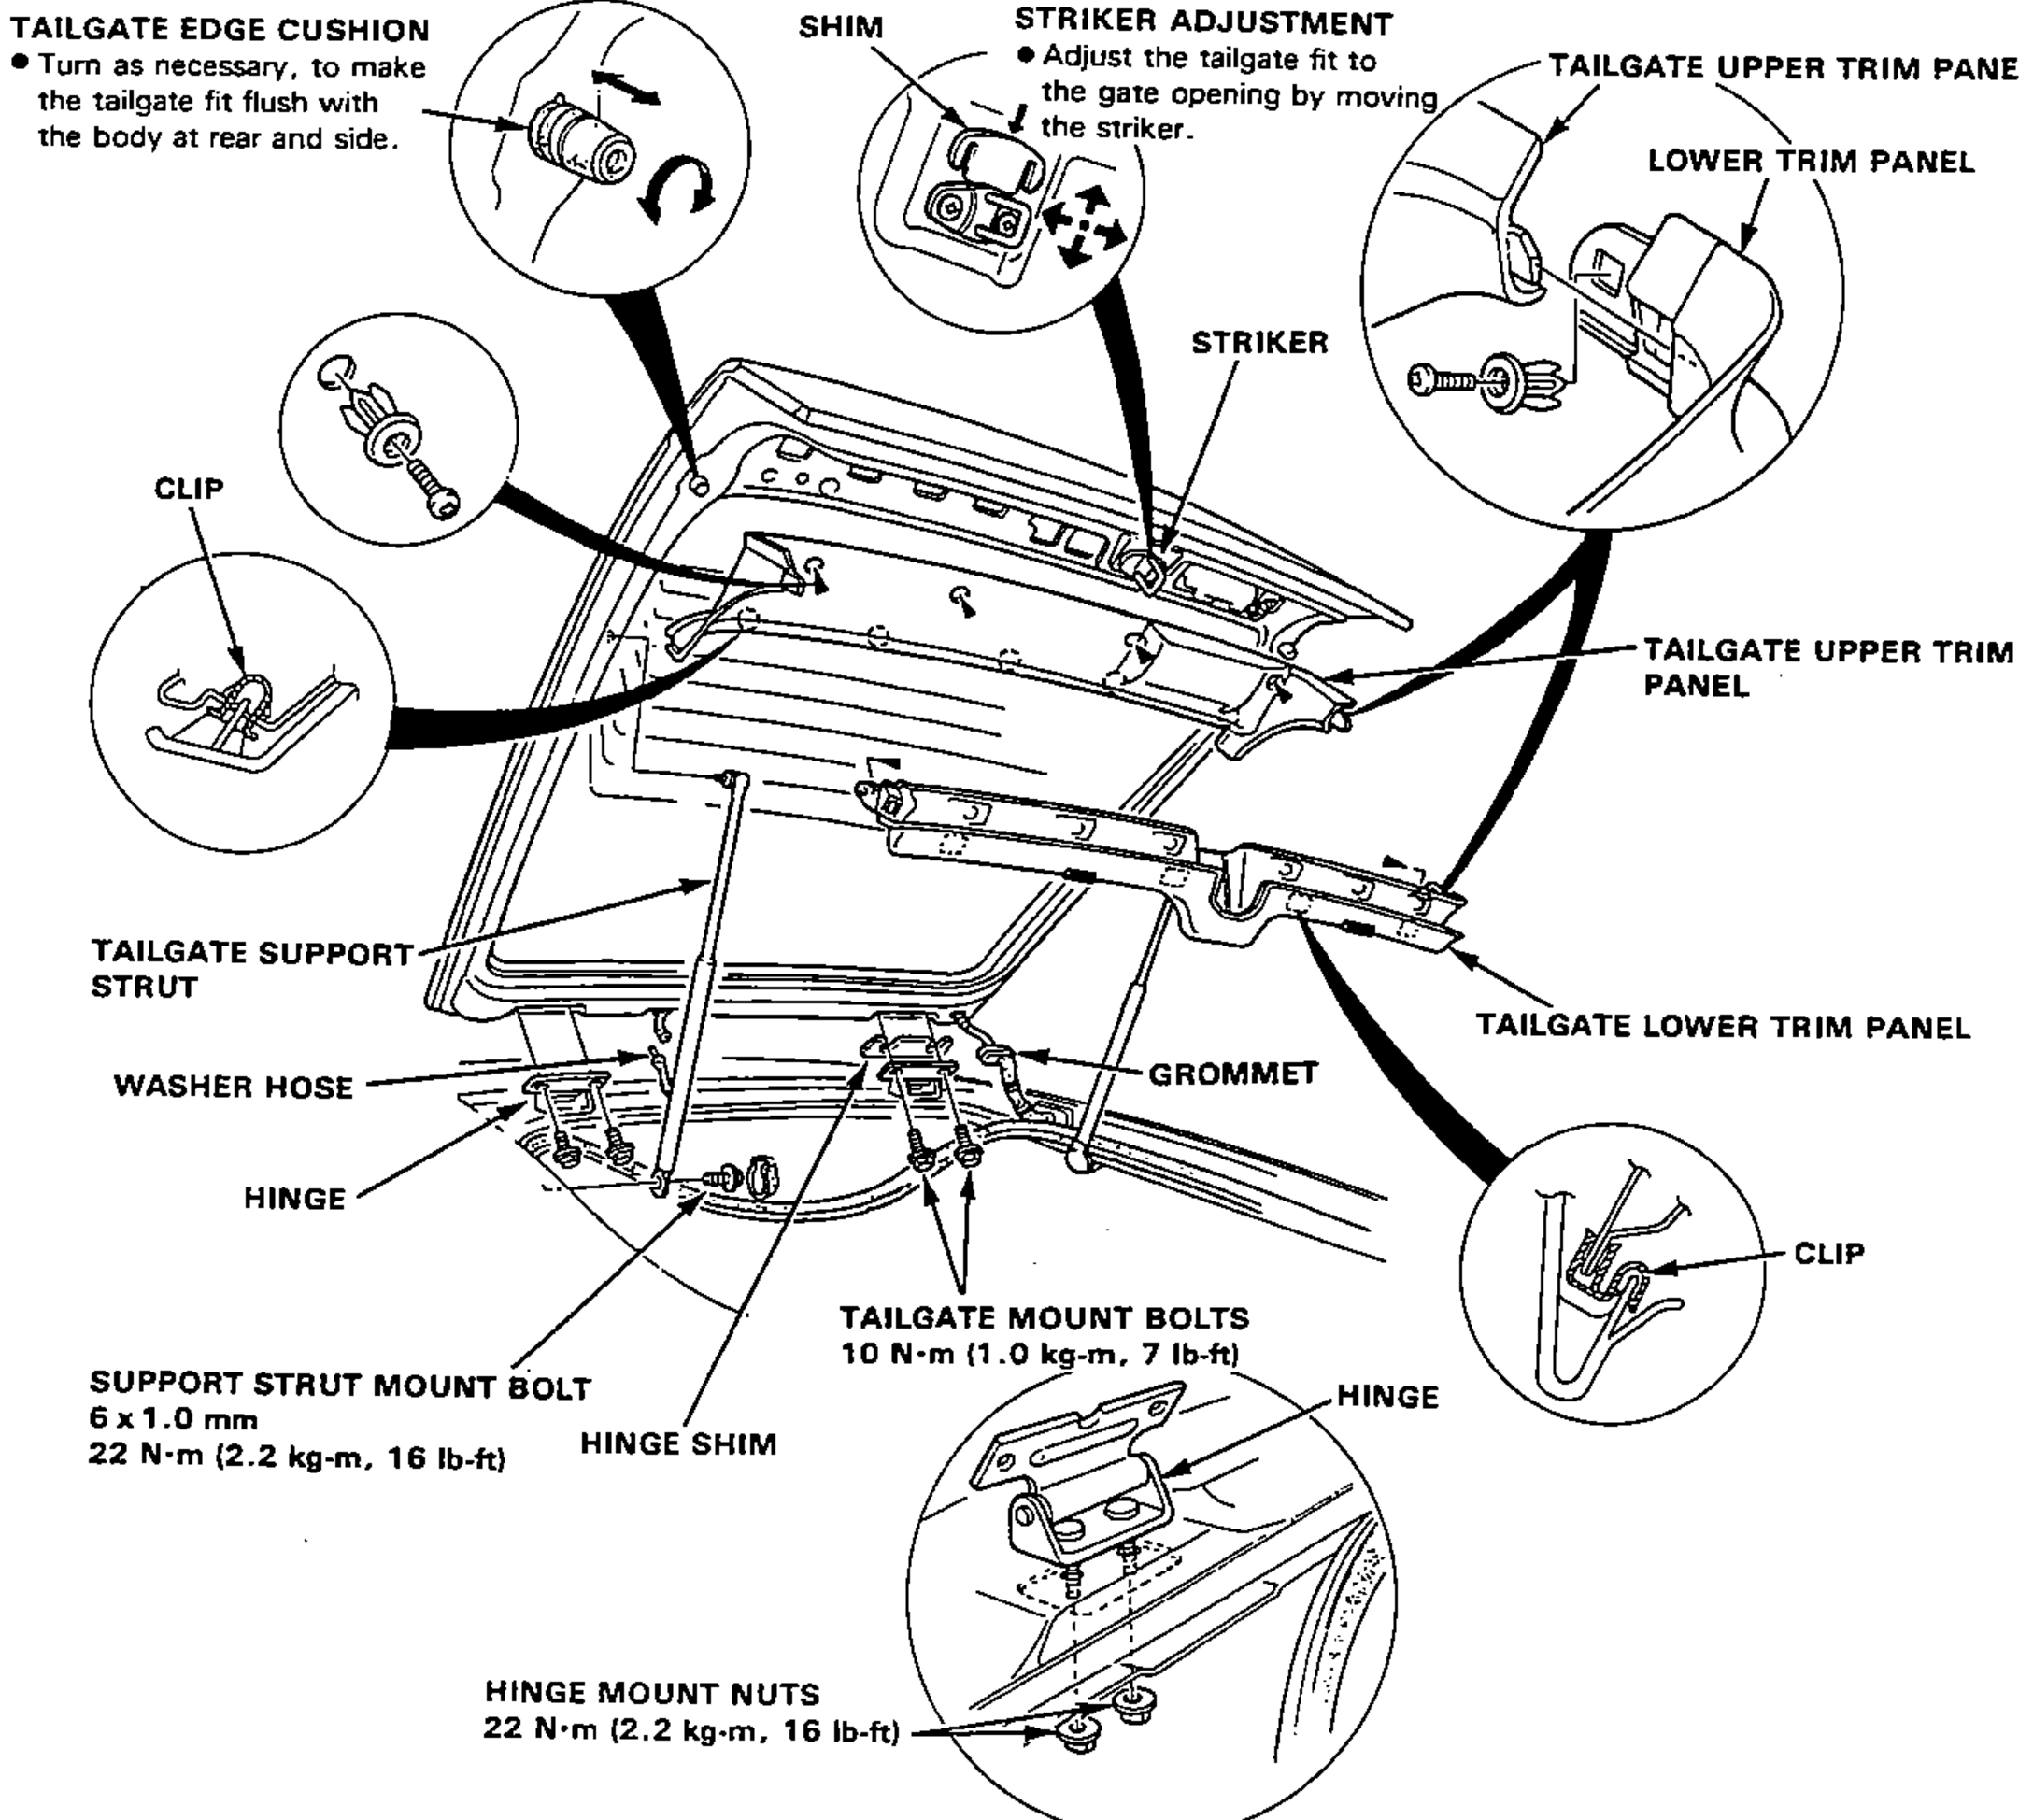
- 2Pull the wire harness out of the tailgate and disconnect the washer hose.NOTE: Before pulling out the wire harnesses, tie a string to the end of it so you can pull it back in when the tailgate is reinstalled.
- 3Remove the tailgate support struts.NOTE: Let an assistant hold the tailgate when removing the struts.
- 4Remove the tailgate by removing the tailgate mount bolts.NOTE: Take care not to damage the roof panel.
- 5Installation sequence is essentially the reverse order of removal. However, observe the following:
| Specification | Value |
|---|---|
| Support strut mount bolt (6 x 1.0 mm) | 22N·m |
| Tailgate mount bolts | 10N·m |
| Hinge mount nuts | 22N·m |
Support strut mount bolt (6 x 1.0 mm)
22N·m
Tailgate mount bolts
10N·m
Hinge mount nuts
22N·m