Honda CRX silhouetteCRX

Dashboard - Replacement

14-56prose procedure

Replacement

  1. 1
    To remove the dashboard, first slide the seats back fully and remove the:
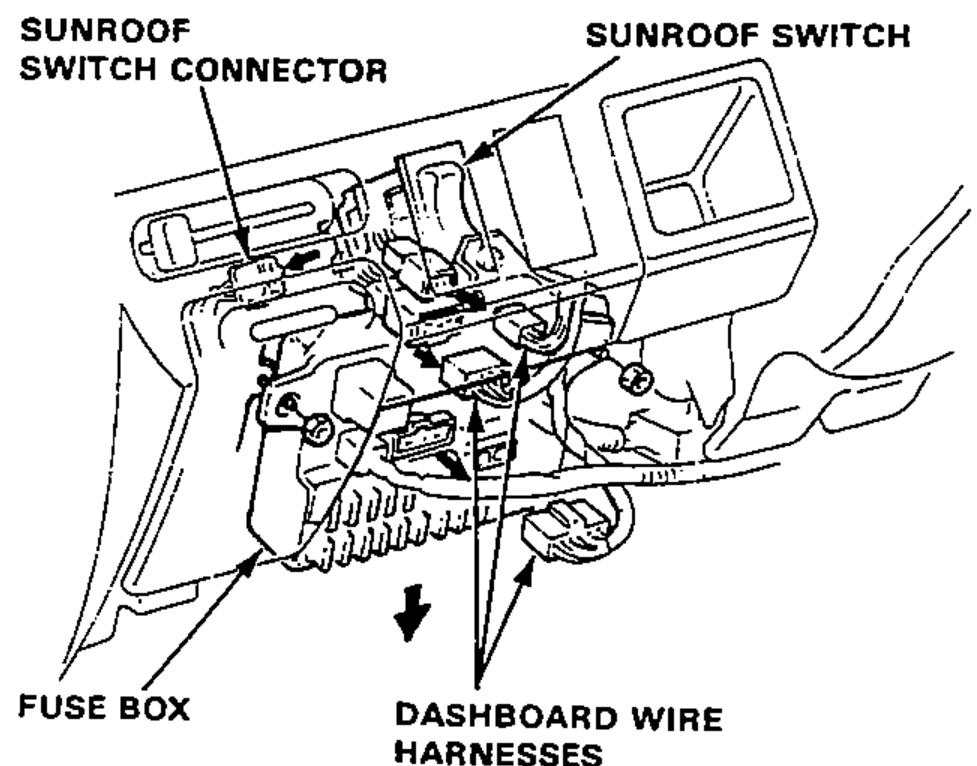
  2. 2
    Remove the fuse lid and disconnect the wire harnesses from the connector holder, and fuse box. Disconnect the sunroof switch connector.
    NOTE: Remove the fuse box mounting nuts, then lower the fuse box, if necessary.
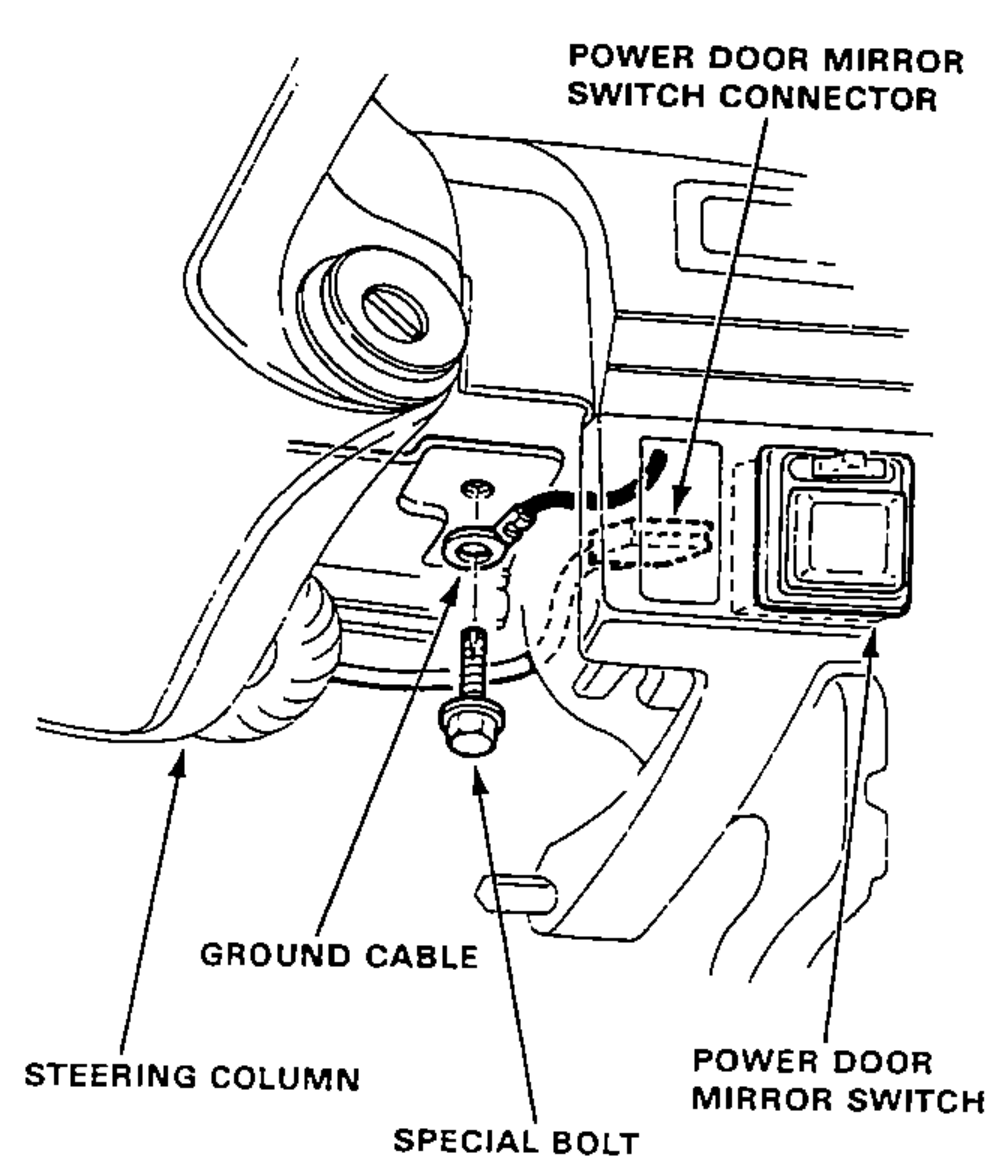
    Underside view of the dashboard/steering-column area showing the fuse box lowered, the dashboard wire harnesses being disconnected, and the sunroof switch and its connector. A downward arrow indicates the direction to lower the fuse box.
  3. 3
    Disconnect the ground cable at right of steering column and power door mirror switch connector.
    View at the right of the steering column showing the ground cable secured by a special bolt, and the power door mirror switch and its connector.
  4. 4
    Remove the coin box.
  5. 5
    Remove the knob, then remove the side air vent face plate.
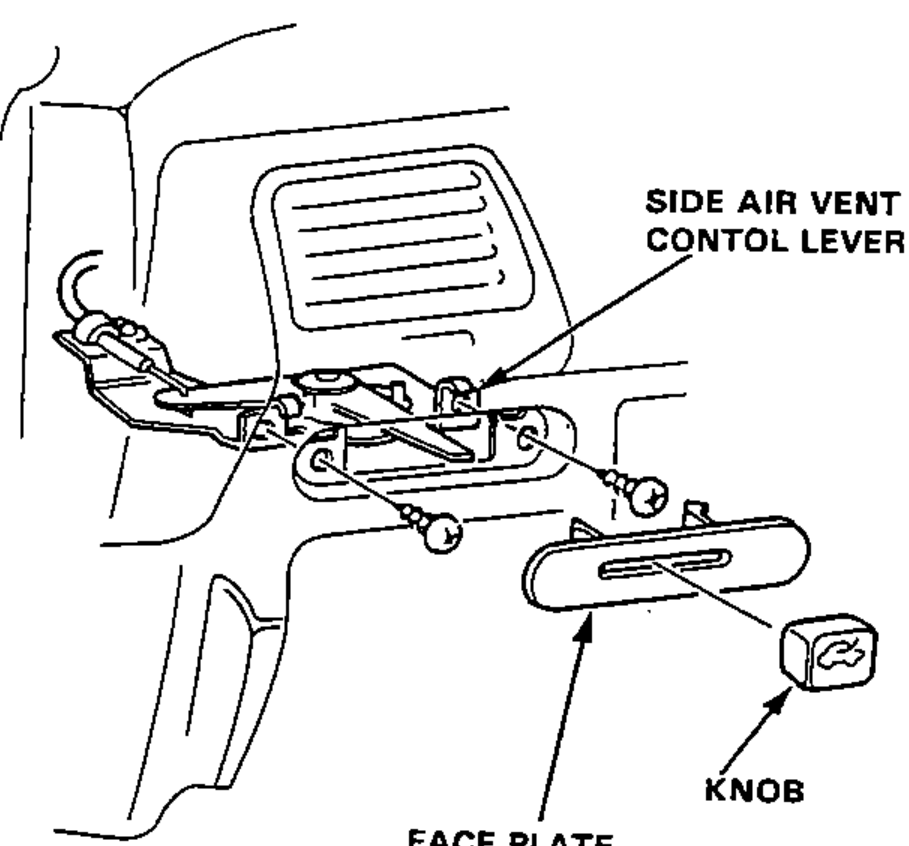
    Side air vent area showing the side air vent control lever, its two attaching screws, the face plate and the removable knob.
  6. 6
    Remove the 2 screws attaching the side air vent control lever.
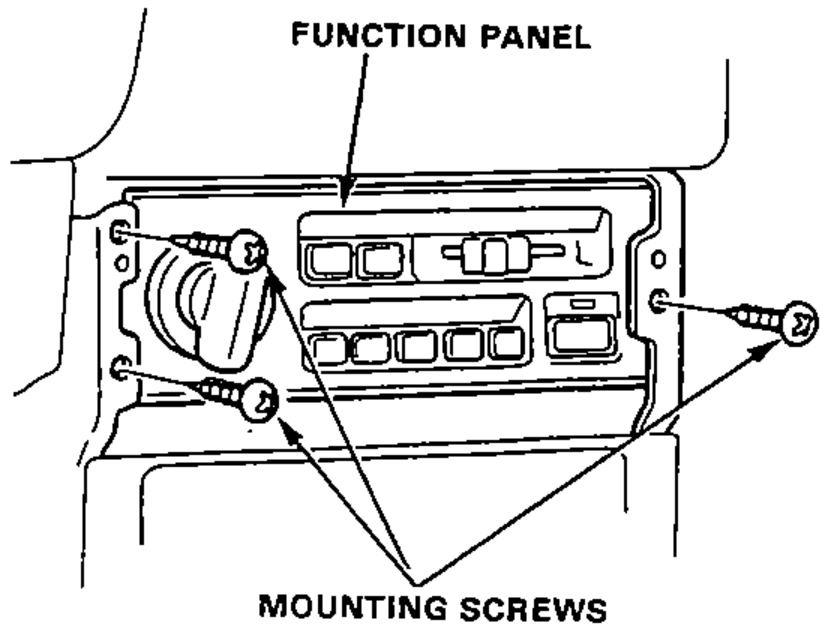
  7. 7
    Remove the 3 screws attaching the function panel to the dashboard.
    Function panel on the dashboard held by three mounting screws, shown with the switch/knob layout.

Search Manual

Search pages, specs, and procedures