Windshield Molding
14-18prose procedureRemoval (cont'd)
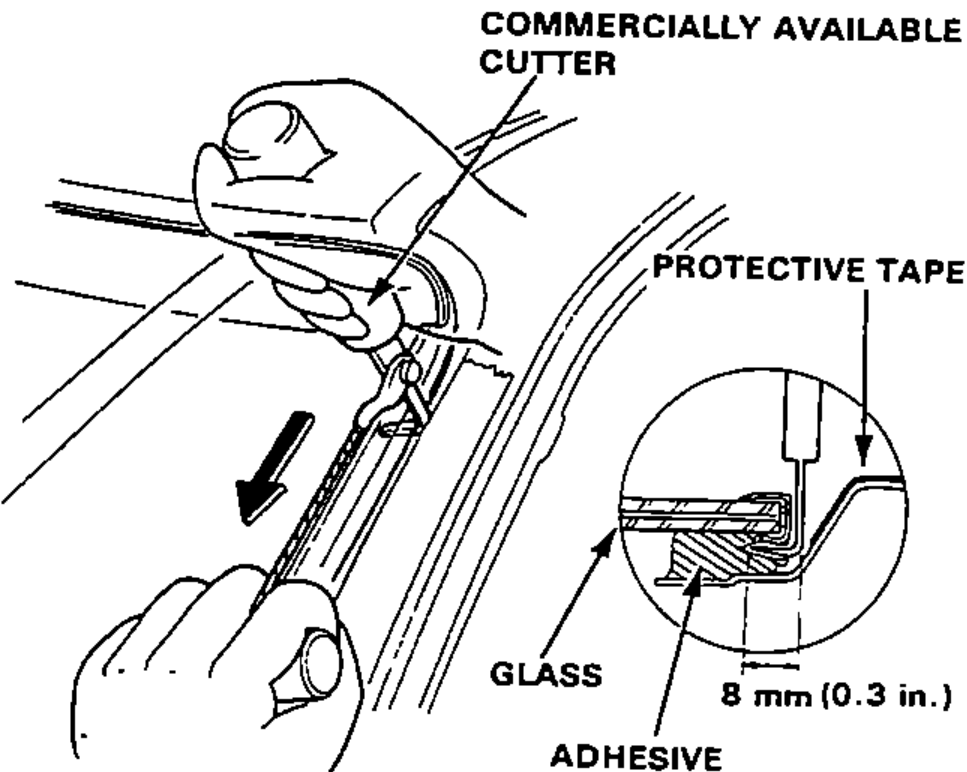
- 4Apply protective tape along the edge of the body next to the glass as shown. Cut the bottom of the side molding as shown. Cut through the adhesive holding the underside of the side moldings.You will need a commercially available cutter with an L-angled blade having 8 mm of cutting surface, in order to cut only the molding adhesive without cutting the glass adhesive. The blade supplied with some cutters may need to be ground down to 8 mm.Windshield moldings can be cut easily with a hot-tip type L-angle bladed cutter.
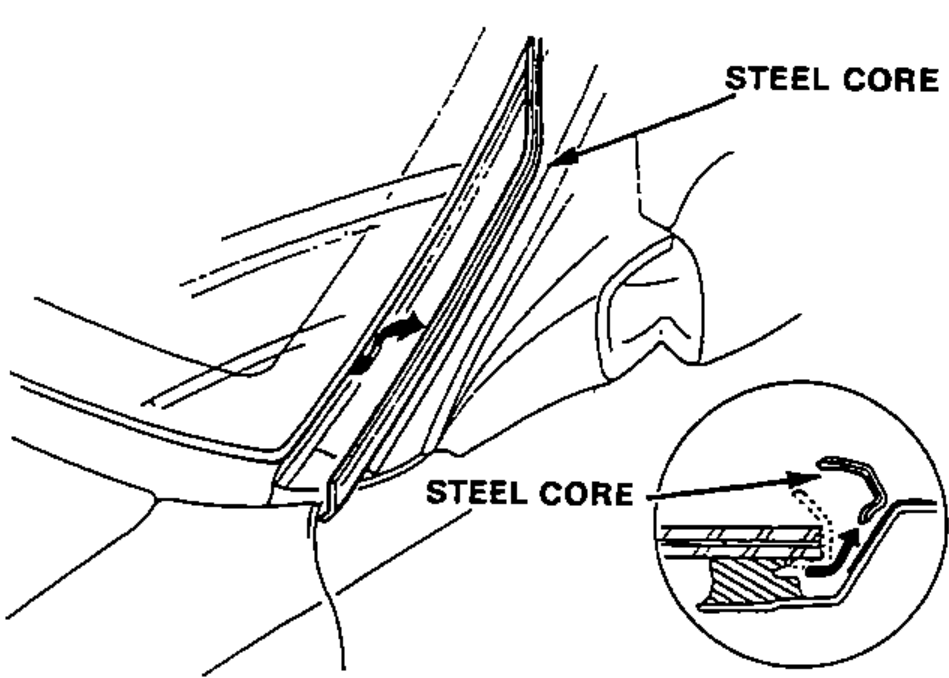
- 5Carefully bend up the top side of the steel core as shown.
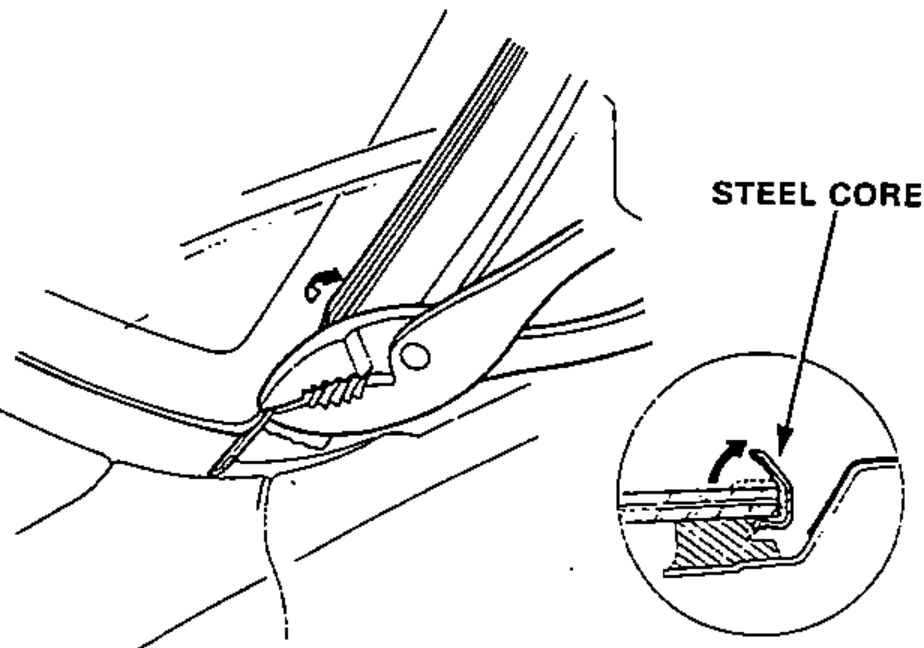
- 6Pull the molding steel core away from the glass.Remove the steel core without damaging the glass.The upper molding can be removed by simply pulling it up.