
Hood - Opener and Latch Replacement
14-61prose procedureOpener and Latch Replacement
- 1Remove the bolts, then remove the hood release handle and disconnect the opener cable.
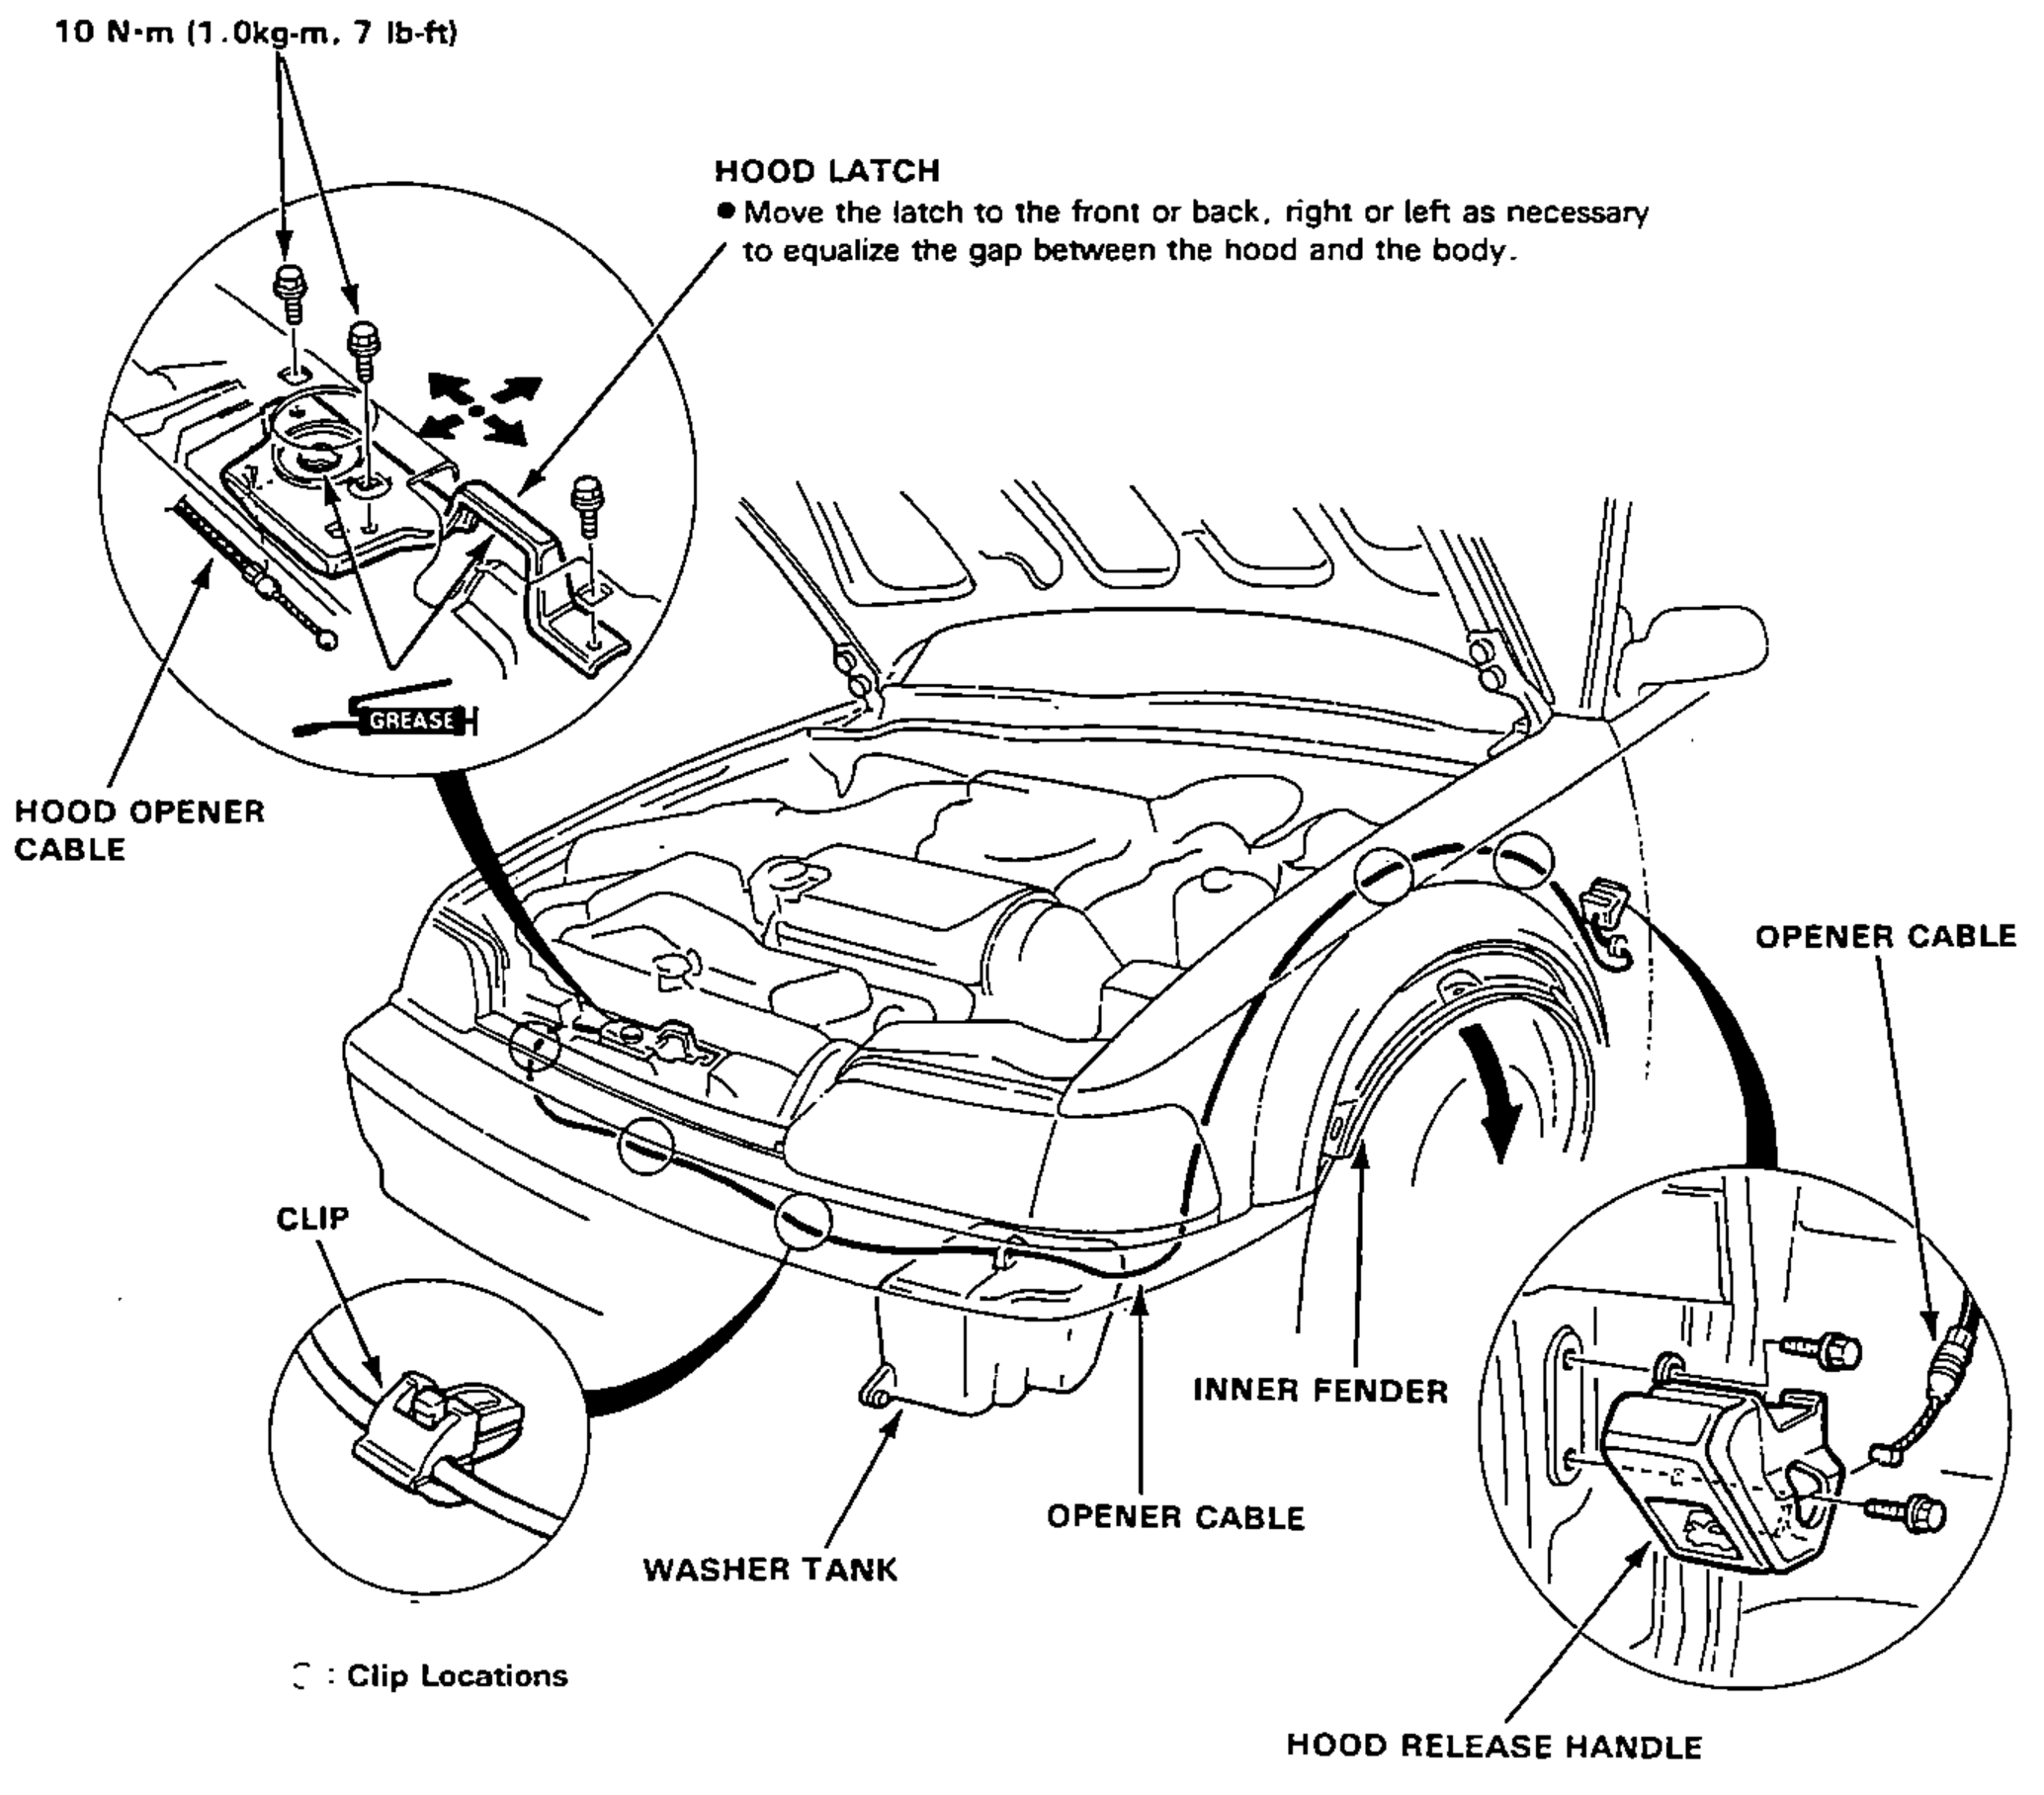
- 2Remove the front bumper.
- 3Remove the 3 mounting bolts, then remove the hood latch and disconnect the opener cable.
- 4Remove the left side inner fender, then pull out the opener cable.NOTE: Before pulling out the opener cable, tie a string to the cable so you can pull it back in later.
- 5After installing, adjust the hood fit to the opening.
| Specification | Value |
|---|---|
| Hood latch mounting bolts | 10N·m |
Hood latch mounting bolts
10N·m