Honda CRX silhouetteCRX

Disassembly/Inspection
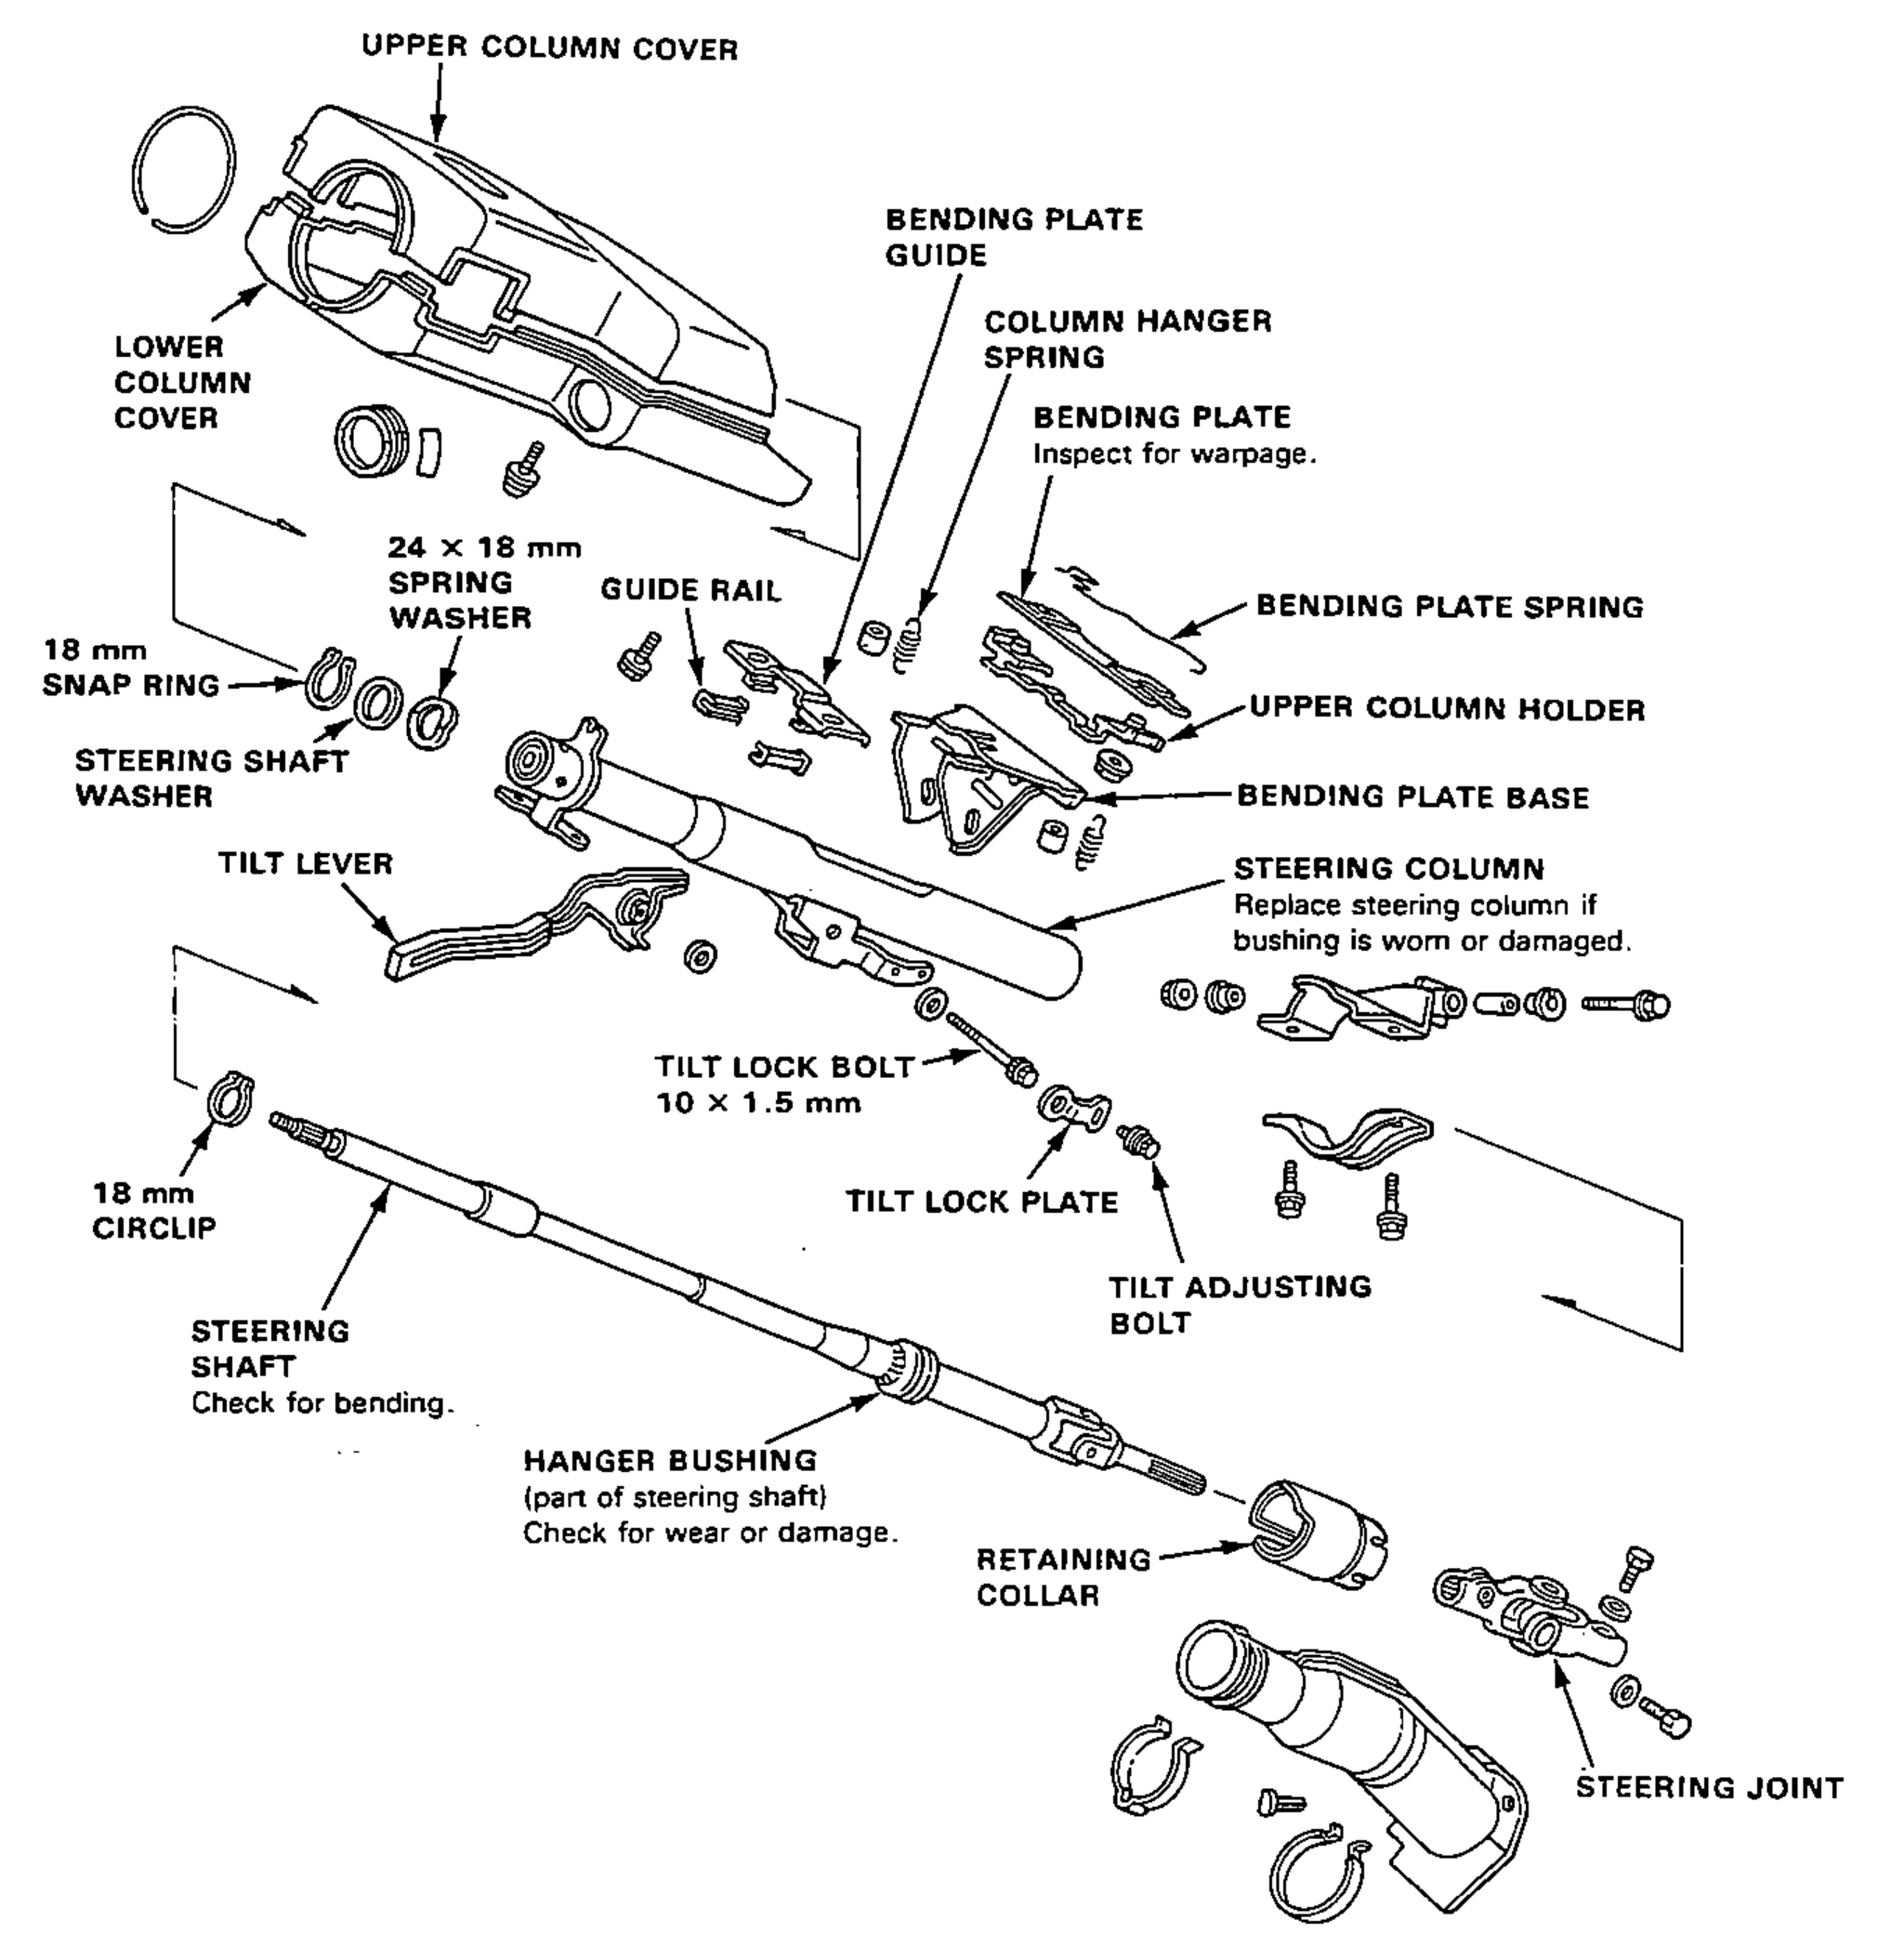
11-31parts diagram
  1. 1
    Remove the upper column holder, bending plate and bending plate spring.
    Exploded view of the tilt steering column assembly showing the upper/lower column covers, steering shaft, tilt mechanism, bending plate assembly and steering joint, with leader-line callouts and inspection notes for each component.
  2. 2
    Remove the tilt lock plate by removing the tilt adjusting bolt.
  3. 3
    Remove the tilt lever, column hanger spring and bending plate base by removing the tilt lock bolt.
  4. 4
    Position the ignition switch in "I".
  5. 5
    Remove the snapring, then remove the steering shaft from bottom of the column.
  6. 6
    Remove the retaining collar.
Parts Diagram
Diagram image not available
Part NameNotes
UPPER COLUMN COVER
LOWER COLUMN COVER
24 × 18 mm SPRING WASHER
18 mm SNAP RING
STEERING SHAFT WASHER
18 mm CIRCLIP
TILT LEVER
GUIDE RAIL
STEERING SHAFTCheck for bending.
HANGER BUSHING(part of steering shaft) Check for wear or damage.
TILT LOCK BOLT 10 × 1.5 mm
TILT LOCK PLATE
TILT ADJUSTING BOLT
RETAINING COLLAR
BENDING PLATE GUIDE
COLUMN HANGER SPRING
BENDING PLATEInspect for warpage.
BENDING PLATE SPRING
UPPER COLUMN HOLDER
BENDING PLATE BASE
STEERING COLUMNReplace steering column if bushing is worn or damaged.
STEERING JOINT

Search Manual

Search pages, specs, and procedures