
Steering Pump - Control Valve Inspection and Replacement (cont'd)
11-42prose procedureControl Valve Inspection and Replacement (cont'd)
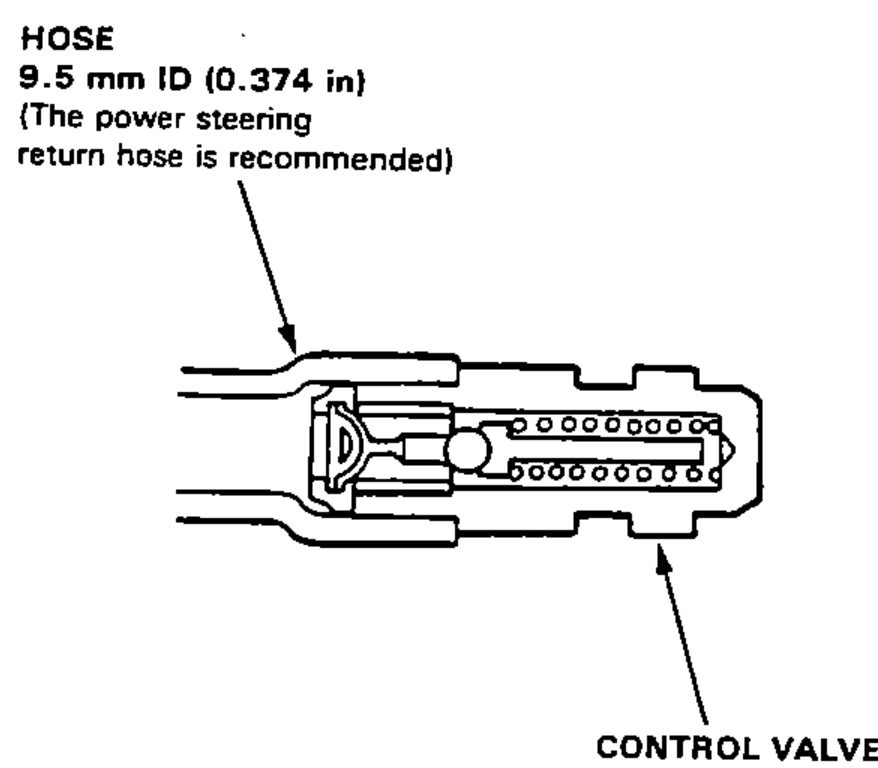
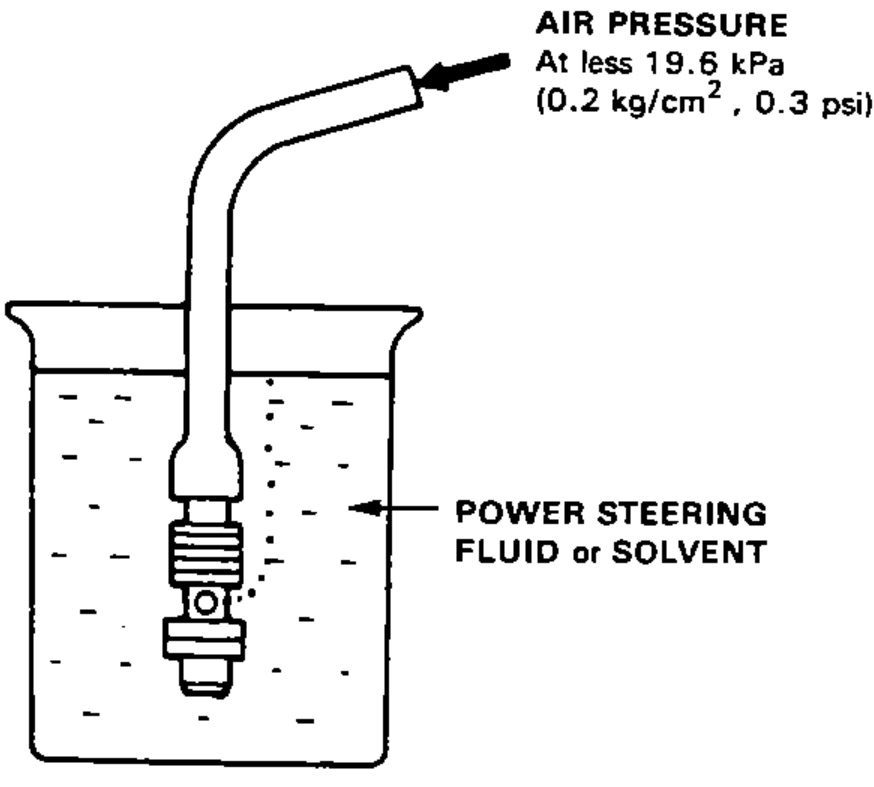
- 6Attach a hose to the end of the valve as shown.
- 7Then submerge the valve in a container of power steering fluid or solvent, and blow on the hose. If air bubbles leak through the valve, replace or repair it as follows.
- 8Clamp the bottom end of the valve in a vise with soft jaws.
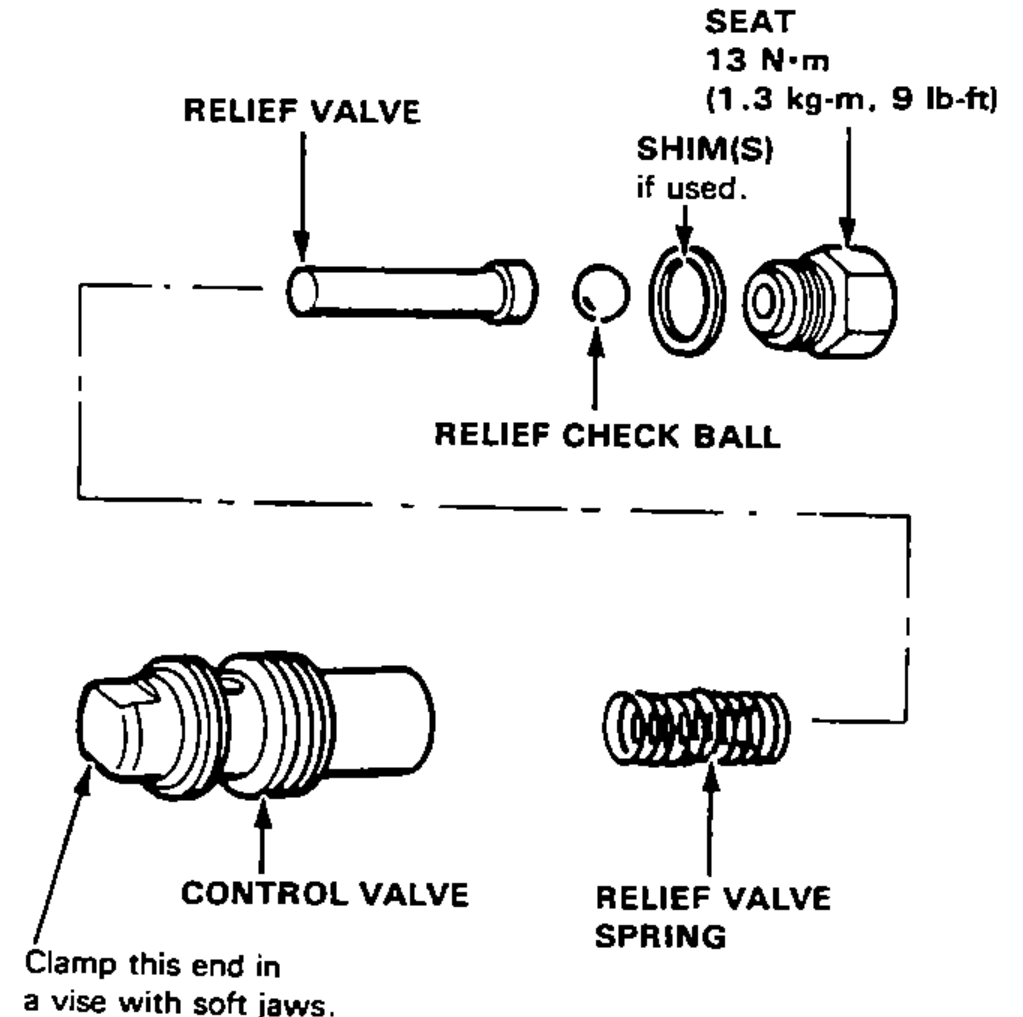
- 9Unscrew the seat in the top end of the valve, and remove any shims, the relief check ball, relief valve and relief valve spring.
- 10Clean all the parts in solvent, dry them off, then re-assemble and re-test the valve.If necessary, relief pressure is adjusted at the factory by adding shims under the check ball seat. If you found shims in your valve, be sure you reinstall as many as you took out.
- 11Install the control valve in the reverse order of removal.