
Power Door Mirrors - Function Test
16-125prose procedureBracketed wire colors ([BLU/BLK], [BLU/GRN]) and grounds ([G201, G401]) apply to RHD models.
Function Test
NOTE
Before testing, remove the dashboard lower panel and push out the switch from behind the instrument panel, then disconnect the 10-P connector to remove the switch.
Mirror Test
One or both inoperative:
- 1Check for voltage between the BLK/YEL terminal and body ground with the ignition switch ON. There should be battery voltage.
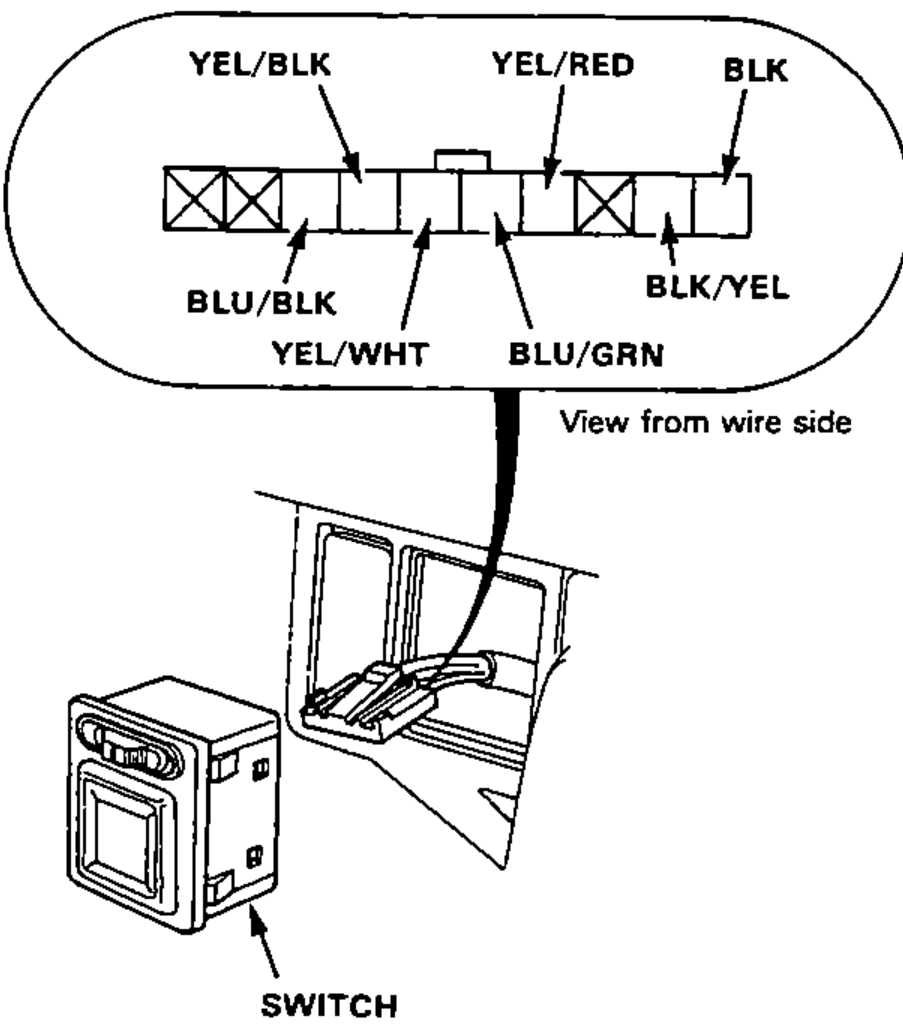
- 2Check for continuity between the BLK terminal and body ground. There should be continuity.
Left inoperative:
Connect the BLK/YEL terminal to the YEL/RED terminal and the YEL/WHT (or YEL/BLK) terminal to the body ground with jumper wires. The left mirror should tilt down (or swing left) when the ignition switch is turned ON.
If the mirror does not tilt down (or does not swing left), remove the left door trim panel and check for open in the YEL/WHT (or YEL/BLK) wire between the left door mirror and switch. If the wire is OK, check the left door mirror.
If the mirror neither tilts down nor swings left, repair the YEL/RED wire.
If the mirror operates properly, check the mirror switch.
Right inoperative:
Connect the BLK/YEL terminal to the BLU/GRN terminal and the YEL/WHT (or BLU/BLK) terminal to the body ground with jumper wires. The right mirror should tilt down (or swing left) when the ignition switch is turned ON.
If the mirror does not tilt down (or does not swing left), remove the right door trim panel and check for open in the YEL/WHT (or YEL/BLK [BLU/BLK] and BLU/BLK) wire between the right door mirror and the switch. If the wire is OK, check the right door mirror.
If the mirror neither tilts down nor swing left, repair the YEL/RED [BLU/GRN] and BLU/GRN wire.
If the mirror operates properly, check the mirror switch.
NOTE
[ ] : RHD