
Charging System - Alternator Replacement
16-60prose procedureAlternator Replacement
- 1Disconnect the ground wire from the battery negative (−) post.
- 2Disconnect the alternator connector from the alternator.
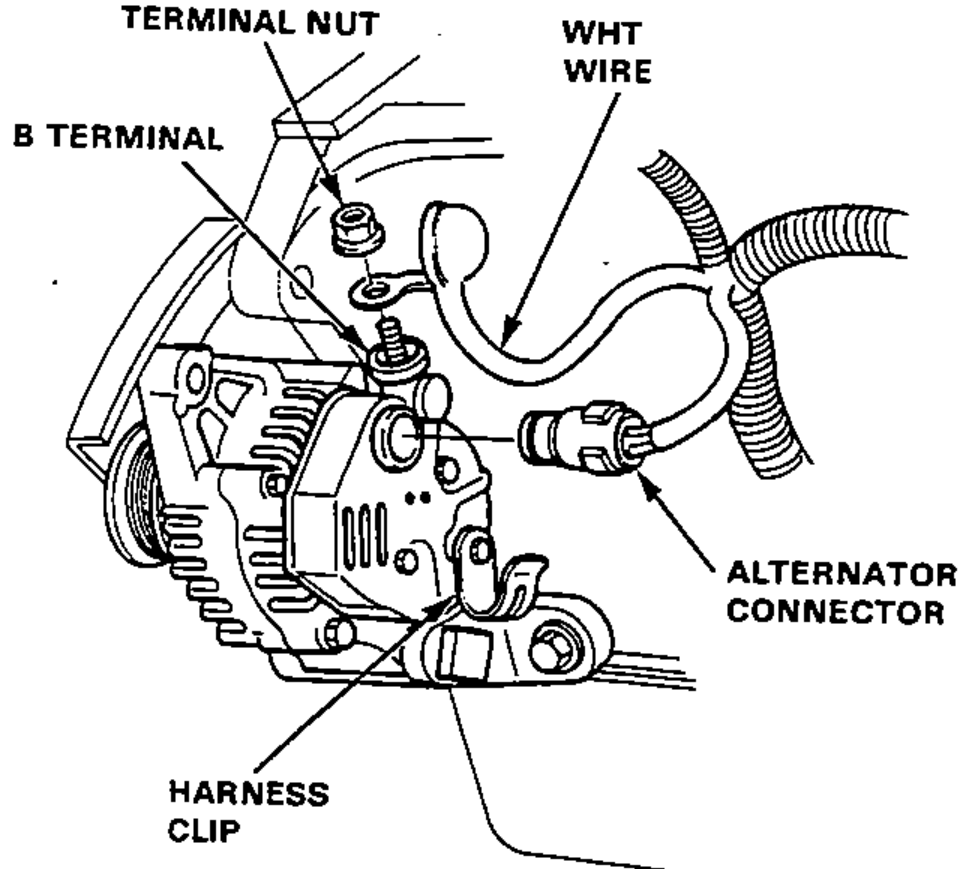
- 3Remove the terminal nut and the WHT wire from the B terminal.
- 4Remove the adjusting bolt and alternator nut, then remove the alternator belt from the alternator pulley.
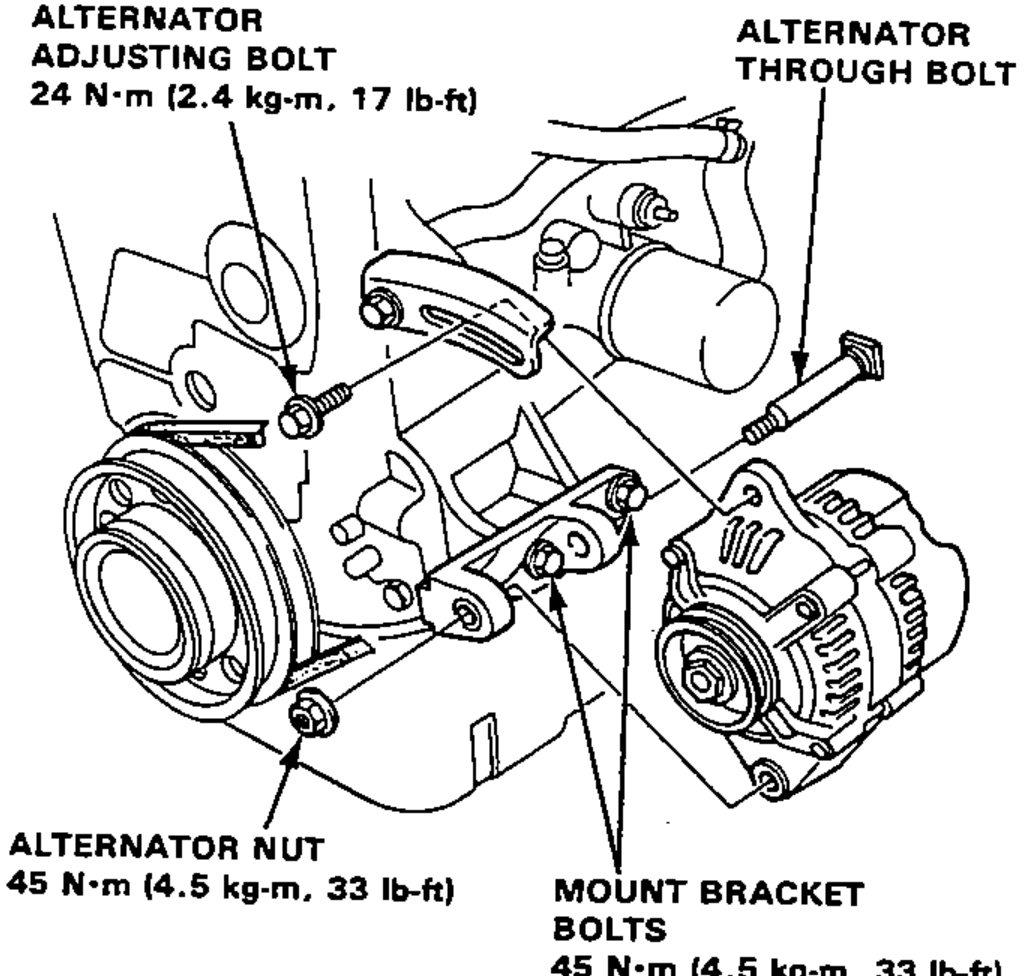
- 5Remove the alternator throught bolt, then remove the alternator.
- 6If necessary, remove the mount bracket bolts, and the upper and lower mount brackets.
- 7adjust the alternator belt tension after installation (see page 16-58).
| Specification | Value |
|---|---|
| Alternator adjusting bolt | 24N·m |
| Alternator nut | 45N·m |
| Mount bracket bolts | 45N·m |
Alternator adjusting bolt
24N·m
Alternator nut
45N·m
Mount bracket bolts
45N·m