
Power Windows — Driver's Switch Test
16-144spec tableSeparate continuity tables for LHD and RHD (driver's switch terminals A/B are polarity-swapped between LHD and RHD). Continuity-dot positions were partly inferred where scan lines were faint; the reading is electrically consistent between LHD and RHD.
Driver's Switch Test
- 1Remove the 2 screws. Disconnect the 10-P connector and remove the switch from the door trim panel.
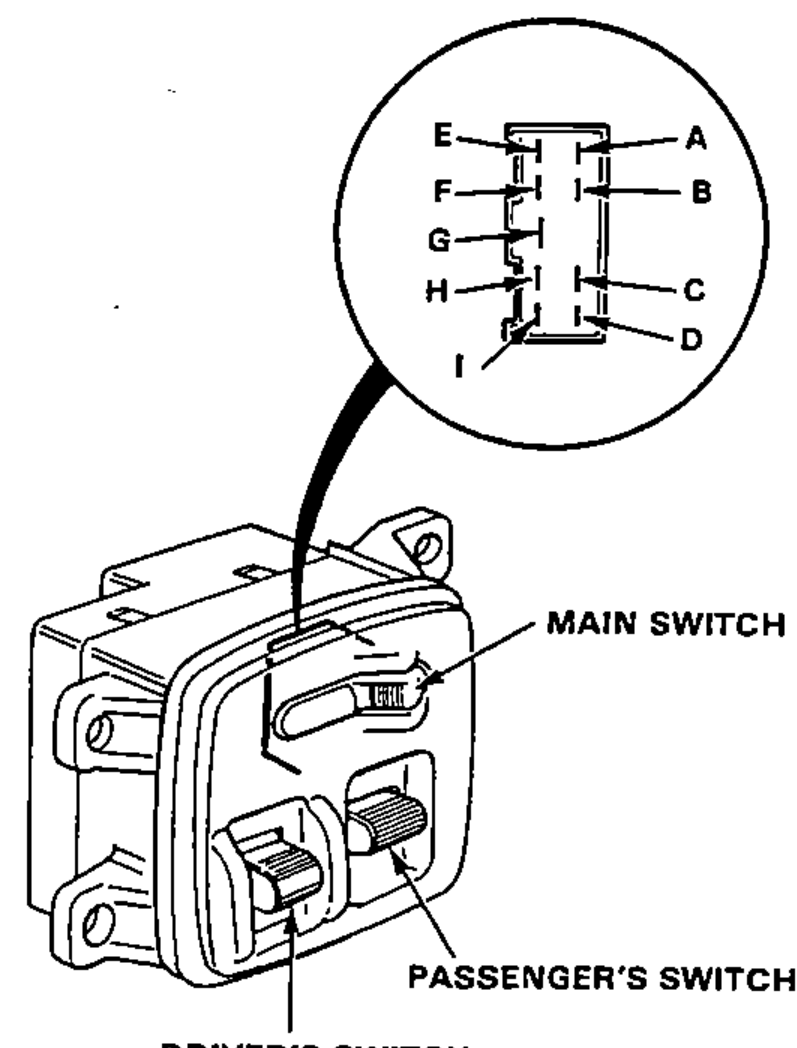
- 2Check for continuity between the terminals in each switch position according to the tables.
NOTE
In the continuity tables below, an "O" marks a terminal joined by a continuity line in that switch position (the joined terminals have continuity).
LHD: Driver's Switch
OFF
A
BO
HO
IO
UP (AUTO)
AO
B
HO
I
UP
AO
B
HO
I
DOWN
AO
B
H
IO
DOWN (AUTO)
AO
B
H
IO
LHD: Passenger's Switch
OFF
Main switchON
CO
D
EO
GO
OFF
Main switchOFF
CO
D
E
GO
UP
Main switchON
CO
DO
E
G
UP
Main switchOFF
CO
DO
E
G
DOWN
Main switchON
C
DO
E
GO
DOWN
Main switchOFF
C
DO
E
GO
RHD: Driver's Switch
OFF
AO
B
HO
IO
UP (AUTO)
A
BO
HO
I
UP
A
BO
HO
I
DOWN
A
BO
H
IO
DOWN (AUTO)
A
BO
H
IO
RHD: Passenger's Switch
OFF
Main switchON
CO
D
EO
GO
OFF
Main switchOFF
CO
D
E
GO
UP
Main switchON
CO
DO
E
G
UP
Main switchOFF
CO
DO
E
G
DOWN
Main switchON
C
DO
E
GO
DOWN
Main switchOFF
C
DO
E
GO