
Sunroof - Switch test / Tilt Up Switch
16-138prose procedureUnverifiedSwitch test
- 1Remove the dashboard lower panel.
- 2Push out the switch from behind the instrument panel, then disconnect the 6-P connector to remove the switch.
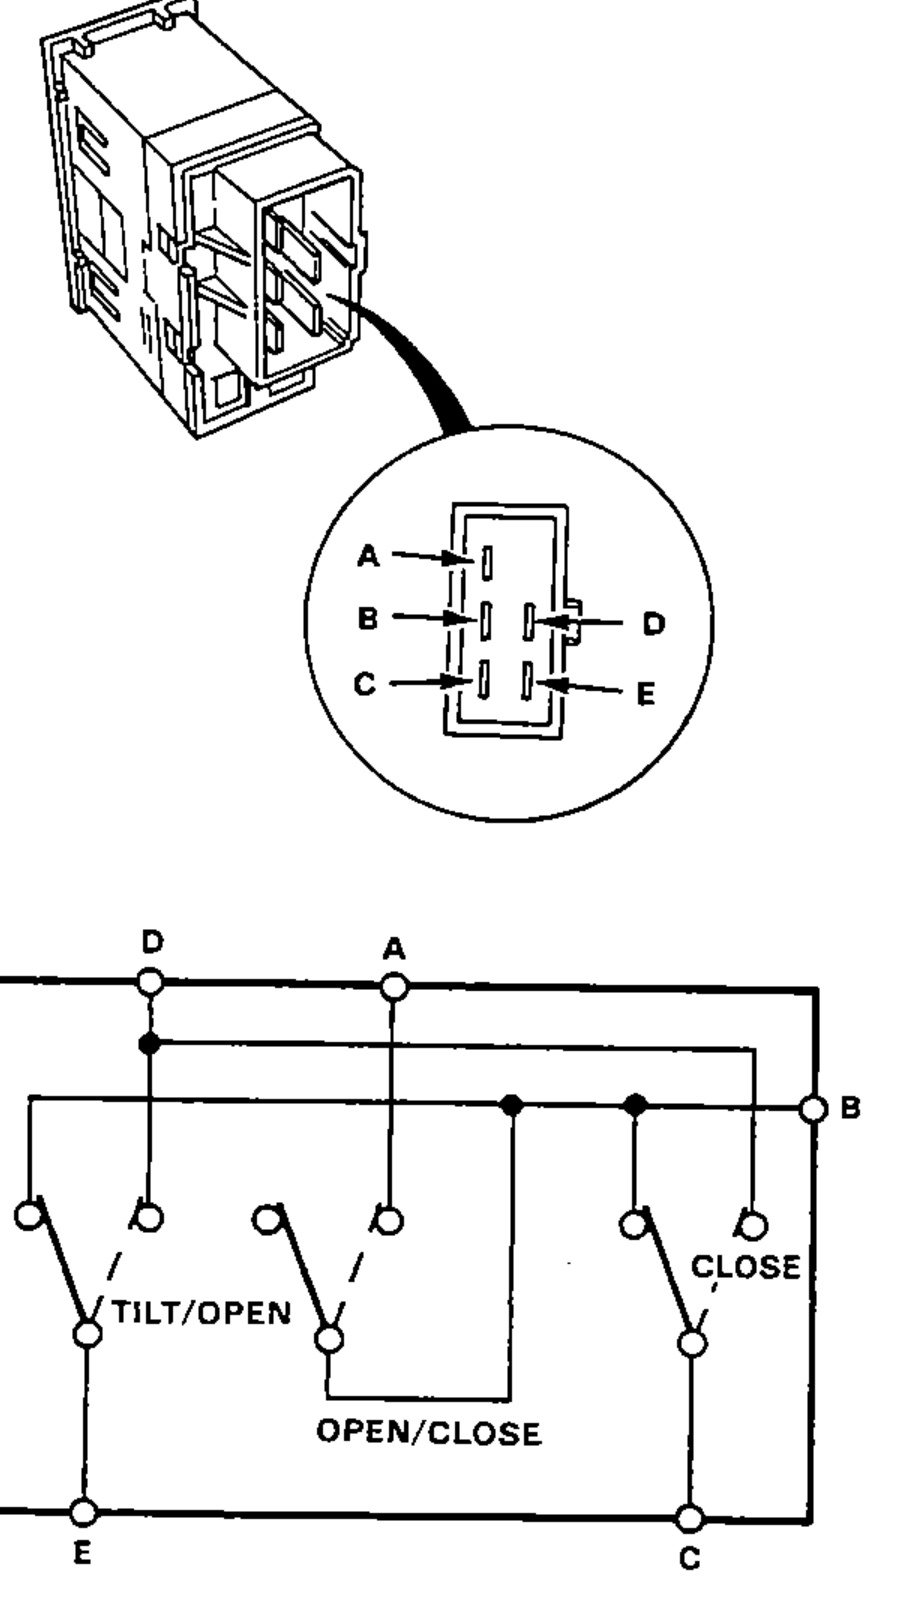
- 3Check for continuity between the terminals in each switch position according to the table.
OFF
Terminals with continuity (A, B, C, D, E)B-C, D-E
TILT
Terminals with continuity (A, B, C, D, E)D-E
OPEN
Terminals with continuity (A, B, C, D, E)A-B, D-E
CLOSE
Terminals with continuity (A, B, C, D, E)A-B, C-D
Tilt Up Switch
- 1Remove the headliner (See section 14).
- 2Disconnect the 4-P connector from the sunroof motor.

- 3Check for continuity between the No.1 and No.2 terminals. There should be continuity when the sunroof is not tilted. There should be no continuity when the sunroof is the tilt-up position.