
Charging System - Alternator and Regulator Test
16-58prose procedureAlternator and Regulator Test
- 1First make sure you have a good battery, and that the alternator belt, and connections at the alternator and main fuses are good. Next, check the No.14 (10A) fuse in the dash fuse box. (If blown, the charge warning light will come on even if the system is working properly)
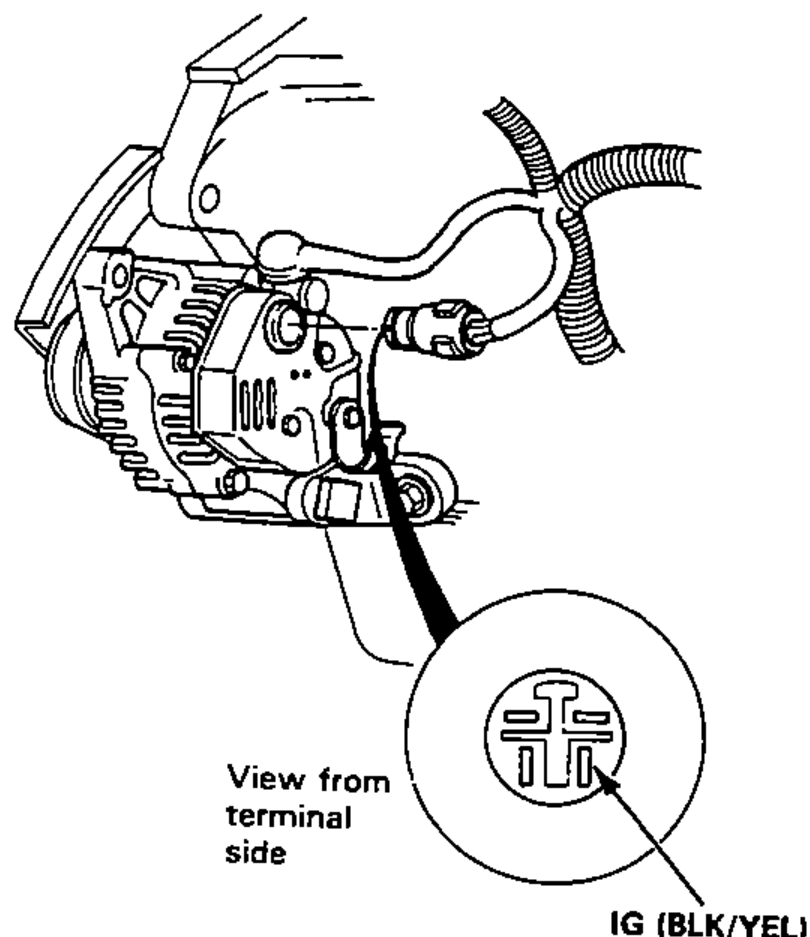
- 2Disconnect the alternator connector from the alternator. With the ignition switch on, there should be battery voltage between the IG (BLK/YEL) terminal and body ground.
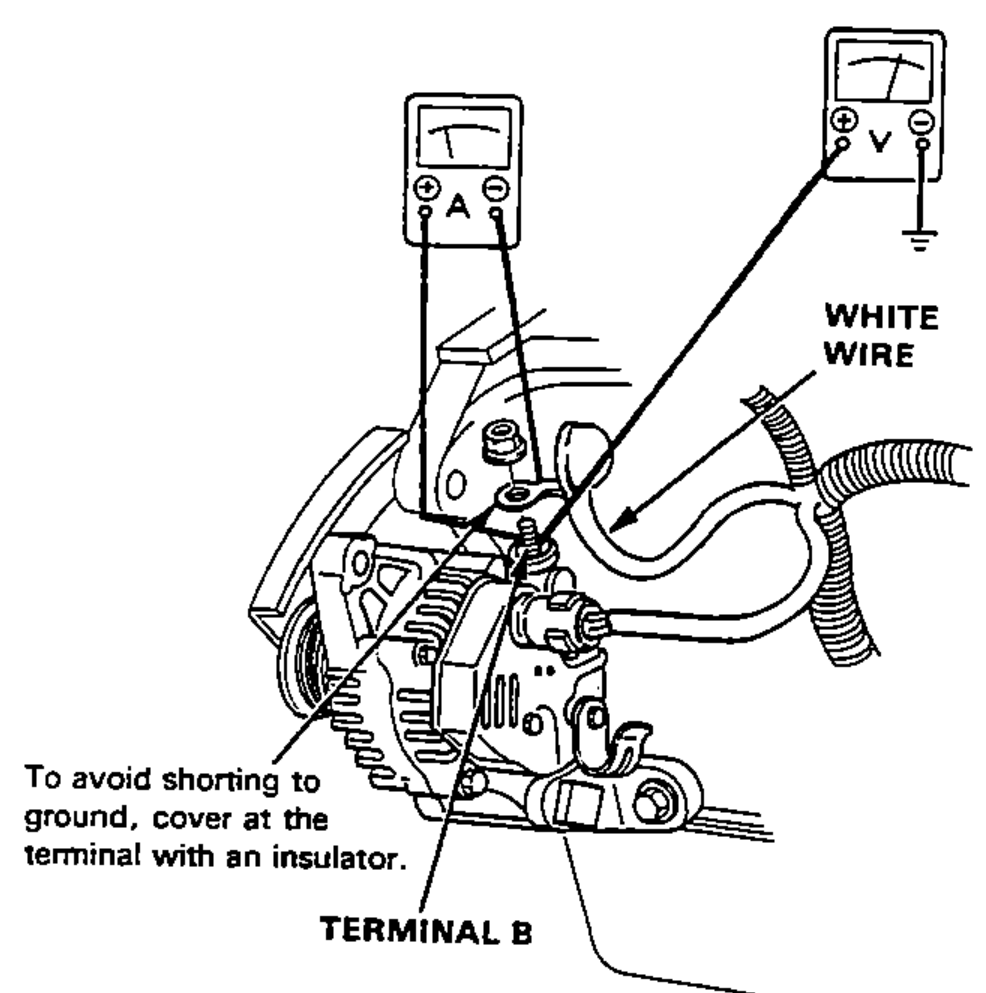
- 3If these check OK, connect a voltmeter between the alternator terminal B and body ground, and an ammeter (100 amp capacity or higher) between the alternator terminal B and the white wire as shown. (An inductive pick up can be used instead of disconnecting the white wire.)
- 4Start the engine, and turn on the headlights, blower motor, rear window defogger, etc.NOTE: If voltage stays above 13.5 V, apply electrical load more to lower the voltage to less than 13.5 V. If the voltage exceeds 16 V, stop the engine and replace the voltage regulator.