
Distributor Reassembly / Ignition Wire Inspection and Test
16-51prose procedureReassemble the distributor in the reverse order of disassembly.
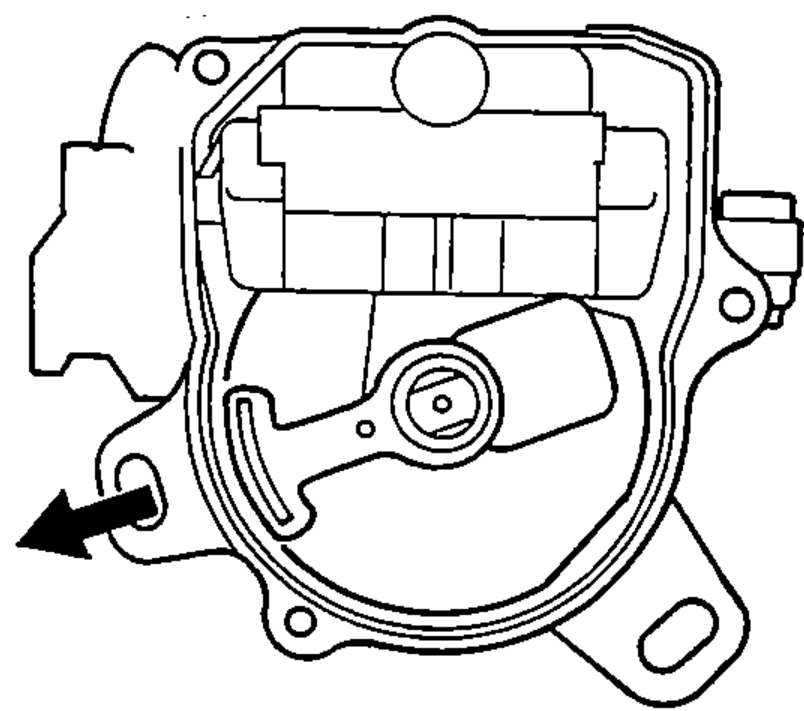
- 1Install the rotor, then turn it so that it faces in the direction shown (toward the No. 1 cylinder).
- 2Set the thrust washer and coupling on the shaft.
- 3Check that the rotor is still pointing toward the No. 1 cylinder, then align the index mark on the housing with the index mark on the coupling.
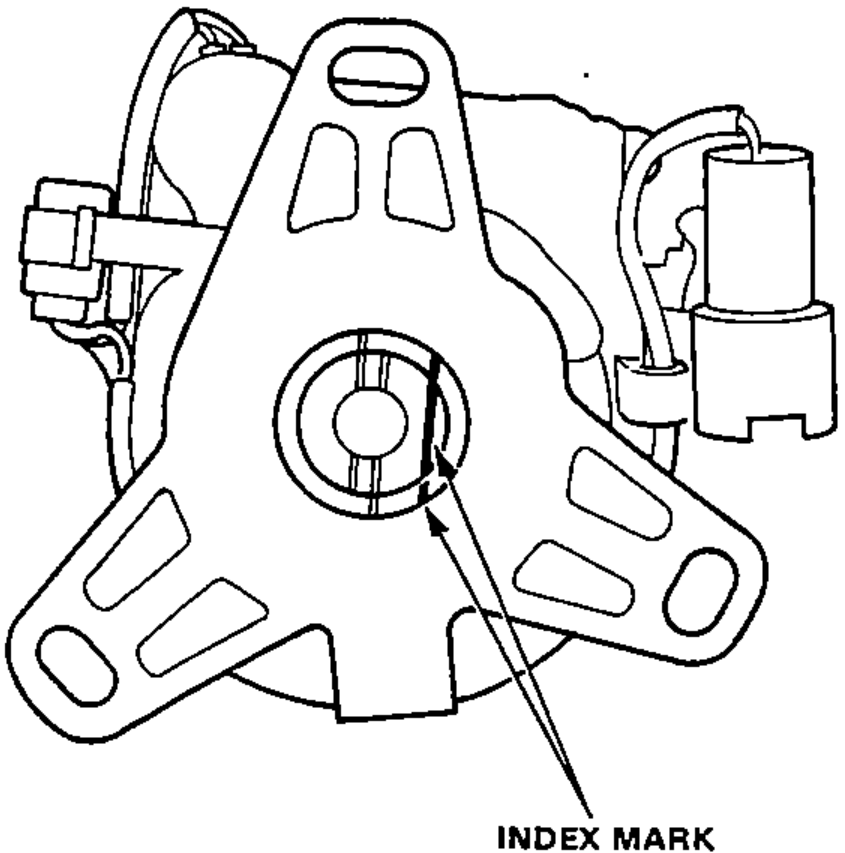
- 4Drive in the pin and secure it with the pin retainer.
Ignition Wire Inspection and Test
CAUTION
Carefully remove the ignition wires by pulling on the rubber boots. Do not bend the wire or the conductor may be broken.
- 1Check the condition of the wire terminals. If any terminal is corroded, clean it, and if it is broken or distorted, replace the wire.

- 2Connect ohmmeter probes and measure resistance.Ignition Wire Resistance: 25,000 ohms max. at 20°C (70°F)
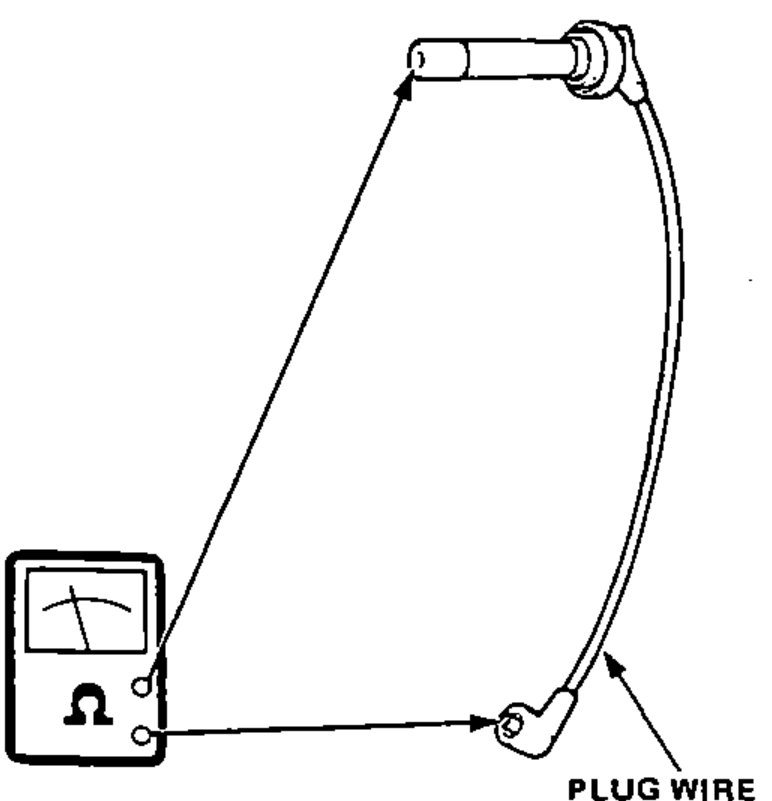
- 3If resistance exceeds 25,000 ohms, replace the ignition wire.
| Specification | Value |
|---|---|
| Ignition Wire Resistance | 25,000 ohms max. at 20°C (70°F) |
Ignition Wire Resistance
25,000 ohms max. at 20°C (70°F)